
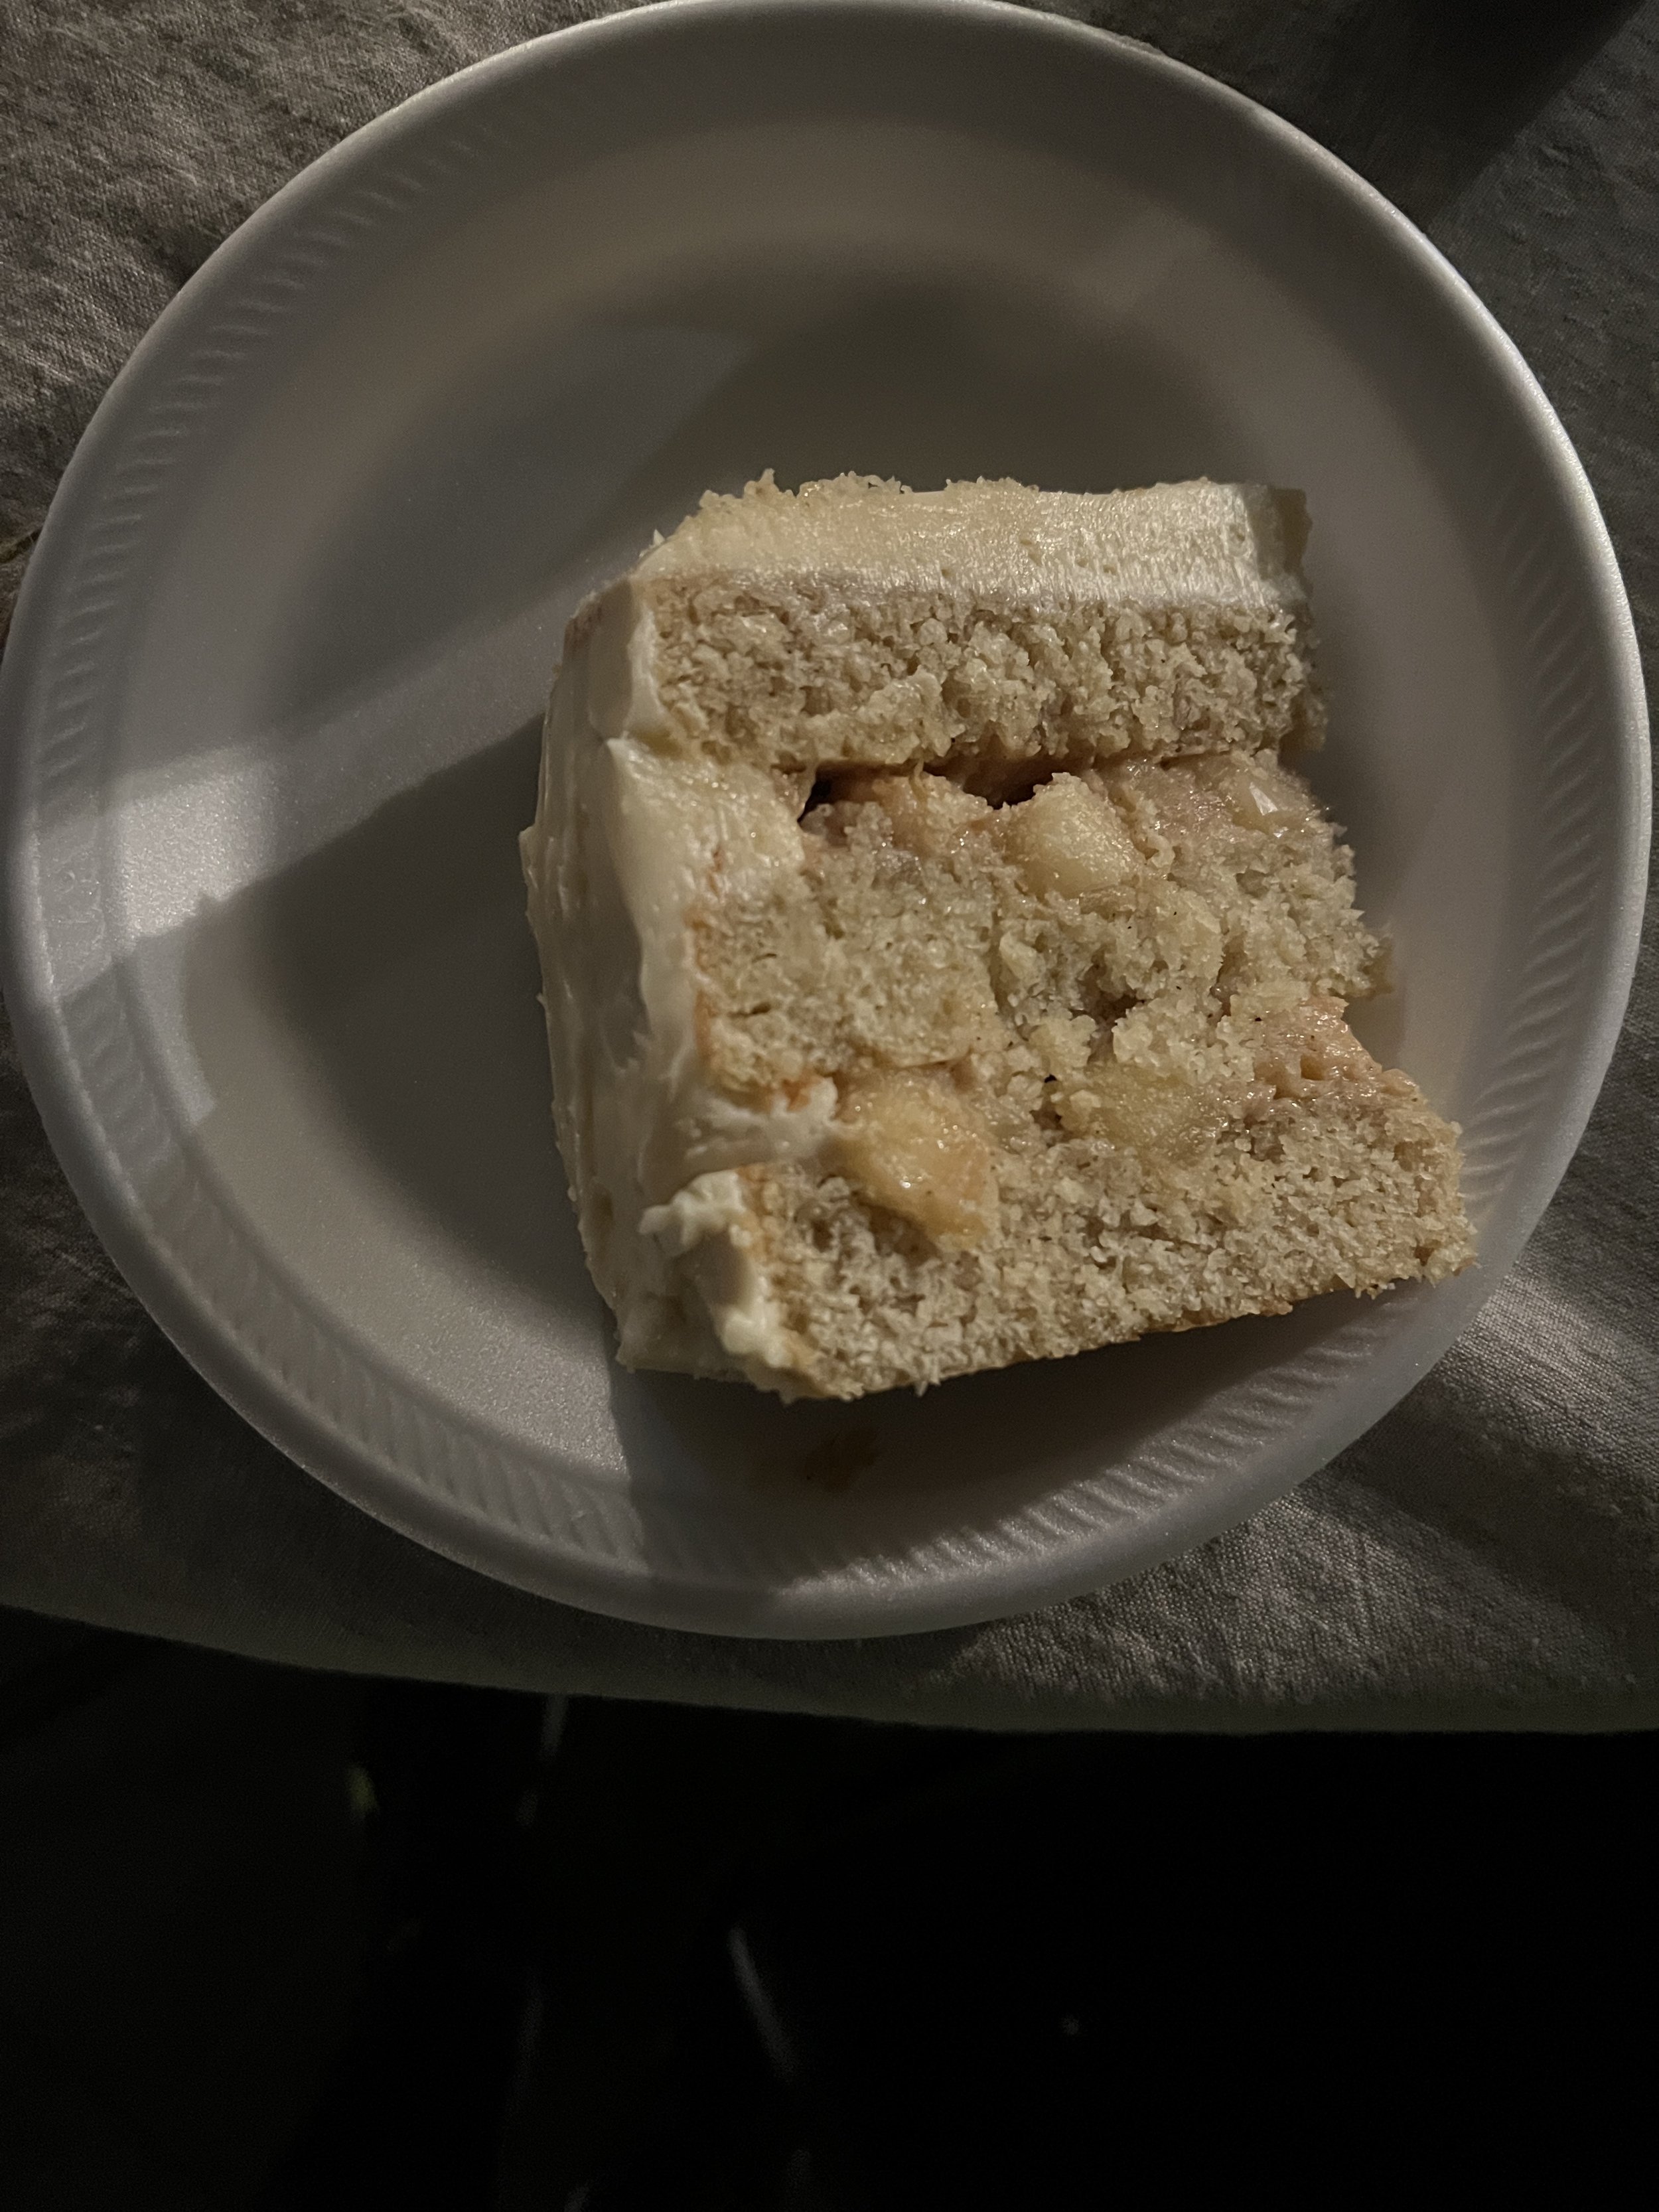
White Chocolate Raspberry Swirl Cheesecake

The Scoop and Gourmet’s Tips:
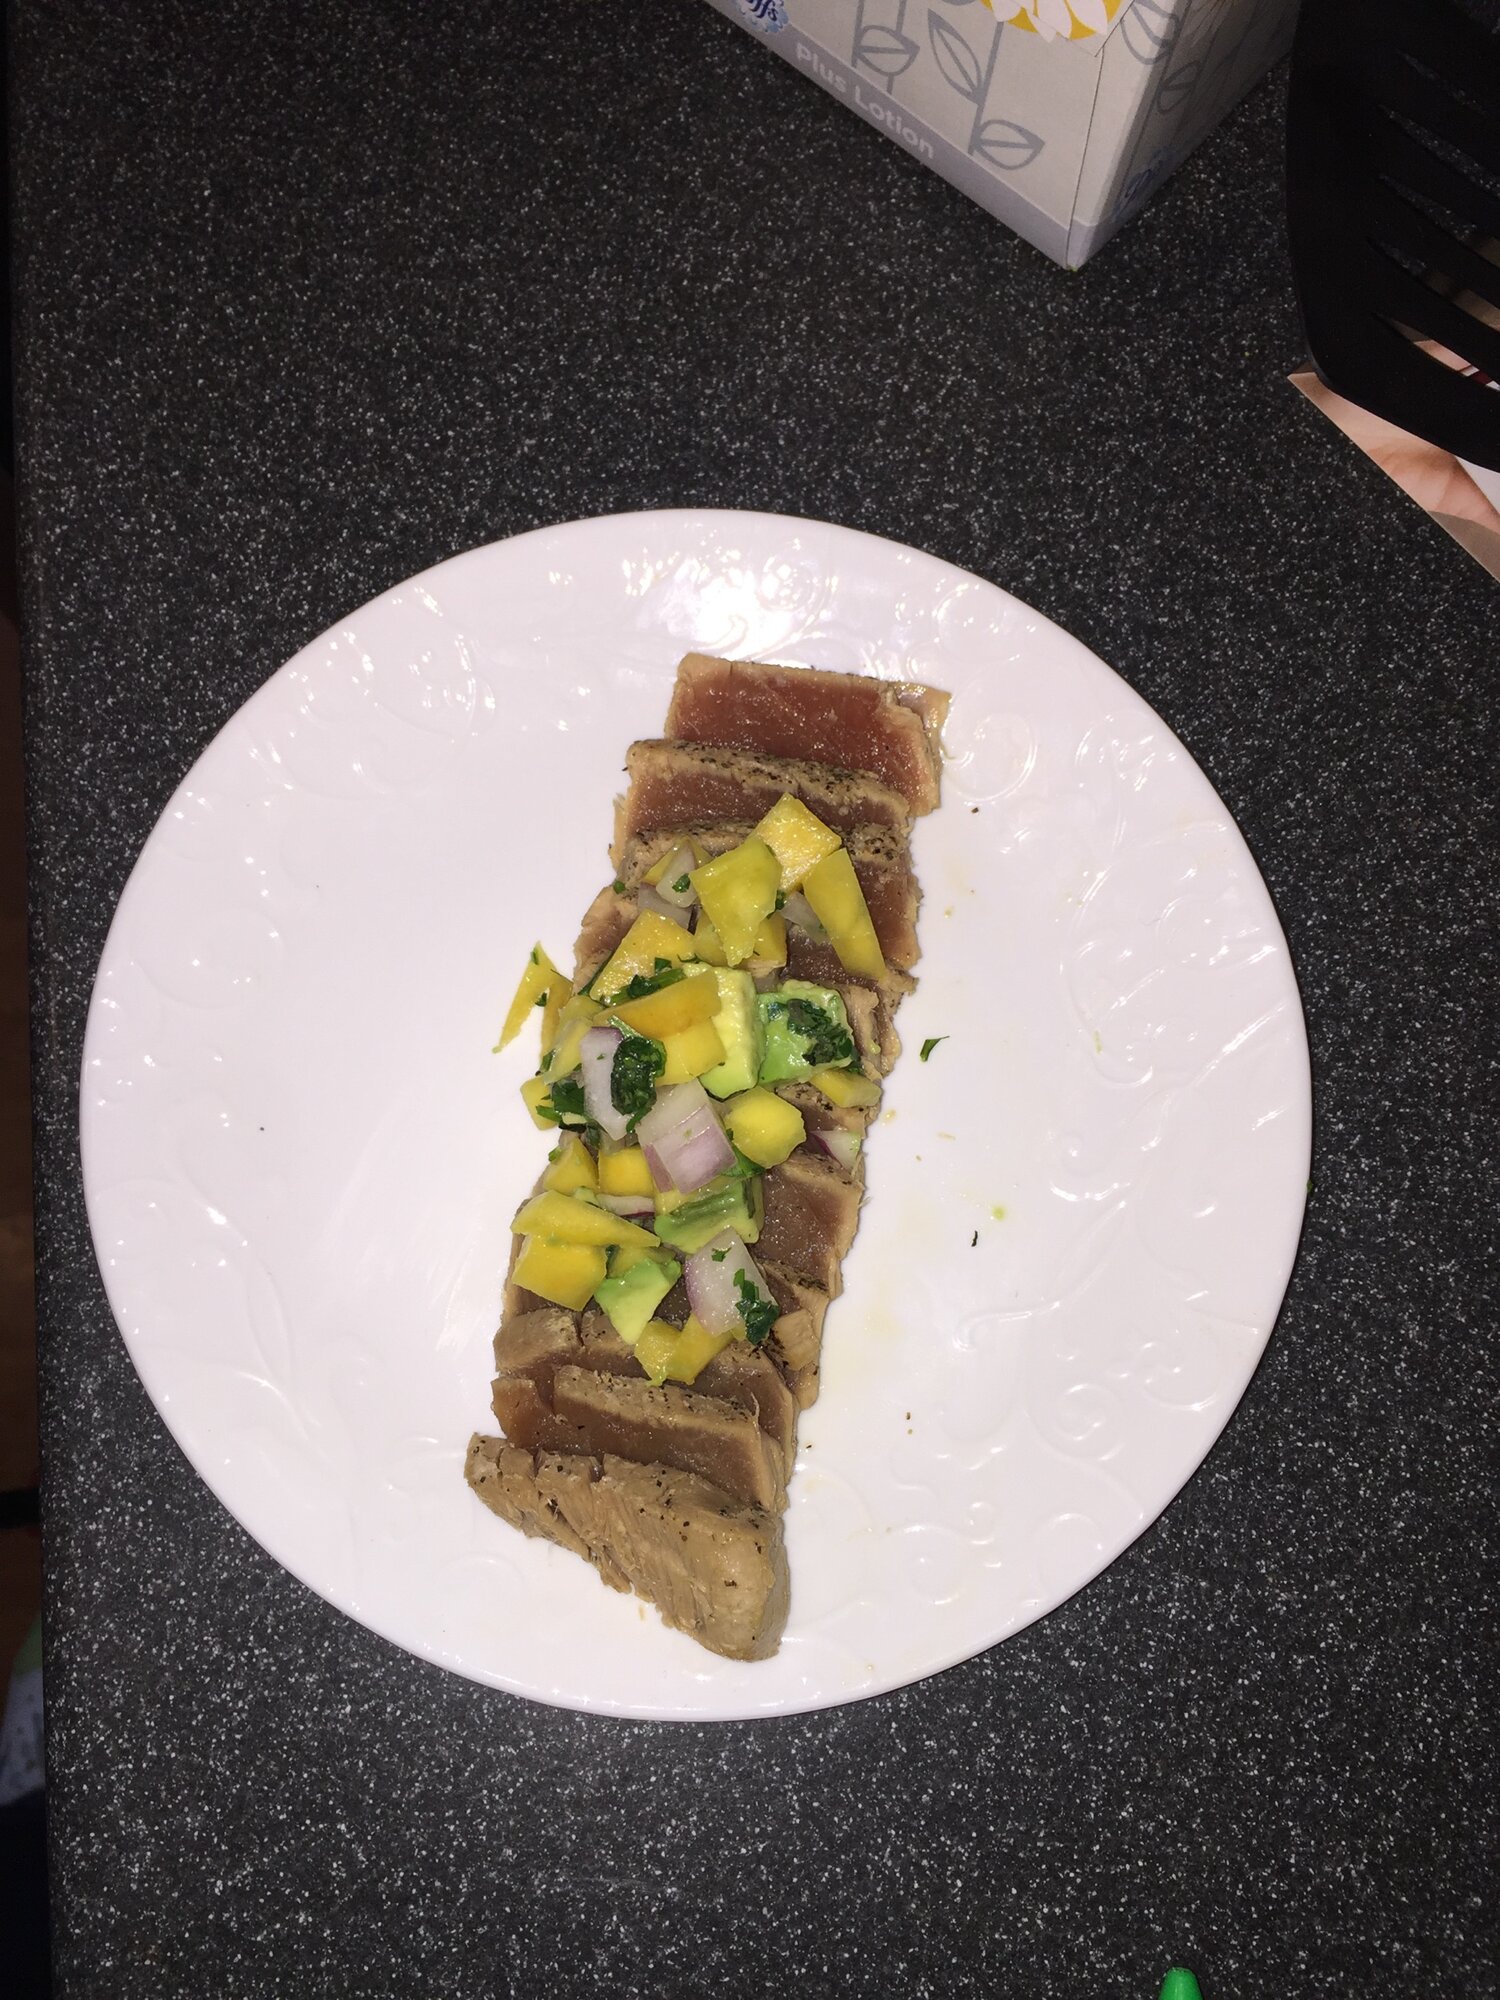
By popular demand, I decided to publish the recipe for the cheesecake from my demo the other day. If you want to check it out for yourself, click the Recipe Video button next to the recipe name and it’ll take you to the video on my Instagram page. Anyway, The classic debate for cheesecake is whether or not to use a water bath (placing the springform pan into a tray of boiling water) when you bake one. This is supposed to create a steamy oven environment to prevent the cheesecake from sinking and cracking as it bakes. The problem is that springform pans aren’t really watertight, even if it is leakproof, which can result in soup. I have never made cheesecakes with any form of water bath, and as you can see in the photos, it came out perfect. No cracks or sinking, and it gave a nice caramelized top that added to the taste and texture. White chocolate and berries are a favorite combination of mine so why not use both here. I brought this to work, and it was a hit. My staff noted that it had the right amount of sweetness. Hope you try this out for yourself. Reach out to me vie my email and social media. As I always say, keep your appetites big and imaginations hungry.
Now for some notes before we start. All ingredients must be room temperature. Patience is key because you need plenty of time to let the cheesecake set, which makes this a great make-ahead recipe. I made this with a 9” springform pan. Double wrap the outside of the springform with foil to make it more watertight. Do not put too much butter to the graham cracker crumbs or it will be like a paste, and they’ll mix better with the butter in a maxing bowl with a spoon. I recommend making the crumbs yourself because I find that store-bought cookie crumbs do not give the right structure. Because brown sugar has some moisture, it will help give more structure to the crust. If it does crack and/or sink, cover the top with white chocolate ganache, raspberry jam, or whipped cream and fruit. Now onto the recipe
Ingredients:
Crust:
12-15 graham crackers worth of crumbs
1/4 cup packed brown sugar
5-6 tablespoons unsalted butter, melted and cooled
Filling:
24 ounces full fat cream cheese (You must use regular bricks of cream cheese, not from a tub)
1 cup sugar
1 teaspoon vanilla extract
Pinch of salt
3 eggs plus 1 yolk, lightly beaten
1/2 cup sour cream
3 tablespoons AP flour, sifted
1-1/2 cups melted white chocolate (cool to about 90F to make it pourable without it being too hot)
1/2 cup of seedless raspberry jam, melted slightly to make it easier to pour.
Directions:
Mix graham cracker crumbs, butter, and brown sugar in a mixing bowl until consistency of wet sand. Spray inside of springform pan with cooking spray and line the bottom with a round of parchment paper.
Pour crumb and butter mixture into the springform, press down with a small round bottomed item (small glass or messing cup works) to form a crust. Be sure to push the crust up the sides as well for more insulation later. Place springform pan into preheated 350F oven for 10 minutes. Remove from oven and cool crust to room temperature. Lower oven temperature to 300F.
Meanwhile, beat cream cheese, sugar, vanilla, and salt in a stand mixer fitter with a paddle attachment on low to medium low speed until fluffy. Do not mix on too high of a speed or you’ll over-aerate your batter and risk it collapsing as it bakes. Be sure to scrape down the bowl every now and then to make sure everything distributes evenly.
With the mixer still on low to medium low, add the egg a little at a time, then add the sour cream, flour, and white chocolate. Keep mixing on low with the paddle attachment, scraping down periodically, until everything is fully incorporated.
Once the crust has cooled to room temperature, pour batter into sprinform pan. Then pour in the raspberry jam and swirl it around with a toothpick or spoon until desired effect is achieved. Gently tap the pan on the counter for 30-45 seconds to knock out any leftover air bubbles.
Place cheesecake into the now 300F oven and bake for 1 hour. Then immediately turn off the oven and leave the cheesecake in the oven, with the door closed, for another hour. This allows the cheesecake to cool slowly to help it retain structure.
Once the hour with the oven off is up, remove the cheesecake from the oven and let it cool to room temperature on the counter (minimum 2-3 hours). Then cover with a cake dome or plastic wrap and refrigerate for at least 6 hours, preferably overnight. Enjoy. The cheesecake will keep for up to a week in the fridge or a month in the freezer.
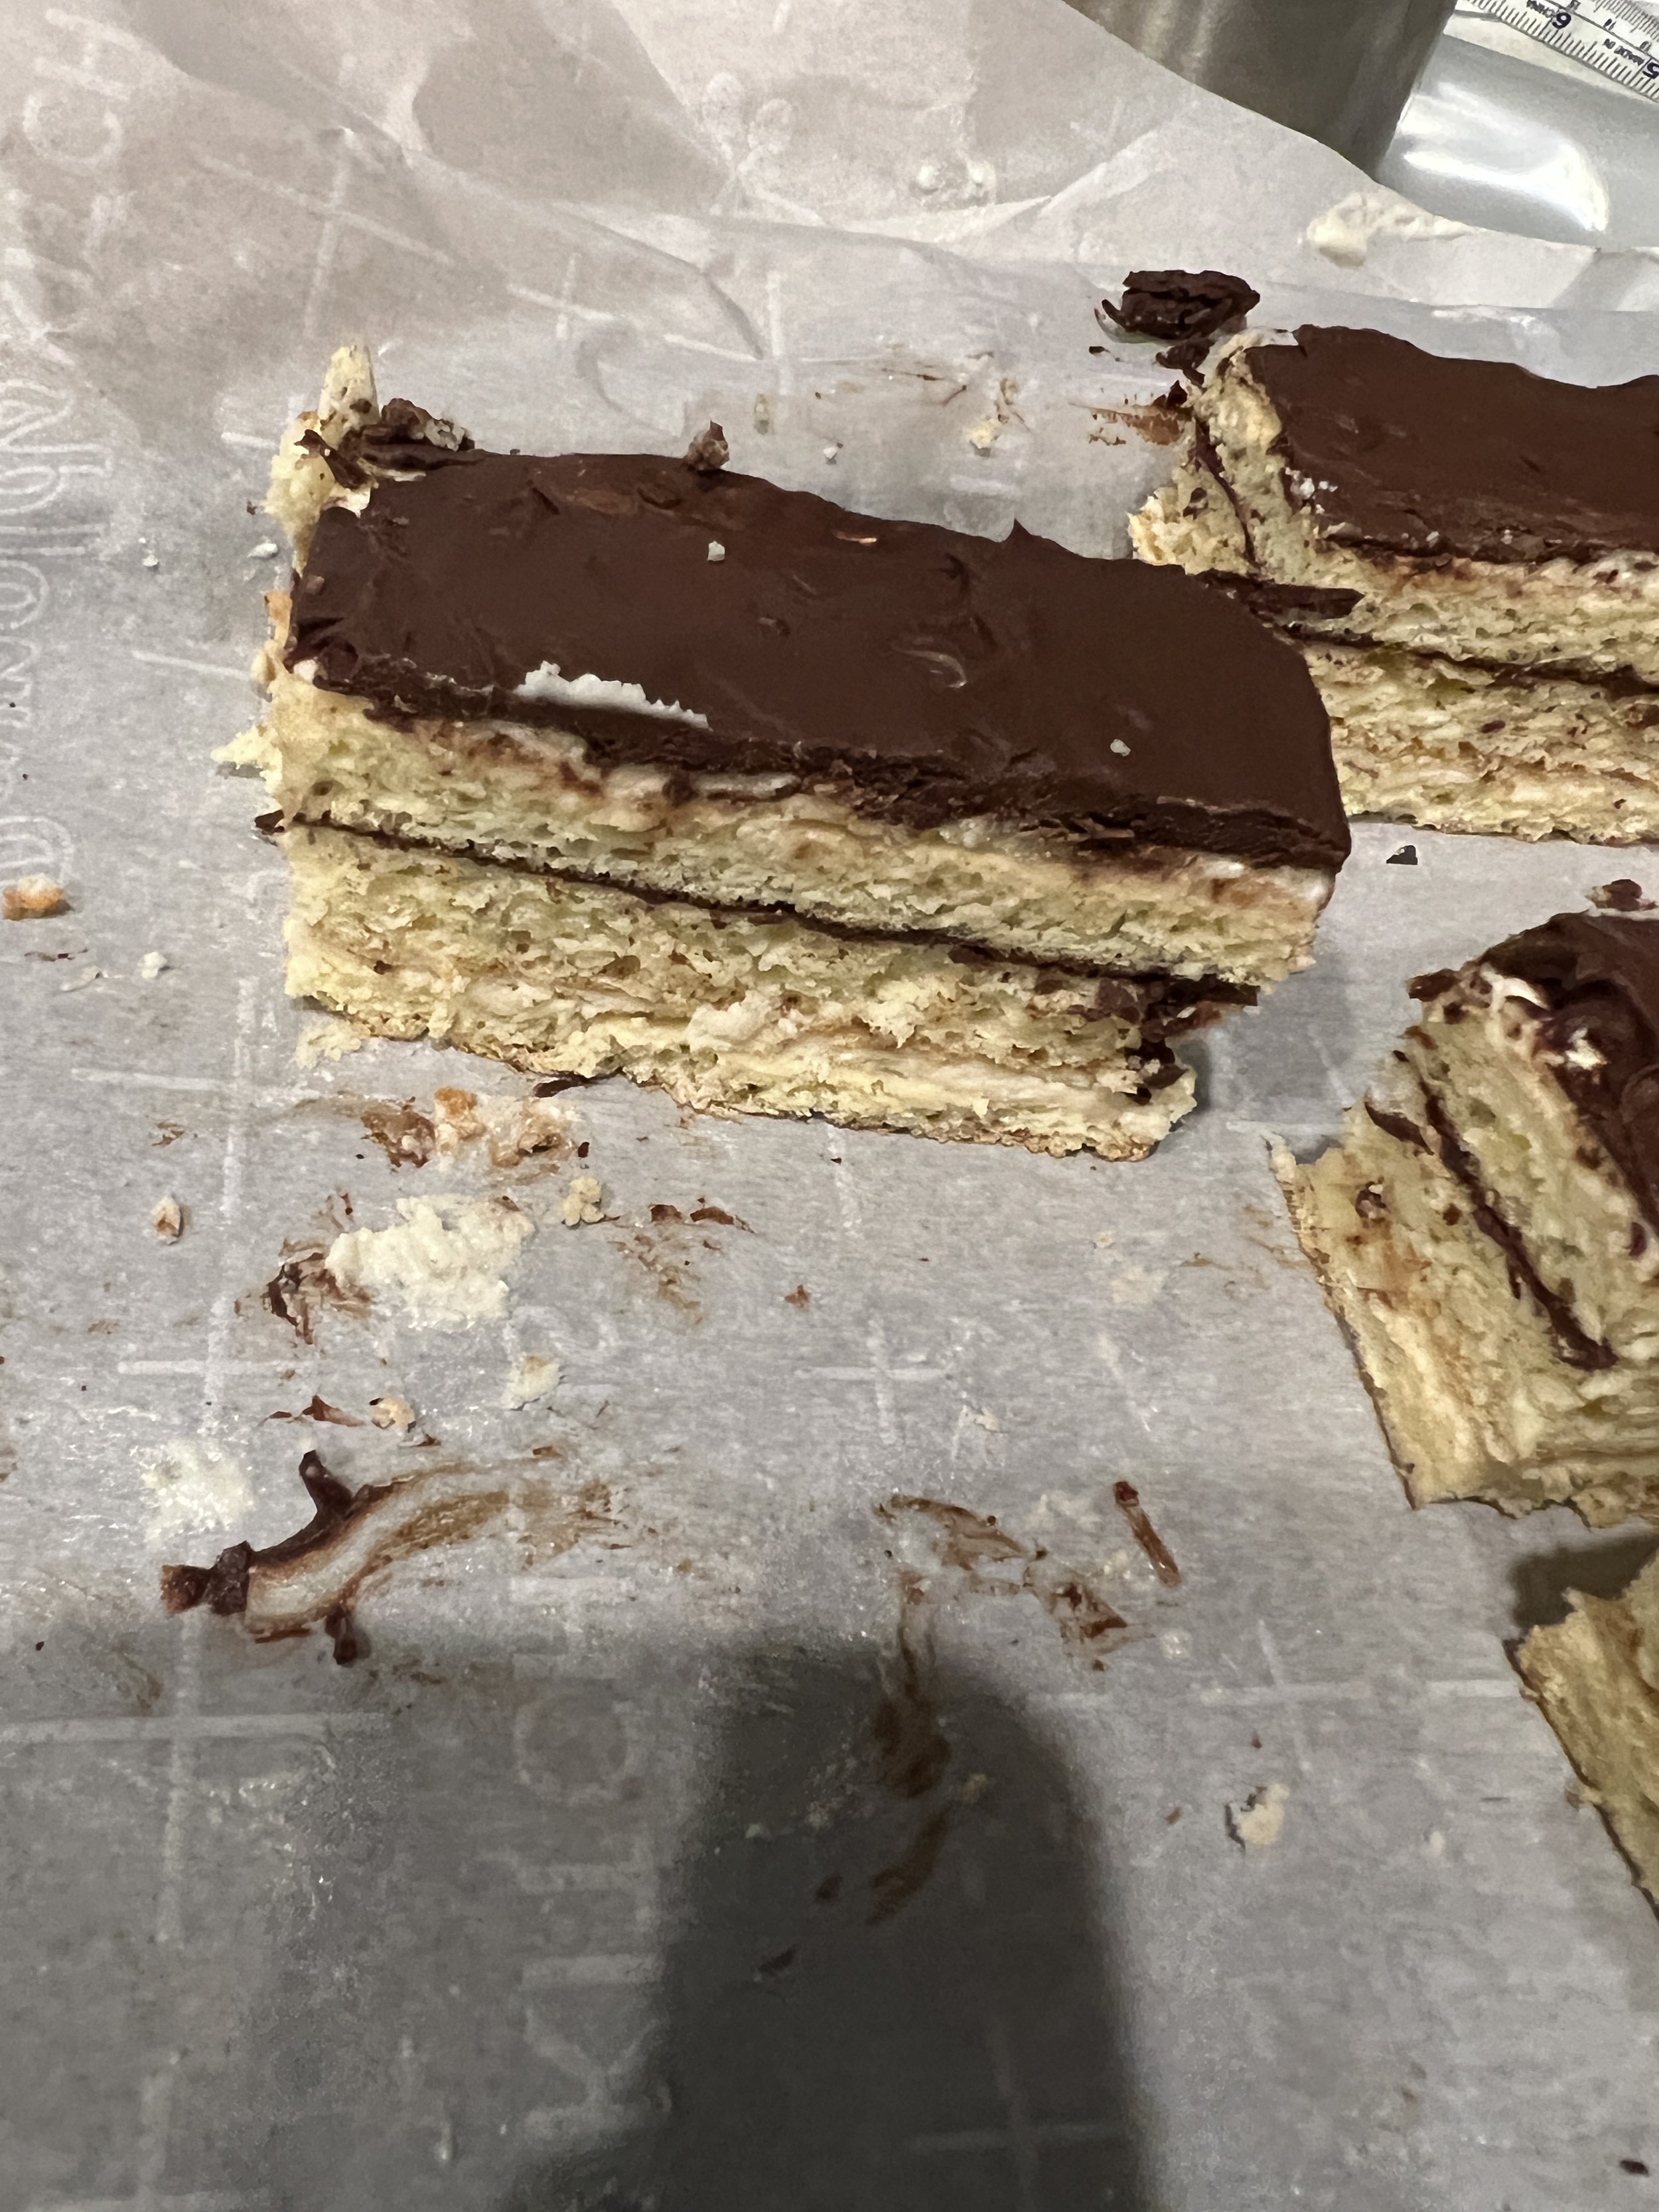
Opera Cake

The Scoop and Gourmet’s Tips:
This was a dessert that I had wanted to make for some time, as well as the inspiration behind my Baked Alaska recipe. And no this dessert will not make you an instant opera star. The trickiest part was the sponge cake, which is a specific type of cake; I’ll explain more in a bit. But I surprisingly managed to pull it off. Visually, this treat is already delicious, and they say that you eat with your eyes first. My main reference for the cake was from John Kanell of Preppy Kitchen, mainly for ingredient quantities. Also, mine uses Italian Meringue Buttercream instead of the usual French Buttercream (same process, but made with Pate Au Bombe (basically Swiss or Italian Meringue made with egg yolks instead of whites) because that’s what I had on hand. There’s no exact measurement for the buttercream because I had to eyeball it based on what I already made, so use any vanilla buttercream you have on hand, but flavor it with coffee syrup and I recommend using homemade buttercream because it tastes better than store bought icing. Reach out to me on my socials or at my email. There will be a multi-part in-depth demo on my Instagram page. Remember, keep your appetites big and imaginations hungry.
Now for some background on Opera Cake. It’s layers of coffee syrup soaked Biscuit Joconde (thin almond sponge cake), coffee buttercream, and dark chocolate ganache or glaze. Think of it as like a French Tiramisu. It is said to be a very hard dessert to make because of the Joconde itself and the layering. But the end product is spectacular; you’ll be impressed when you take that first bite of this mocha almond delight. The exact origin is unclear, but the originators are claimed to be Cyriaque Gavillon or Gaston Lenotre in 1955 and 1960 respectively.
Before going into the recipe, here are some tips. The Biscuit Joconde cooks fast in the oven, so keep an eye on it. Don’t use too many eggs or your cake will taste too eggy. Have a ruler on hand because you will need to be as exact as possible when cutting the Joconde for the layers. The dry ingredients are weighed out before sifting them. I haven’t tested this with a smaller sheet pan so use the size stated in the recipe. You must use AP flour, cake flour may not work properly. Because the Joconde is so thin, be gentle when handling them as they are a bit more fragile. A general rule of thumb for instant coffee is a 4:1 water to coffee ratio, but some brands may vary. Make a double batch, a mistake I made when developing the recipe, because you need it for brushing the Joconde and flavoring the buttercream. The Joconde will be made with French Meringue, which involves beating the egg whites with the sugar while they are raw, so work quickly as this is not as stable as Swiss or Italian Meringue. You can make the coffee syrup up to a month ahead,; just keep it in the fridge in the meantime. Now onto the recipe.
Ingredients:
For the Biscuit Joconde:
3 eggs, plus 3 whites
100 grams of powdered sugar, sifted
100 grams of almond flour, sifted
2 tablespoons of granulated sugar
30 grams of AP flour, sifted
2 tablespoons melted butter or coconut oil (cooled to room temperature)
For the coffee syrup:
1/2 cup granulated sugar
1/2 cup water
2 tablespoons of instant coffee (I used decaf)
Plain vanilla buttercream (I used my Italian Meringue Buttercream), amount may vary
For the gnanche:
1/2 cup really good dark chocolate, chopped into tiny, but even, pieces
1/2 cup heavy cream
Directions:
Combine almond flour, powdered sugar, and whole eggs in a bowl, beat with a hand mixer until the mixture doubles in volume and becomes pale in color. Add the flour.
In a separate bowl, beat the egg whites until they get foamy. Then slowly drizzle the granulated sugar into the whites as you continue beating them until they reach stiff peaks. Then gently fold the whites into the whole egg mixture in 3 additions, and then add the melted butter or coconut oil.
Evenly spread out on a parchment lined 17”x11” baking sheet, smoothing out with an offset spatula. Then bake in a preheated 400F oven for about 10 minutes, or until the cake is springy to the tough and the top is slightly golden brown.
Carefully invert the cake onto a wire rack and cool to room temperature.
Meanwhile make the coffee syrup by combining the water, sugar, and instant coffee in a small pot and bringing to a boil for 1-2 minutes. Cool completely to room temperature. Once cooled, mix half of the syrup into the buttercream and reserve the rest for assembly.
Cut the cake in half crosswise (each half was about 21 centimeters in my version) and cut a 9 centimeter strip of the cake lengthwise.
Meanwhile, put the chopped chocolate and cream in a separate bowl. heat by placing the bowl over a small pot of simmering water and mix with a rubber spatula until well incorporated (about 4-5 minutes; the mixture may look ugly at first but patience is the key). Cool to about 90-95F before assembly.
Now let’s assemble. line wire rack with parchment and place over baking sheet. Use one of the wider pieces of cake for the bottom layer. Place the first layer on the wire rack, brush liberally with the coffee syrup, and top with the buttercream, making sure to smooth the buttercream layer. Next, make the 2nd layer by placing the 2 narrow strips of cake onto the buttercream, brush with coffee syrup, and top with some of the ganache, smoothing out the ganache (just enough to coat the 2nd layer of cake. Then place the other wide piece of cake on top of the ganache layer, brush with remaining coffee syrup, and another layer of buttercream, again smoothing out the layer of buttercream. Place the cake you assembled so far into the fridge for at least 30 minutes or the freezer for at least 5-10 minutes. Remove from the fridge or freezer, pour the rest of the ganache over the cake, return to the fridge or freezer for at least 30 minutes or 5-10 minutes respectively. Remove from the fridge or freezer. Trim the edges of the cake off. Cut cake in half lengthwise, then cut each half into 6 rectangular pieces. Enjoy.

Key Lime Pie Charlotte

The scoop and Gourmet’s tips:
Lately, I have been posting live demos of my recipes on my Instagram page, but I felt that this recipe, given how intricate it was, would be more worthy of a description on the website from all the steps. Inspiration came from my trip to Miami earlier this year, where I attended the Chefs Making Waves cruise, and met some of my favorite celebrity chefs. I had been interested in doing a Charlotte for some time and I figured summer would be the right time and key lime would be the right flavor as it’s a very summery and bright flavor. I will be honest, this is my first time making this dessert and I’m very surprised it came out perfectly. Charlotte’s are a great way to experiment with flavor and texture combinations so let your imagination run wild here. Be sure to reach out to me vie my social media pages or email me (email address is at the bottom of the page). I will be posting a recorded demo on my Instagram page, but the recipe here may be different than in the demo. As always, keep your appetites big and your imaginations hungry.
For those unfamiliar with a Charlotte, it’s a French dessert that has several variations. The most known to my knowledge is the Charlotte Russe, a ladyfinger lined mold filled with Bavarois AKA Bavarian Cream (a variation of Diplomat Cream, whipped cream folded into pastry cream, only the pastry cream thickened with gelatin instead of butter or cornstarch). For mine, I lined my mold with madeleines and used ladyfingers for my base in each layer. My filling differs from a traditional Charlotte because I use a chiffon instead of a Bavarois. This worked because it made the filling lighter and chiffon also involves folding a whipped element into a sweet egg yolk base that’s thickened with gelatin rather than butter. If you want tips on chiffon, you can consult my Peppermint S’mores Chiffon Pie recipe. The crushed graham crackers are to remind us of Key Lime Pie and the toasted coconut is my personal touch. If you want, you can brush the madeleines with simple syrup to add moisture. If you can’t find key lime juice, you can use regular limes (1 lime contains 2 tablespoons of juice) or use any citrus fruit you like. Use any meringue you like, I used Italian Meringue because you all know that’s my go to meringue.
Onto the recipe
Ingredients:
16 madeleines
16 ladyfingers
4 eggs, separated
3/4 cup key lime juice (I used Nellie and Joe’s Key Lime Juice, which you can get on Amazon)
2 1/2 cups granulated sugar (1 cup for the key lime base, the rest for the meringue)
Optional; a little coconut extract
1 teaspoon gelatin powder
1/2 teaspoon cream of tartar or 1 teaspoon lemon juice
Crushed graham crackers and toasted coconut flakes (as much as you like)
Directions:
Place a 9” circle of parchment paper on the bottom of a 9” springform pan. Line the sides with the madeleines and the bottom with 8 ladyfingers. Set aside until ready
Bloom gelatin powder in a small bowl with 1 tablespoon of cold water (5-10 minutes), set aside until ready. Meanwhile, combine egg yolks, key lime juice, coconut extract (if using) and 1 cup of sugar in a mixing bowl. Place the mixing bowl over a pot of simmering water and whisk constantly until the temperature registers 160F on an instant-read thermometer. Keep whisking while heating the eggs or you’ll end up with scrambled eggs. Once at 160F (the mixture may still be liquidy), take the bowl off the heat and add the bloomed gelatin and whisk until the gelatin is fully incorporated. Place the bowl in an ice bath (a large bowl filled with ice or ice water) and and let the key lime base cool for about 15-20 minutes, whisking occasionally. The base will thicken from the gelatin, but don’t cool it for too long or the gelatin will set too much. you want the base to be thickened, but still pourable.
Meanwhile. make the meringue using the egg whites, cream of tartar (or lemon juice), and the remaining 1 1/2 cups of sugar. Whip the meringue to stiff peaks. Gently fold the meringue into the cooled key lime base in 3 additions; the 1st addition is sacrificial to loosen up the base. Once fully incorporated, pour half of the chiffon mousse into the mold, add some crushed graham crackers and toasted coconut. Add the remaining ladyfingers on top of the filling in the mold, pour the remaining chiffon onto the ladyfingers, and add the graham crackers and coconut. Chill for at least 6 hours, preferably overnight. Unmold on your serving platter. Enjoy.
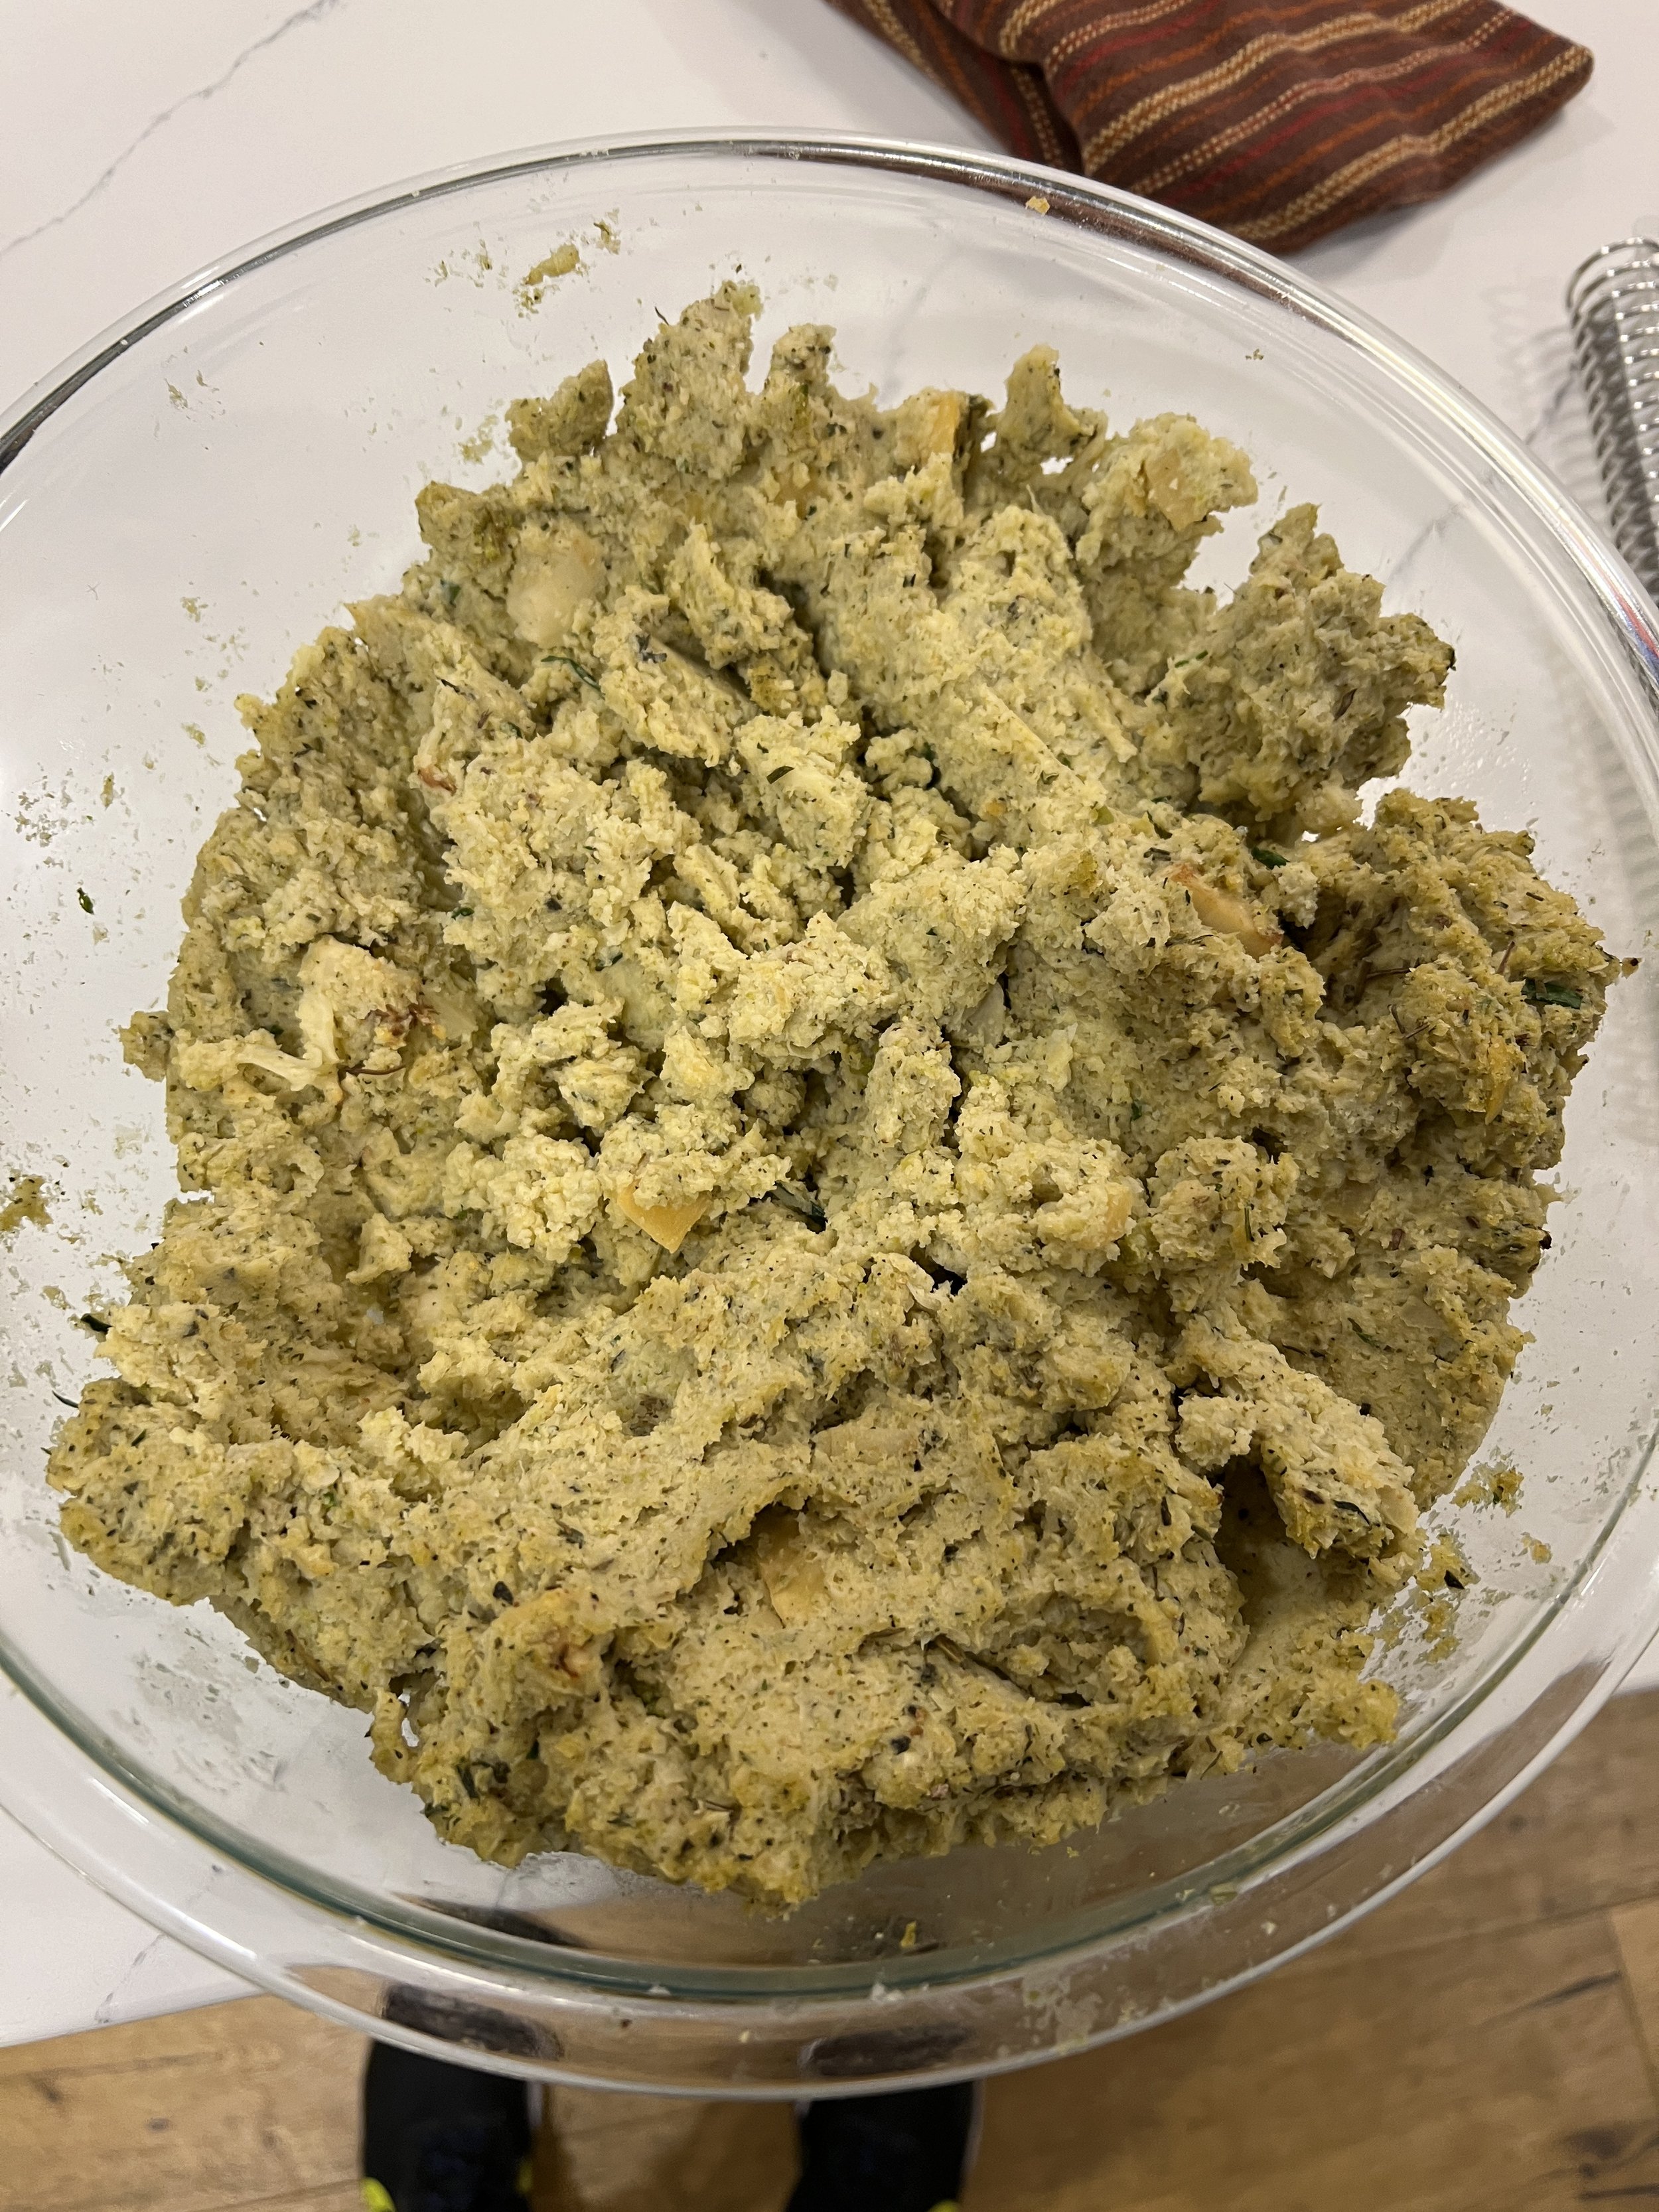
Roasted Cauliflower and Root Veggie Mash
The Scoop and The Gourmet’s Tips
This was a component from a future addition to the site that I am still working out the bugs in, but realized that it can be a standalone recipe in the meantime, albeit with some tweaks. The idea came from a couple places, working on healthy recipes as someone who works out often, and a couple people in my family with dietary restrictions, including my mom who doesn’t eat most starches. I felt that mashed cauliflower is a great alternative to potatoes and adding some other root veggies to the mix would also be delicious. The Greek yogurt in the recipe along with the chives and herbs is a great and healthier spin on sour cream and chive mashed potatoes because you have the tang of the yogurt and the bite of the chives. Also brought this for Thanksgiving and everyone loved it, even my mom. You can reach out to me for feedback vie email (email address is at the bottom of the page) and on social media. Remember, keep your appetites big and imaginations hungry.
Here are some notes before we start. Comb your produce section for some good root vegetables (I used, celeriac, parsnip, and rutabaga). I also used Romanesco cauliflower, as shown by the color. I made a double batch, so this recipe will be for a single batch. The milk is to add some extra moisture to help it puree into a smoother consistency. I recommend using an immersion blender, but a regular blender or a food processor will work. Now, onto the recipe.
Ingredients:
1 head of cauliflower, cut into florets and edible stems cut into 1-2” pieces
1 each of parsnip, rutabaga, and celeriac (peeled and cut into 1-2” pieces)
2 cloves of garlic, chopped
1 handful of chopped flat leaf parsley
a few sprigs worth each of rosemary, thyme, and oregano, stemmed and chopped
2 or 3 sage leaves, chopped
a little olive oil
Salt and pepper to taste
1 1/2 tbsp butter
1/2 cup milk, heated
1/2-3/4 cup plain Greek yogurt
1 bunch snipped chives
Directions:
Preheat oven to 375F. Line a baking sheet or two with foil (depending on the size of your baking sheets), add cauliflower and root veggies to the tray in an even layer. Drizzle with olive oil. Evenly sprinkle the garlic, salt and pepper, and herbs (except the chives), shaking the tray to evenly distribute if necessary. Roast in oven for about 30 minutes.
Remove from the oven, add to a medium mixing bowl, add butter and milk, and puree with an immersion blender. Once close to desired consistency, add the yogurt, chives, and more salt and pepper to taste, and keep blending until at desired consistency (I like mine smooth with some chunks for textural contrast). Enjoy; best served warm.
Chai Spiced Apple Cake
The Scoop and the Gourmet’s Tips

What says fall like apples? This moist and delicious apple cake. It was a hit at Thanksgiving, with my family commenting on its moisture. The cake is a modification of my sweet potato cake from my Hummingbird Cake, where I used applesauce instead of sweet potato, and I swapped out the spices. For my birthday, I got a membership to a spice program called Burlap & Barrel, and one of them was a Chai spice blend which I figured would go great with the cake when I took a whiff of it. For the filling, I riffed off an apple pie filling recipe from Spend With Pennies, making a double batch and replacing the water and granulated sugar with cider and light brown sugar. Still, this was a delicious cake in the end, and I frosted it with my Cider Caramel Meringue Buttercream. Reach out to me for feedback. Email address is on the bottom of the page and follow me on Instagram at Theautisticgourmet. As always folks, keep your appetites big and imaginations hungry.
Here are some notes before jumping into the recipe. When baking with applesauce, it lightens the final product and adds moisture. But, you will need to make a few modifications in your recipe when baking with applesauce to prevent the cake from being too dense or too moist. You will need another 1/2 tsp of baking powder to lighten the cake. Reduce the amount of eggs and fat (whether it be butter or oil) as applesauce can substitute some of those ingredients; in terms of the amount of eggs, applesauce can only replace up to 2 eggs in a recipe.
The Chai spice I used is available for purchase on the Burlap & Barrel website. Click here if you’d like to check it out for yourself. Or you can make your own; here’s a Chai spice recipe I found that you can use as an example.
The image shows a 3-layer cake, but this recipe will be for 2 layers. If you do want to make enough for 3 layers, just increase the ingredient quantities by 50%.
Here are some baking tips I have learned. Sift your dry ingredients into the bowl to reduce lumps and then whisk them together. They distribute better when you add the wet ingredients to the dry ingredients as you mix. The flour and sugar measurements are in grams, mainly because I use cake flour for my cakes; this helps if using AP flour instead cause it will work as a 1:1 substitute if measuring by weight.
For some variations, you don’t have to use my meringue buttercream or the apple filling recipe I used. This cake is also great with a cream cheese icing flavored with warming spices or a brown butter icing. Toasted walnuts are also a great addition to an apple cake, whether it be in the batter or between the layers for texture.
Well that took a while, now for the recipe.
Ingredients:
336 grams cake flour
398 grams granulated sugar
1 tbsp + 1/2 tsp baking powder
A pinch of salt
About 1 1/2 or 2 teaspoons Chai spice (depends on your spice preference as this stuff is potent raw)
1/2 cup coconut oil or butter, melted room temperature
3 eggs, room temperature
2 cups unsweetened applesauce, room temperature
1 quantity of apple pie filling (this is the one I used with my aforementioned substitutions from my notes)
1 adjusted quantity of Cider Caramel Meringue Buttercream (make the full amount if making it a 3-layer cake; you may not use all of it)
Directions:
Preheat oven to 350F. Grease and flour 2 9”-round cake pans. Line the bottoms of the pans with a round of parchment paper.
Sift flour, sugar, baking powder, and Chai spice into a large bowl, add the pinch of salt and whisk for a few seconds to incorporate. Add coconut oil or butter, eggs, and applesauce to the dry ingredients, and mix with a whisk until all ingredients are fully incorporated. Let the batter come to room temperature if the wet ingredients were cold when added to the batter.
Even distribute the batter among the cake pans and bake in the oven for 30-35 minutes (or until a toothpick comes out clean or with little to no crumbs when inserted into the center). When ready, remove cakes from the oven, let them cool in the pans for 10 minutes, then transfer from the pans to a wire rack to continue cooling to room temperature.
Make a frosting dam around the edge of the 1st layer and spoon the apple pie filling onto that layer. Top with final layer, frost the outside of the cake. Enjoy.

Cider Caramel Meringue Buttercream
Ingredients:
8 egg whites
2 cups granulated sugar (1/2 cup separate from the rest of the sugar)
1 tsp cream of tartar
6 sticks of butter, softened to just above room temperature and cut into 1-tablespoon pieces
1 teaspoon vanilla extract
1 cup of Apple Cider Caramel or store bought caramel sauce with 1/3 cup of boiled cider mixed in (see Apple Cider Caramel recipe for tips)
Directions:
Put egg whites and cream of tartar in the bowl of a stand mixer, fitted with the whisk attachment. Beat on medium speed, slowly pouring the reserved 1/2 cup of sugar as the mixer goes.
2. Meanwhile, add the remaining 1-1/2 cups of sugar to a small pot with 3/4 cup of water and boil until sugar is at softball stage (240F; a good thermometer, (I recommend a candy thermometer) is a must).
3. Once at that stage, carefully and in a slow stream, pour the sugar syrup into the egg whites as the mixer goes, pouring in between the whisk and the sides of the bowl. Crank up the speed to high and keep mixing until stiff peaks are achieved and the bowl cools about room temperature. The cooling will take about 10 minutes; you can expedite the cooling of the bowl by placing ice packs or bags of frozen fruits or veggies against the bowl as the mixer goes.
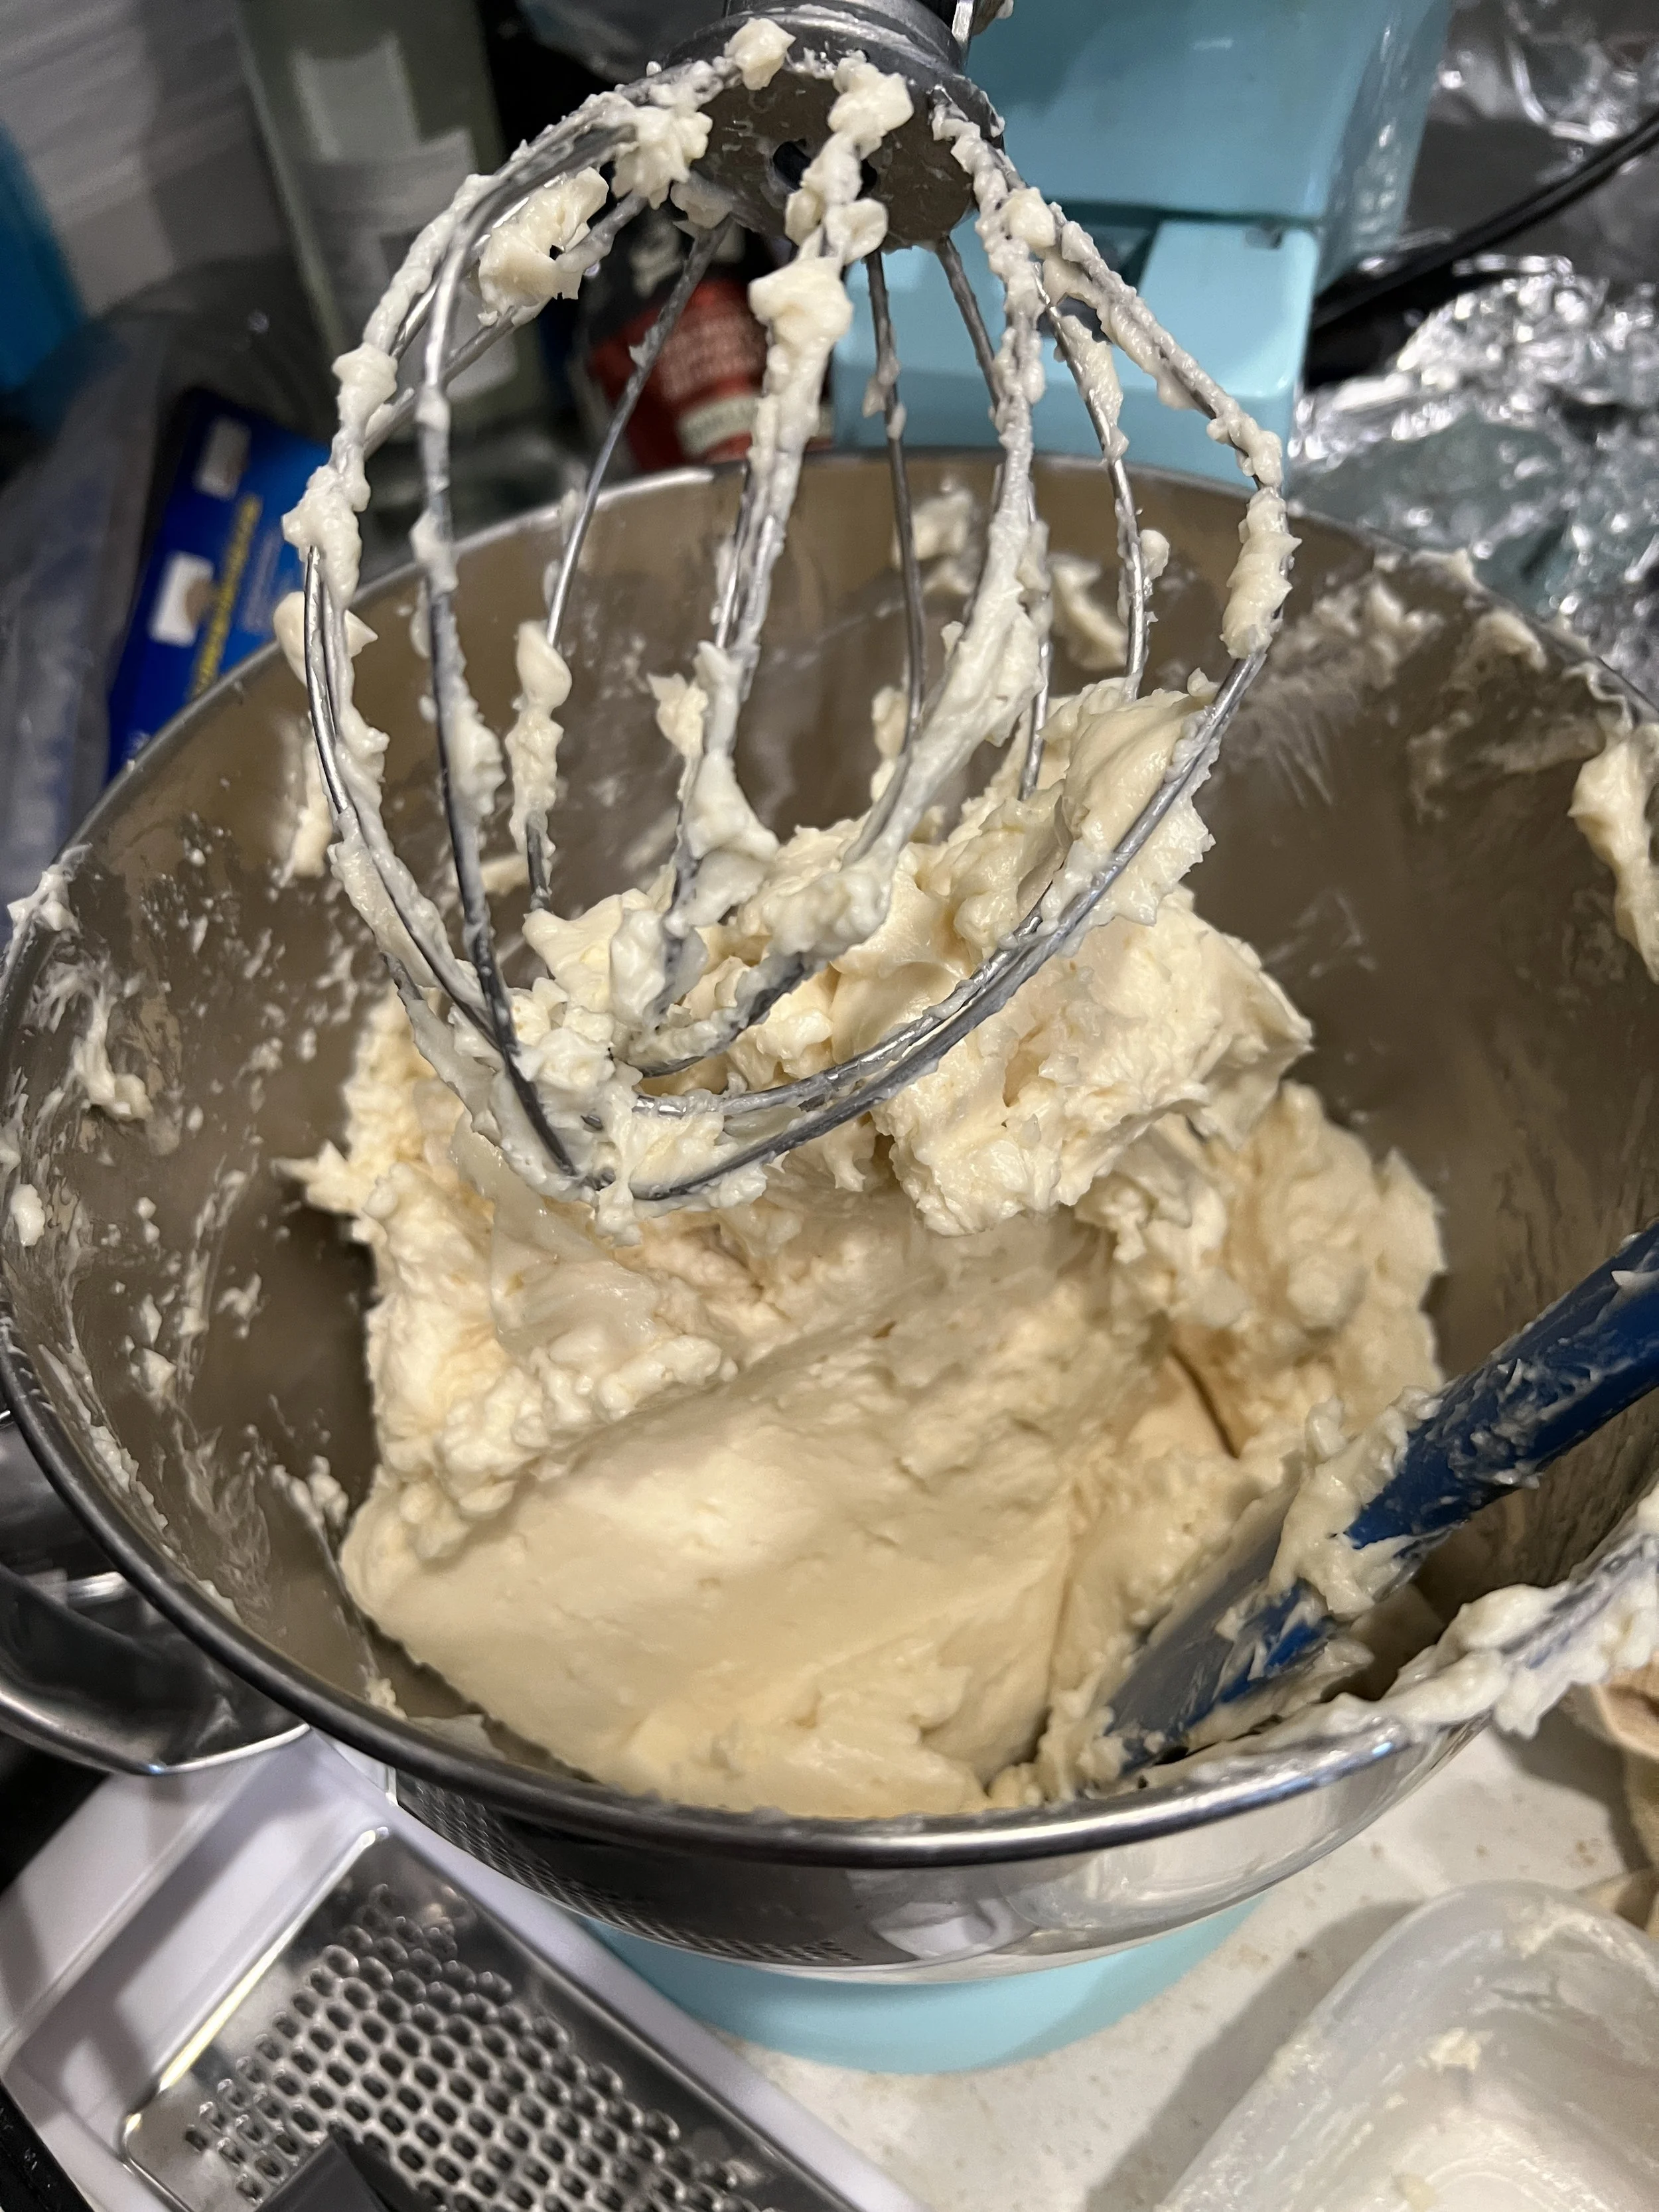
4. Once cooled. Switch to your paddle attachment. With the mixer on medium-low speed, add the butter to the meringue 1 chunk at a time, letting each chunk fully incorporate into the meringue before adding the next chunk. Scrape down the bowl every now and again to ensure all the butter is fully incorporated. Once all the butter is added, switch back to the whisk attachment and keep mixing on high until at a smooth and creamy consistency, again scraping down the bowl periodically.
5. Once at the desired consistency, add the vanilla extract and mix for another 15 seconds. Remove the bowl from the mixer, fold in the caramel until fully incorporated, and use right away or store in an airtight container and refrigerate or freeze.
The Scoop and the Gourmet’s Tips
This is a variation on my Coconut Buttercream from my Hummingbird Care recipe, but in a higher amount, and using my Cider Caramel instead of coconut. I will admit, I meant for it to be an Italian buttercream but I may have accidentally made a Korean buttercream cause some of my butter was a bit too cold when I added it to the meringue. Korean buttercream, for those unfamiliar, is a newer buttercream; it’s the same process as any meringue buttercream, but the meringue and butter are colder when you add the butter. This makes a large batch, but meringue buttercream keeps in the freezer for a few months if stored properly. Reach out to me vie my email and social media. As i always say, keep your appetites big and imaginations hungry.
Now for my notes and some tips. You can make this buttercream with Swiss or Italian meringue (I used Italian). The meringue will deflate and/or curdle when you add the butter at the beginning, don’t panic this is normal. I find that using the paddle attachment when adding the butter and then switching back to the whisk attachment helps the buttercream come together and gives me the smooth and airy texture I want. The temperature of your butter when you add it to the meringue and the amount added in at a time will affect the consistency. If added in when too soft, it will turn soupy, while added in too cold or too much at a time may cause it to curdle and split. If too soupy, you can fix it by placing the mixing bowl with the buttercream in the fridge for about 20 minutes to cool it down. If too curdled, crank up the speed on your mixer to at least medium-high and mix in 1-minute intervals until back to the correct consistency, fitted with the whisk attachment and scraping down the bowl between intervals. In the case of curdling, this is due to the liquid separation from the butter, which will reincorporate if you keep mixing (scrape the bottom of the bowl to see how much liquid from the butter is on the bottom to get an idea of your progress). If you freeze this buttercream for a later use, thaw it overnight in the fridge, then let it sit at room temperature for about 2 hours to soften, and then rewhip in your mixer, w/ the whisk attachement, to make it pliable. I rambled on enough, onto the recipe.

Apple Cider Caramel
The Scoop and the Gourmet’s Tips

There are things I like about the fall; those being my Halloween, Thanksgiving, my birthday, and of course apple cider. For one of my Thanksgiving recipes this year, I figured it was time to take the next step in sweets, homemade caramel. Although I helped my mom make candy apples when I was very young, she cooked the caramel, so this is the first time I made caramel from scratch by myself. Since I love hot caramel cider, it gave me the idea to do this apple cider caramel. I did do some research to get the basics as caramel can go horribly wrong if made incorrectly. I riffed off a recipe from YouTube, albeit with some variations, so it is my own recipe as I put my own spin on it. This recipe was actually developed as an ingredient for another one of this year’s Turkey Day recipes, but you can make it as a standalone recipe for anything you desire because it keeps in the fridge for a few weeks if stored properly (from candy apples, dessert topping, a glass of hot cider, the possibilities are endless). Reach out to me vie social media or email me for feedback (email address is at the bottom of the page). Remember, keep your appetites big and imaginations hungry.
Now for some notes. First, you will need to make boiled cider, which is just apple cider boiled down and reduced by 75% on the stove top to a syrup-like consistency. If it sounds too intimidating, you can order boiled cider online (King Arthur carries boiled cider). Tossing the sugar in a little lemon juice before cooking the caramel will help prevent clumping as it cooks, allowing for a smoother caramel. This recipe makes about 1 1/2-2 cups. Now onto the recipe.
Ingredients:
2 cups of apple cider
300 grams of granulated sugar
50 grams of packed brown sugar
1/2 tbsp cinnamon
A pinch of salt
A little lemon juice
1 cup heavy cream
About 2 tbsp unsalted butter
Directions:
In a small pot, bring cider to boil and reduce to simmer until reduced to 1/2 cup and syrup-like (10-15 minutes)
Meanwhile, toss granulated and brown sugar in a separate small pot and coat with the lemon juice. Stir in salt, and cinnamon.
Add boiled cider to the pot with the sugar mixture. Over medium to medium-low heat, stir until sugar fully dissolves. Increase heat to about medium-high and cook for about 10-20 minutes (or until it turns an amber color). Do not stir, but shake the pan a bit from time to time to prevent burning. DO NOT take your eyes off the caramel as it cooks or you will risk burning it or having it spatter; this stuff will be very hot as it burns.
Once at an amber color, take off the heat, stir in the heavy cream, pouring in a slow stream as you stir the caramel. Then, add the butter and keep stirring until the butter is melted and incorporated. Cool caramel to room temperature (it will thicken as it cools), enjoy.

Sweet Potato Hummingbird Cake with Pineapple Compote and Coconut Italian Meringue Buttercream
This cake was a hit at my friend’s 4th of July barbecue last month. It was a cake that I had wanted to put my own spin on because I felt that it would be fun. Not to mention it sounded like a good cake for the summer given its background. I actually hate bananas, a main ingredient in Hummingbird Cake, so I did some research for banana substitutes in baking and landed on sweet potatoes. This works because like bananas, and this cake, sweet potatoes are popular in Caribbean cuisine, and they pair well with the other flavors (particularly pineapple and spices). Instead of folding the pineapple into the cake, I put a pineapple compote between the layers of the cake because fruit filling is very popular in layer cakes, and why not a pineapple compote as a filling? As for the frosting, I opted for my favorite frosting, Italian meringue buttercream, instead of the traditional cream cheese frosting because 1. I love how meringue buttercream is not too sweet and has a light and airy feel on the palate, and 2. meringue buttercream, especially Italian meringue buttercream, has an advantage of better stability in warmer climates than cream cheese frosting which is softer and has to be kept chilled. Where the coconut comes in, I thought I would also highlight Hummingbird Cake’s Caribbean origin by adding coconut to the frosting. I had to do tons of R&D to come up with my own cake recipe. I used this Basic 1-2-3-4 Cake recipe from Bake From Scratch to riff off of for my cake, and it did wonders. Give this cake a go for yourself. Reach out to me vie social media or my email address at the bottom of the page. As always, keep you appetites big and imaginations hungry.
Before we fly in to the recipe, pun intended, here’s the buzz on Hummingbird Cake. It is a 2-3 layer spiced banana cake with pineapple and pecans mixed into the cake and frosted with cream cheese frosting. It originated in Jamaica where it was named after the island’s national bird, the scissors-tail hummingbird. The recipe, along with other Jamaican recipes, was exported in the late 1960’s by the Jamaican Tourist Board vie media press kits sent to the US. The first known US print of a Hummingbird Cake recipe was in the February 1978 issue of Southern Living magazine, written by L.H. Wiggins. Thanks to Wiggins’ submission of the recipe, Hummingbird Cake gained traction and major recognition in the US, including Southern Living’s favorite recipe of 1990, and is their most requested recipe.
Now for some notes. I pureed the sweet potatoes after I baked them to make them easier to incorporate into the batter. If you do not feel like cooking sweet potatoes, you can substitute 1 cup of unsweetened applesauce or 2 mashed bananas. I recommend toasting the pecans before adding them to the batter to deepen the flavor. I developed the compote and buttercream recipes using Swerve, but the measurements will be in real sugar (in a 1:1 ratio). As the buttercream utilizes Italian meringue, you must use raw egg whites, not pasteurized. The meringue and butter must be at just above room temperature when you add the butter, and the butter must be added 1 tablespoon at a time. If the meringue and butter are not at the correct temperature when adding the butter, the buttercream will get too curdled or too liquid depending on the temperature. When adding flavorings to meringue buttercream, add them after all the butter is fully incorporated and the frosting is mixed to the correct consistency to prevent deflating the frosting too much. If you like, you can add a generous handful of golden raisins to the compote. Or if you really want to make it fun, add a splash of coconut rum to the compote if you really love coconut (just remember to flambe the alcohol off). Also, you must use a stand mixer when making the frosting because you will need to keep the mixer going for a while
I rambled too much, onto the recipe.
For the cake:
1 cup of plain pureed sweet potatoes (about 2-3 sweet potatoes depending on their size)
1/3 cup coconut oil
300 grams cake flour, sifted
2 cups sugar
1 tbsp baking powder
1-2 tsp each cinnamon, nutmeg, and ginger depending on spice preference
4 eggs
1 cup milk
1-1/2 cups chopped toasted pecans
For the pineapple compote:
1 pineapple, chopped into small pieces (i like mine a tad larger for more texture)
1 cup of brown sugar
1 cup unsweetened pineapple juice
1/2 tsp cinnamon
For the coconut Italian meringue buttercream:
6 egg whites
1 1/2-2 cups granulated sugar
3/4 tsp cream of tartar
4 stick unsalted butter (softened to just above room temperature and cut into 1 tbsp pieces)
1 tsp vanilla or coconut extract
2/3 cup coconut milk
Directions:
Start with the cake. Preheat the oven to 350F. Grease and flour 2 9” round cake pans and line the bottoms of each with a 9” round piece of parchment paper.
Add all dry ingredients, except the pecans, into a medium mixing bowl and whisk to incorporate. Add the wet ingredients to the dry ingredients and mix until fully incorporated. Do not overmix or your cake will sink in the center as it bakes. Once the batter is fully mixed, mix in the pecans.
Evenly divied the batter among the cake pans. Bake in 350 degree oven for 25-30 minutes, or until a toothpick comes out clean with little to no crumbs when inserted into the cakes. Cool in cake pans, then invert onto cooling racks to continue cooling to room temperature. You can make the cakes ahead and freeze for up to a whole month (just wrap the cakes with plastic wrap and foil before freezing and let sit for at least 1-2 hours to soften up.)
Make the compote. Add pineapple, brown sugar, juice, and cinnamon to a medium saucepan. Bring to boil, then lower heat to medium until the liquid reduces to a syrup consistency and the pineapple softens (about 7-10 minutes). Cool to room temperature or in the fridge if making ahead and set aside until ready to use.
Now for the frosting. Add egg whites and cream of tartar to the bowl of a stand mixer fitted with a whisk attachment. Start the mixer on medium-low speed until the egg whites get foamy. Meanwhile, in a small saucepan, whisk the sugar and 3/4-1 cup of water (depending on how much sugar you use) and boil until the mixtures turns into a syrup and reaches 240F on a thermometer (soft-ball stage, I recommend a good candy thermometer here). Once the syrup reaches that temperature, remove from the heat and, in a slow stream with the mixer going, carefully pour the hot sugar syrup into the egg whites. Turn up the mixer to high until the meringue reaches stiff peaks and the bowl is cool to the touch (about another 7 minutes). Turn off the mixer and let the meringue cool a bit more and then switch to the paddle attachment. With the mixer going on low or medium low speed, add the butter 1 tablespoon at a time. The meringue will deflate and curdle a bit, this is normal when adding butter to make a meringue buttercream. Once all the butter is incorporated, switch back to the whisk attachment, and mix on medium speed until incorporated and is nice and fluffy (about 10 minutes minimum). Add the extract and coconut milk and mix on medium low speed until just incorporated, about another 30-45 seconds more give or take.
Assemble the cake. Scoop some of the frosting into a piping bag. Squeeze some of the frosting around the top edge of the bottom layer. Put the cooled compote on top of that layer. Put the final layer on top and frost with the rest of the frosting, using a frosting spatula to smooth out the frosting. Garnish with pecans (or if you want, some shredded coconut, pineapple rings, or cherries). Enjoy. This cake is best served at room temperature. Save unused frosting for another use as it keeps in the freezer in an airtight container for about 1-3 months.

Yes you can make a Hummingbird Cake without bananas.

Frozen White Chocolate Grasshopper Pie
There was a cookbook that I often read as a kid called Retro Desserts written by Wayne Brachman, a former protoge of chef Bobby Flay. This book focused on desserts from around the 1904s-1970s, and was where I first heard about some of the desserts in my repertoire, including Baked Alaska, Chiffon Pie, and this recipe, the Grasshopper Pie. After last Christmas’ pie success, I decided to make pie an annual Christmas tradition, and I felt that Grasshopper Pie would be perfect for Christmas as its main flavor is mint. Like Wayne Brachman’s Grasshopper Pie, mine also utilizes white chocolate. I think white chocolate was a smart choice in the filling because I feel that it helped mellow out the strong flavor of the mint. I served this at my workplace’s annual Christmas party, and it was a hit. My co-workers kept asking for seconds, and even the co-workers who hate mint loved it. This is also a popular pie for St. Patrick’s Day, as the filling is usually green. Try this out for yourself and reach out to me vie my email at the bottom of the page or on my social media pages. As I say, keep your appetites big and imaginations hungry.
Before jumping into the recipe, no pun intended, here’s the background on Grasshopper Pie. It is a pie inspired by the Grasshopper cocktail, an after-dinner cocktail from New Orleans made from equal parts creme de menthe, creme de cacao, and cream (basically those fancy after-dinner chocolate mints in alcoholic drink form). It is typically a chocolate crumb crust, with a minty green filling made by folding whipped cream into either a melted marshmallow or sweetened cream cheese mixture, before adding the same alcohols from the cocktail to give the filling its signature minty flavor and green color.
This recipe is non-alcoholic, and uses the marshmallow mixture and green food coloring for the filling, along with mint Oreo filling. Any chocolate cookie works for the crumb crust; I made mine using the Nabisco chocolate wafers (update: Nabisco just discontinued their Famous Chocolate Wafers, very sad). This is a standard crumb crust using cookie crumbs and melted butter, but you can use a store bought chocolate crumb crust. The melted white chocolate I used was the same whipped white chocolate ganache from my Black Forest Cake recipe, but you can use straight melted white chocolate. I will admit, I was hesitant to use mint Oreo’s for my filling out of fear that it would make it too minty. But, it ended up working in my favor.
Onto the recipe:
For the crust:
1 9-ounce pack of Nabisco Famous Chocolate Wafers
1/4 cup butter, melted and cooled
For the filling:
1 recipe of whipped white chocolate ganache (see Black Forest Cake recipe for tips), or 4 oz good quality white chocolate, melted
1 7oz jar of marshmallow fluff
1/2 cup whole milk
1/2 tsp peppermint extract (or less depending on your taste)
About 6-8 drops of green food coloring (I recommend gel food coloring)
2 cups heavy whipping cream, whipped to stiff peaks
12 mint Oreos, crushed
Directions:
Combine chocolate wafer crumbs and melted butter until all crumbs are coated in butter (a wet sand consistency). Place crumb and butter m xture in a 9” round pie pan, press down in the pan to form using a round item with a flat bottom (dry ingredient measuring cups work). Cover and place in freezer for at least 1-2 hours to set.
Meanwhile make the marshmallow mixture. Heat mashmallow fluff and milk in a small saucepan over medium heat until liquid, stirring constantly. Don’t worry if the mixture becomes liquidy, it will fix itself when you freeze the pie later. Take off the heat, let it cool completely, and add peppermint extract and food coloring.
Add marshmallow mixture to the whipped white chocolate ganache. Fold in the whipped cream in a few batches, taking care to be gentle when folding. Once all the whipped cream is folded in, gently fold in the crushed Oreos. Add filling to your crumb crust, cover with foil or a plastic dome (depending on your pie pan), and freeze overnight (min. 6 hours).
Remove from the freezer, let it thaw at room temperature for about 10 minutes, enjoy. I recommend dipping the serving knife in hot water just in case.

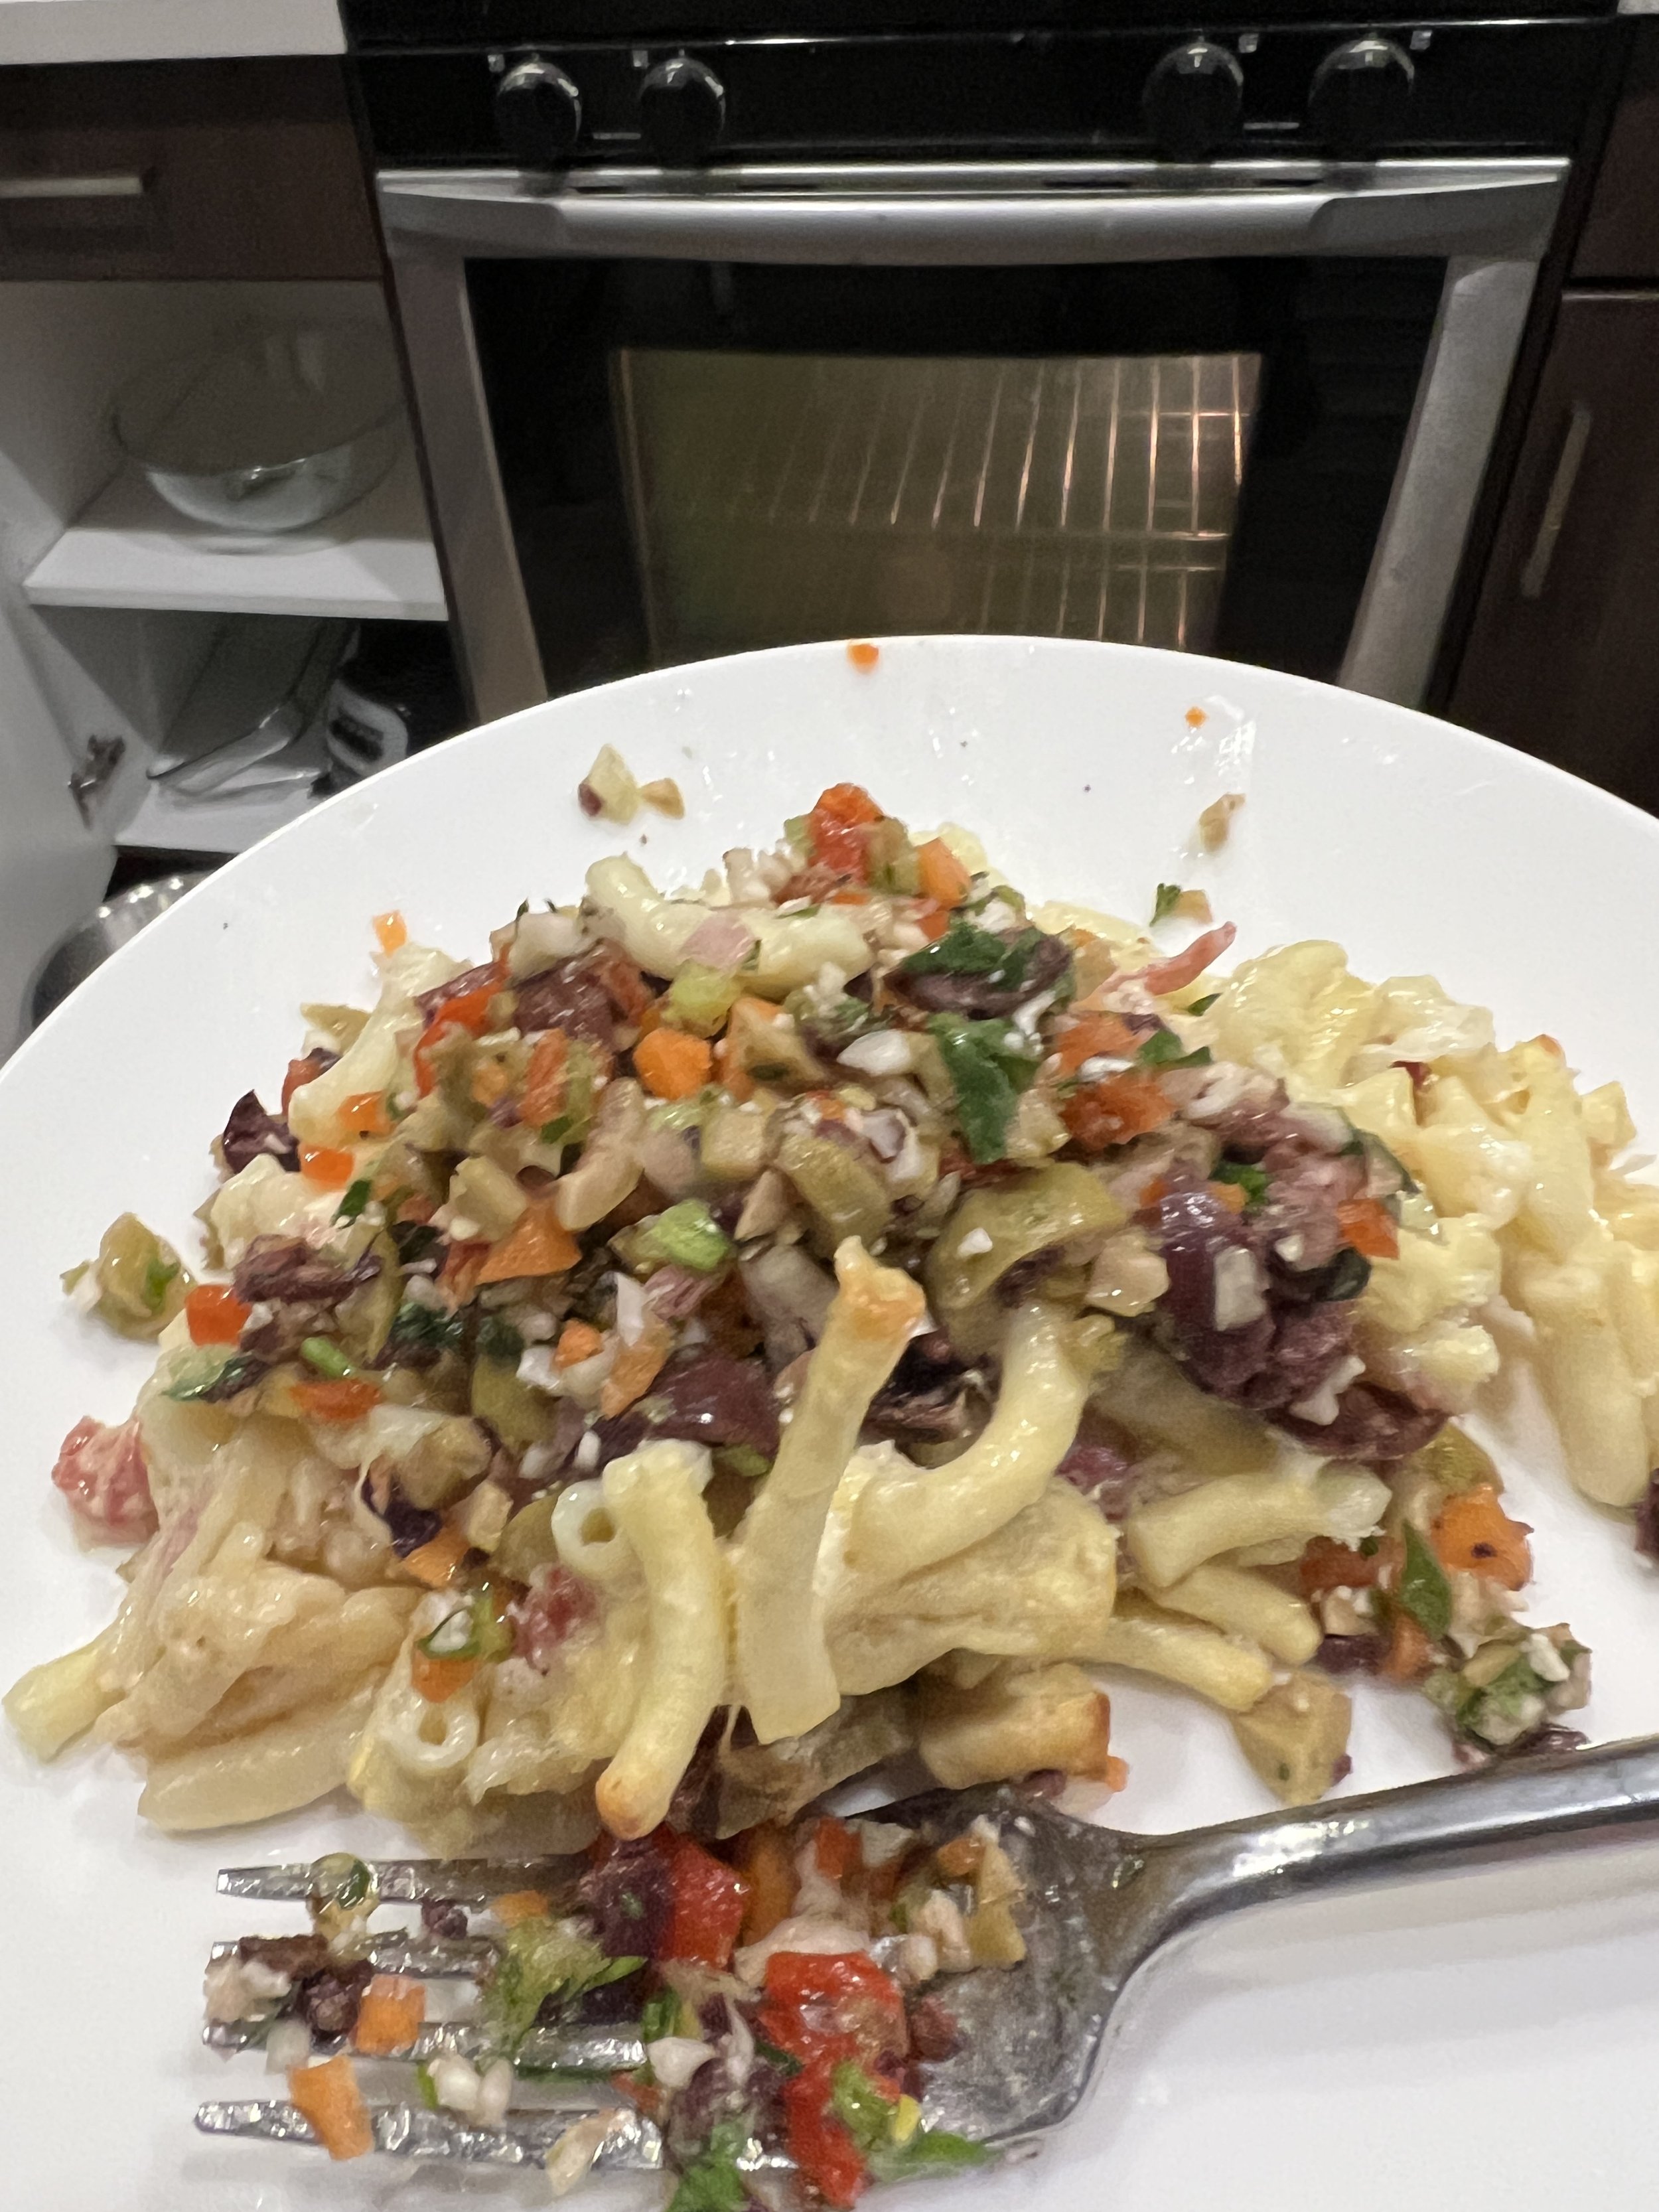
Muffaletta Mac N Cheese
The Super Bowl, or any game day viewing party, is a great time to get inspiration for new recipes. What says game day like mac n cheese and muffelatta? I thought, let’s mash them up together and make a killer muffelatta Mac N Cheese. It has all the things you’d find in a muffaletta; those being the meats, cheeses, and of course you can’t have muffaletta without the olive salad. This is a tasty dish that is sure to be a winner at any game day party, from the creamy cheeses, to the salty flavors of the olives and meats. Reach out to me vie email and my social media pages. I would love your feedback. As always, keep your appetites big and imaginations hungry.
You probably know the drill now, I like to provide some insight before getting into the recipe. You can use any macaroni for this recipe; the macaroni attachment for my CuisinArt pasta maker makes the small macaroni you find in Kraft mac n cheese (great if making this for your kids). A traditional muffaletta sandwich has Italian cold cuts (mine uses soppresata, mortadella, and capicola), but you can use any cold cuts that sound delicious to you. You can get creative with the cheeses, but I mainly used Italian cheeses to fit in withe the sandwich’s Italian influence (mine is a 5-cheese mac using: sharp white cheddar, smoked mozzarella, provolone, asiago, and fontina). While shredded cheese melts better, I recommend shredding the cheese yourself as most store-bought shredded cheeses are coated in anti-caking agents that prevent clumping, but make them harder to melt. I added sliced olives to the mac n cheese, which is totally optional depending on your umami preference. You can get away with using riced cauliflower, which I did, for the olive salad (culinary is one of the few places in which there are shortcuts to success depending on the situation). You can make the salad at the last minute, but it is best made at least 1 hour ahead to allow the flavors to come together.
I rambled too much, onto the recipe.
1 pound of pre-cooked pasta
About 4-6 slices each of 3 Italian cold cuts, chopped (again, I used soprpreata, mortadella, and capicola)
For the cheese sauce:
1 total pound of shredded cheese (any combination; again, I used sharp white cheddar, smoked mozzarella, provolone, asiago, and fontina)
1 tbsp each of butter and flour
1 cup of whole milk
A couple dashes of hot sauce (helps add more flavor)
A few grinds of pepper
For the olive salad:
1/2 cup each of pitted black Kalamata and pimento-stuffed green olives, chopped (you can substitute the pimento-stuffed green olives with pitted plain green olives and 1 roasted red pepper, chopped)
About 1 cup cauliflower rice
1 celery stalk, chopped
A handful of chopped Italian parsley
1-2 garlic cloves, finely chopped
4-6 red cherry peppers, chopped (use unstuffed cherry peppers, which you can often find at your supermarket’s olive bar)
1 tbsp dried oregano
2 tbsp red wine vinegar
2 tbsp extra virgin olive oil, plus another drizzle for storing
Directions:
Combine all the ingredients for the olive salad in a mixing bowl. Add another drizzle of olive oil once the salad is mixed, set aside until serving time.
Preheat the oven to 350F. Melt butter in medium saucepan over medium heat. Once melted, gradually add flour and keep stirring until your roux is a caramel color. Add the milk gradually. Once the milk is fully heated, gradually add the cheese and keep stirring until the cheese had melted and the mixture has formed into a creamy sauce (about 5-7 minutes). Add your pepper and hot sauce. Add the cooked pasta and chopped meats to the cheese sauce and stir to coat. Once coated, transfer mac n cheese to an 8x8 baking dish and bake in the oven for 20 minutes, or until the top is browned to your liking.
Remove from the oven, plate, and top with the olive salad.


Sweet Potato Basque Cheesecake
Remember my Basque cheesecake disaster that led to my Kabocha Mousse last Thanksgiving? Well, I decided to give this another go and bring it to thanksgiving along with the Sachertorte. I changed it to sweet potato since I did pumpkin last year and wanted to do more Thanksgiving variety. It was also made using my new KitchenAid, which does a great job with cheesecakes. I think what caused my cheesecakes to collapse in the oven last time I made them was that I must have over aerated them, which caused them to puff up and sink as they baked. While Basque cheesecake is supposed to sink a bit in the center, the sinking is supposed to happen as it cools, not while it bakes. Amazingly, this one came out perfect, and the top surprisingly did not crack a whole lot.I got great feedback from my family, which makes me proud to call this “cheesecake redemption”. My main references for developing this are a couple Basque cheesecake recipes, mainly a Pumpkin Basque Cheesecake recipe from Sweet and Sorrel, and a plain Basque Cheesecake recipe from John Kanell of Preppy Kitchen. Try this soft and lightly spicy cheesecake at any cool-weather holiday event, including Christmas. Reach out to me vie social media or my email address at the bottom of the page. Always remember, keep your appetites big and imaginations hungry.
Before jumping into the recipe, here’s the dish on Basque cheesecake and some notes. Basque cheesecake, AKA Basque burnt cheesecake, is a baked cheesecake that originated in Spain’s Basque region in 1990 before achieving a strong online following in the 2010’s thanks to a recipe from British food writer Nigella Lawson. It is different from other baked cheesecakes, like say a New York cheesecake. The main differences in Basque cheesecake is that it’s baked without a crust or water bath, instead being baked in a parchment lined springform pan. It’s baked for about the same amount of time as most baked cheesecakes, but this cheesecake is baked on a much higher temperature (usually 400-450F), giving it that signature caramelized burnt top. Unlike other cheesecakes, Basque cheesecake is a little softer in the center, like a medium-rare steak, and it is okay for this cheesecake to sink and crack on top (again, only if the sinking and cracking happens as it cools, not while it bakes). Now for my tips. You must use plain mashed cooked sweet potatoes. I recommend baking them before mashing as this retains more of its nutrients. Baked sweet potatoes take the same amount of time as a regular baked potato (about 1 hour), but I suggest baking them at 425F. Bake them whole, and cut open and scoop out the insides for mashing straight from the oven, but wear oven mitts cause they will be hot. The potatoes will need to be cooled after mashing, so you can mash and refrigerate them a day ahead (bring them to room temp before adding to the batter). Once you start adding the eggs to the batter, slow the mixer down to low or medium-low speed or you’ll risk over aerating the cheesecake. Also, check your parchment paper to see if it can handle high temperature baking as this cake will be baked in the 400’s. You can also spray your springform with cooking spray before lining with the parchment to help the parchment stay better in the pan.
Enough of my rambling. Onto the recipe
Ingredients:
24 ounces softened full-fat cream cheese (you must use regular bricks of cream cheese, not the whipped kind)
1 cup of granulated sugar
A pinch of salt (I recommend smoked salt for a little more flavor)
1 teaspoon of vanilla extract
3 eggs, plus 1 yolk, room temp
1 teaspoon each of cinnamon and Chinese Five Spice
1/2 teaspoon of ginger (powdered ginger, not raw ginger)
2 tablespoons of flour, sifted (any kind)
12 ounces of mashed cooked sweet potatoes, room temp (about 4 potatoes worth)
1.5 cups of heavy whipping cream, room temp (must be at least 36% fat)
Directions:
Preheat oven to 425F
Spray a 9” springform pan with cooking spray and double line with parchment paper. Make sure the parchment paper hangs about 2” over the edges of the pan. Then place the springform on a sheet pan.
Add cream, cheese, vanilla, sugar, and salt to the bowl of a stand mixer. Beat with paddle attachment on medium speed until fluffy, scraping down the bowl a few times to make sure everything is incorporated.
With the mixer on low speed, add the eggs 1 yolk at a time. Make sure each egg is fully incorporated, no yellow streaks remain, and scrape down the bowl after adding each egg. After the eggs are mixed in, add the cinnamon, five spice, and ginger, and mix on low until just incorporated.
In a small mixing bowl, whisk together the sweet potato, heavy whipping cream, and flour until thickened and no lumps remain. Add to the cream cheese mixture and beat on low or medium-low for a minute or two until incorporated.
Pour batter into the parchment lined springform pan, lightly tapping the springform on the table a few times to get rid of any air bubbles, and bake in the oven for 50-60 minutes, until the top is burnt (again, caramelized burnt not charcoal burnt) and the cake jiggles a bit.
Remove from the oven and cool in the pan for about 30 minutes. Then carefully unmold from the pan and transfer to a wire rack to cool to room temp, a few hours. Then refrigerate uncovered for at least another hour, or overnight. Enjoy. This cake is best served at room temperature, so bring it out of the fridge and let it sit at room temp for about an hour before serving. Store any leftovers in a covered container. It also freezes well.


Sachertorte
I got the idea to make this from a few places. A read through of a Sherry Yard cookbook that I own, wanting to make something to bring for Thanksgiving, and my birthday a couple weeks ago, where I had dinner at Spago in Beverly Hills and I got a KitchenAid stand mixer as a present. I was glad to put my new mixer to use because it did a bang up job. I will be honest, this is by far one of the hardest recipes I have developed. The hardest part in particular was the cake alone, as the cake for Sachertorte is very specific; I will go into detail in my notes. When I did my research, I saw that there were variances on how many eggs to use, which is vital to prevent sponge cake from tasting too eggy. Still, everyone loved my Sachertorte, with some comments including that the cake was neither too moist, nor too dry. I feel that it is a huge positive as most people, including Wolfgang Puck, would say that the particular sponge cake used in this dessert is a tad dry on its own. I want your feedback and reach out to me vie email or my Facebook and Instagram pages for any recipe ideas. As I say, keep your appetites big and imaginations hungry.
Before we get into the recipe, here’s the dish on the Sachertorte. It is one of the most famous culinary treats in Vienna, Austria; the best description of the original is a double layer semisweet chocolate sponge cake coated with apricot jam and a chocolate glaze. The hisotry behind this confection is shrouded in mystery, but the best known origin is that Franz Sacher invented the Sachetorte in 1832 when he was only 16. It is said that he had to invent a novel cake when Chancellor Metternich’s chef, whom Sacher was apprenticing under, came down ill. The exact recipe comes down to interpretation, but one of the best known is the “Original Sacher Torte” from Vienna’s Hotel Sacher. The Hotel Sacher version’s recipe is said to be a closely guarded secret, but some believe the secret lies within the chocolate glaze. Some recipes use alcohol (usually rum) either by mixing the alochol with the apricot jam or by brushing each layer with a boozy sugar syrup before applying each with apricot jam. My recipe uses the latter of the two, but with the Kirsch syrup from my Double Chocolate Black Forest Cake because I think the cherry notes of Kirsch pair well with apricot.
Now for some notes, most of which are technical. Remember what I said earlier about this recipe’s chocolate sponge cake being very specific? That is because the sponge is made a specific way, so you cannot use just any chocolate cake recipe like unlike my Baked Alaska and Black Forest Cake recipes. This particular chocolate sponge is made by folding French meringue and flour into an emulsion of butter, egg yolks, and melted chocolate. Speaking of chocolate, here comes another important note, which also applies to the apricot jam or preserves. You must use really good quality chocolate and apricot jam or preserves. The chocolate must be at least 55% cacao; I used Guittard semisweet baking wafers, which are 66% cacao (you can find them on Amazon). The brand of apricot jam matters because the fancier jams have more real fruit than most commercial brands; I recommend Bonne Maman brand apricot preserves. As for the sugar syrup, you will definitely be making a homemade syrup because you need hot plain sugar syrup to make the chocolate glaze; you can add some booze to store-bought simple syrup for brushing the cake layers. If you want, you can omit the sugar syrup altogether and use a chocolate ganache instead of the traditional chocolate glaze. But, I strongly advise brushing the cake with the sugar syrup because it will add some much needed moisture to the cake; you can make the cake non-alcoholic by omitting the alcohol.
After that lengthy ramble, onto the recipe.
For the cake:
8 tablespoons unsalted butter, room temp
110 grams icing sugar, sifted
7 eggs, separated
1 teaspoon vanilla extract
100 grams of really good quality baking chocolate (with at least 55% cacao), chopped and melted
1 tablespoon instant coffee powder
A pinch of salt
A little over 3/4 teaspoons of cream or tartar
1/2 cup plus 2 tablespoons of granulated sugar
128 grams of bleached cake flour, sifted
1/2 quantity of Kirsch syrup, optional but recommended (see my Double Chocolate Black Forest Cake recipe)
About 17 ounces of apricot jam or preserves (again, use the fancier stuff)
For the chocolate glaze:
200 grams of baking chocolate (use the same kind of chocolate that you used for the cake)
1 cup granulated sugar
1/2 cup water
Directions:
Preheat oven to 350F.
Grease and flour 2 9” round cake pans, then line each one with a round of parchment paper.
Melt the chocolate in a microwave in 20 second intervals until fully melted. Add the instant coffee to the chocolate and stir until fully incorporated. Let cool to 90F, stirring occasionally (This is crucial because it will prevent the melted chocolate from melting the butter when added to the emulsion later)
Meanwhile, in a stand mixer with a paddle attachment, beat the butter on medium speed until fluffy. Then gradually add the icing sugar with the mixer going on medium-low speed.
Keep the mixer going on medium-low speed and beat in 1 egg yolk at a time; make sure the yolk is fully incorporated and scrape the bowl down before adding the next yolk. Add the pinch of salt.
Once the chocolate has cooled to 90F, add to the stand mixer and keep beating on medium-low speed until incorporated into the emulsion and no streaks remain (still scraping down the bowl every now and then). Set aside.
Now make the French meringue. In a separate bowl (metal or glass), add eggs and cream of tartar and beat with a hand mixer (with whisk attachment) on medium speed until foamy. Then gradually add the granulated sugar with the hand mixer still going, Keep beating until mexture doubles in volume and the meringue reaches soft peaks.
Gently fold the meringue and flour into the chocolate mixture in 4 and 3 additions for the meringue and flour respectively (start with the meringue and alternate between fildong the meringue and flour; 1 portion of meringue, then 1 portion of flour and so on. Sift the flour into the mixture). Be gentle when folding and do not overmix or you will risk deflating your cake batter.
Add an equal amount of batter to each cake pan, evening the tops with an offset spatula, and bake for about 20-25 minutes (as these are sponge cakes, I suggest testing for doneness with the touch test; touch the top of the cake with your finger and if it springs back without leaving an imprint, like amkitchen sponge, it is ready). Remove from the oven and cool in cake pans for about 15 minutes. Then, run a knife around the edges to loosen and invert onto a wire rack, carefully peel back the parchment, and cool to room temp (minimum 1 hour).
Meanwhile, get your assembly station ready by placing another wire rack over a wax paper lined sheet pan. Place an 8” cardboard disc on the wire rack.
Begin assembling the torte. Place one of the cake layers on the cardboard disc. Brush with the sugar syrup (if using) and spread a layer of apricot jam on top of the layer using an offset spatula. Place the other layer on top of the first layer, brush with the syrup (again, if using), and spread the apricot jam; put more jam on the second layer so that it flows down the sides and covers the whole cake. Let stand until the apricot coating sets, at least 1-2 hours.
Once the apricot coating sets, make the chocolate glaze. Bring sugar and water to a boil in a small saucepan. Remove from heat and add the reserved chocolate, stirring until fully melted and incorporated into a thick syrupy glaze (it is like a ganache, but with sugar syrup instead of heavy whipping cream). Let cool for about 2-3 minutes and pour onto the cake in a circular motion (pour around the edges first and work your way to the center). Use the offset spatula to evenly spread the chocolate coating both on top of and on the sides of the cake, making sure the chocolate flows down the sides like with the second layer of apricot jam. Let it sit at room temp for a few hours until the chocolate mostly sets and no linger drips too much.
Carefully transfer the cake, with the cardboard disc still underneath, to a platter and refrigerate, uncovered, for at least another 3-4 hours (or overnight). Remove from the fridge, slice and serve. Cover up and refrigerate any leftovers as this will keep for about a week in the fridge if stored properly. Also, I recommend dipping the knife in hot water before cutting.

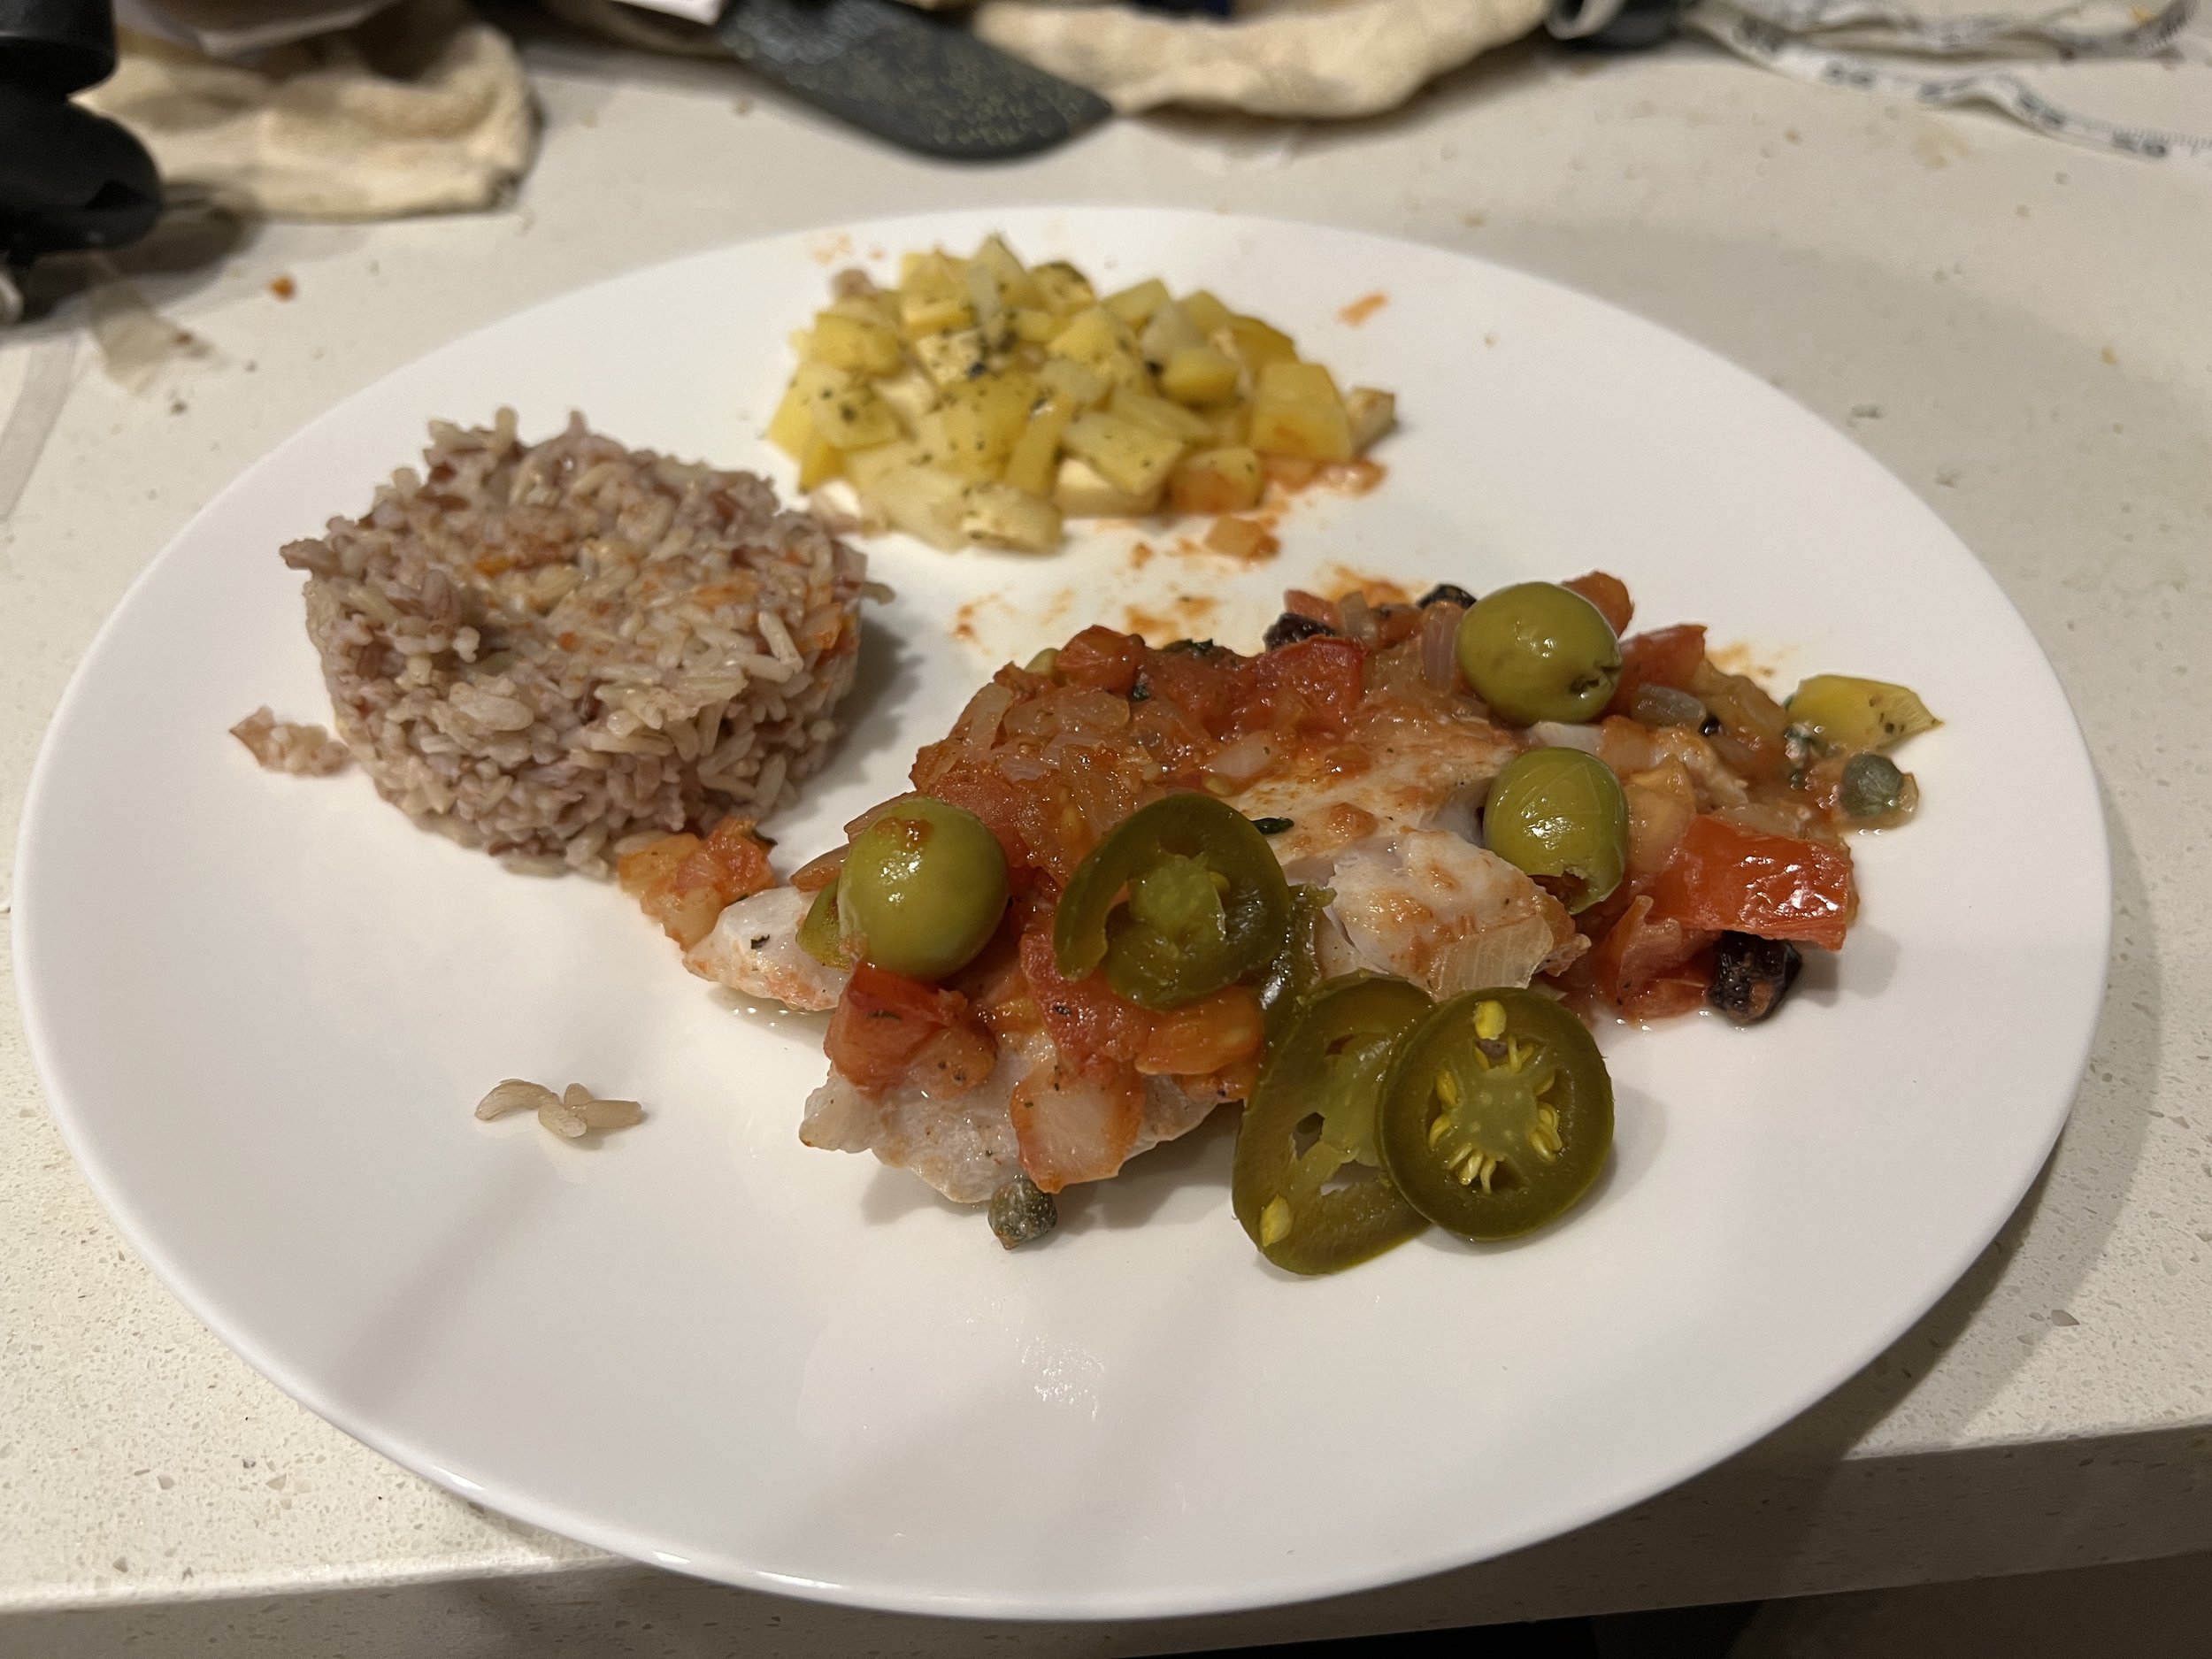
Huachinango a la Veracruzana
Last month, I attended a fashion show on a VIP ticket. When I was there, one of the reporters who interviewed me on the red carpet turned out to be a fan of my recipes. I never caught her name, but I remember her liking my seafood recipes and requesting that I add another one to my repertoire. Originally, I had planned to do another tuna recipe, but I realized that with extensive seafood recipes, I need to include other types of seafood. After doing some research, I stumbled on this dish and it sounded like a great recipe to try out for myself. Here we have my take on Huachinango a la Veracruzana. This is a great, healthy, and delicious recipe to try for yourself. I want your feedback. You can contact me vie my social media pages and email, located on the bottom of the page. As I always say, keep your appetites big and imaginations hungry.
Before we start, here’s the dish on Huachinango and some notes. It is a Mexican seafood dish from the Mexican state of Veracruz, where it is called the state’s national dish. It has influences from Spain and pre-colonial Mexico, with some Mediterranean influence in terms of the ingredients and cooking style. It is fish, traditionally a whole red snapper, marinated in salt, pepper, nutmeg, and lime and baked in a tomato sauce that has jalapenos, olives, and sometimes capers and raisins. It is traditionally served with roasted root vegetables and a grain, usually small roasted potatoes and white rice. I kept it on the healthier side by serving it with roasted rutabaga and parsnip, and brown rice. I couldn’t find snapper, so I used rockfish fillets. This ended up working in my favor because I was able to expedite the marinating time and bake the fish in the skillet. You can use any seafood for this recipe like cod or even shrimp for example. If you don’t like seafood, you can also use chicken cutlets as well. Adjust the cooking times accordingly for the protein depending on which protein you’re using. I used an ovenproof pan when developing this. If you don’t have an ovenproof pan big enough for all your fish, you can either bake the fish with the sauce in a 9x13 baking dish or just cook the fish in the sauce on the stove. If cooking the fish on the stove, cover the pan with a lid after you add the fish to the pan and cook until the fish is cooked through; cooking times will vary depending on what fish you use.
Now onto the recipe:
1 pound of rockfish fillets, pinbones removed
1 tsp each of salt, pepper, and nutmeg
Juice of 1 lime
For the sauce:
1 white onion, chopped
4 garlic cloves, minces
6 Roma tomatoes, chopped
1 tsp tomato paste
A splash of white wine or chicken stock to deglaze the pan
1 tsp salt and pepper
A couple dashes of bittersweet smoked paprika
1 tsp of dried Italian herbs
1 tsp of dried epazote or marjoram
1 handful chopped Italian parsley
2 whole bay leaves
1/4 cup capers, rinsed and drained
1/2 a jar of pimento stuffed green olives, halved
A handful of raisins, optional
12 slices of pickled jalapenos
Directions:
Preheat oven to 350F
Coat fish in salt, pepper, lime juice, and nutmeg and marinate for at lease 30 minutes
Heat oil in an oven safe large skillet over medium-high heat. Add onion and garlic and sweat for 3-4 minutes.
Add tomatoes, tomato paste, salt, pepper, dried herbs, parsley, bay leaves, and epazote, and lower heat to medium or medium-low. Continue cooking until tomatoes cook out and sauce thickens, about 7-8 minutes. Deglaze with a splash of white wine or chicken stock if needed. Add capers, raisins (if using), and olives.
Lay the fish fillets on top of the sauce in the pan. Spoon some of the sauce on top of each fillet, then place pan in oven and bake until fish is cooked through, about 15 minutes.
Remove pan from oven, remove bay leaves from the pan, plate, and enjoy. Garnish with more olives, parsley, and jalapenos if desired.


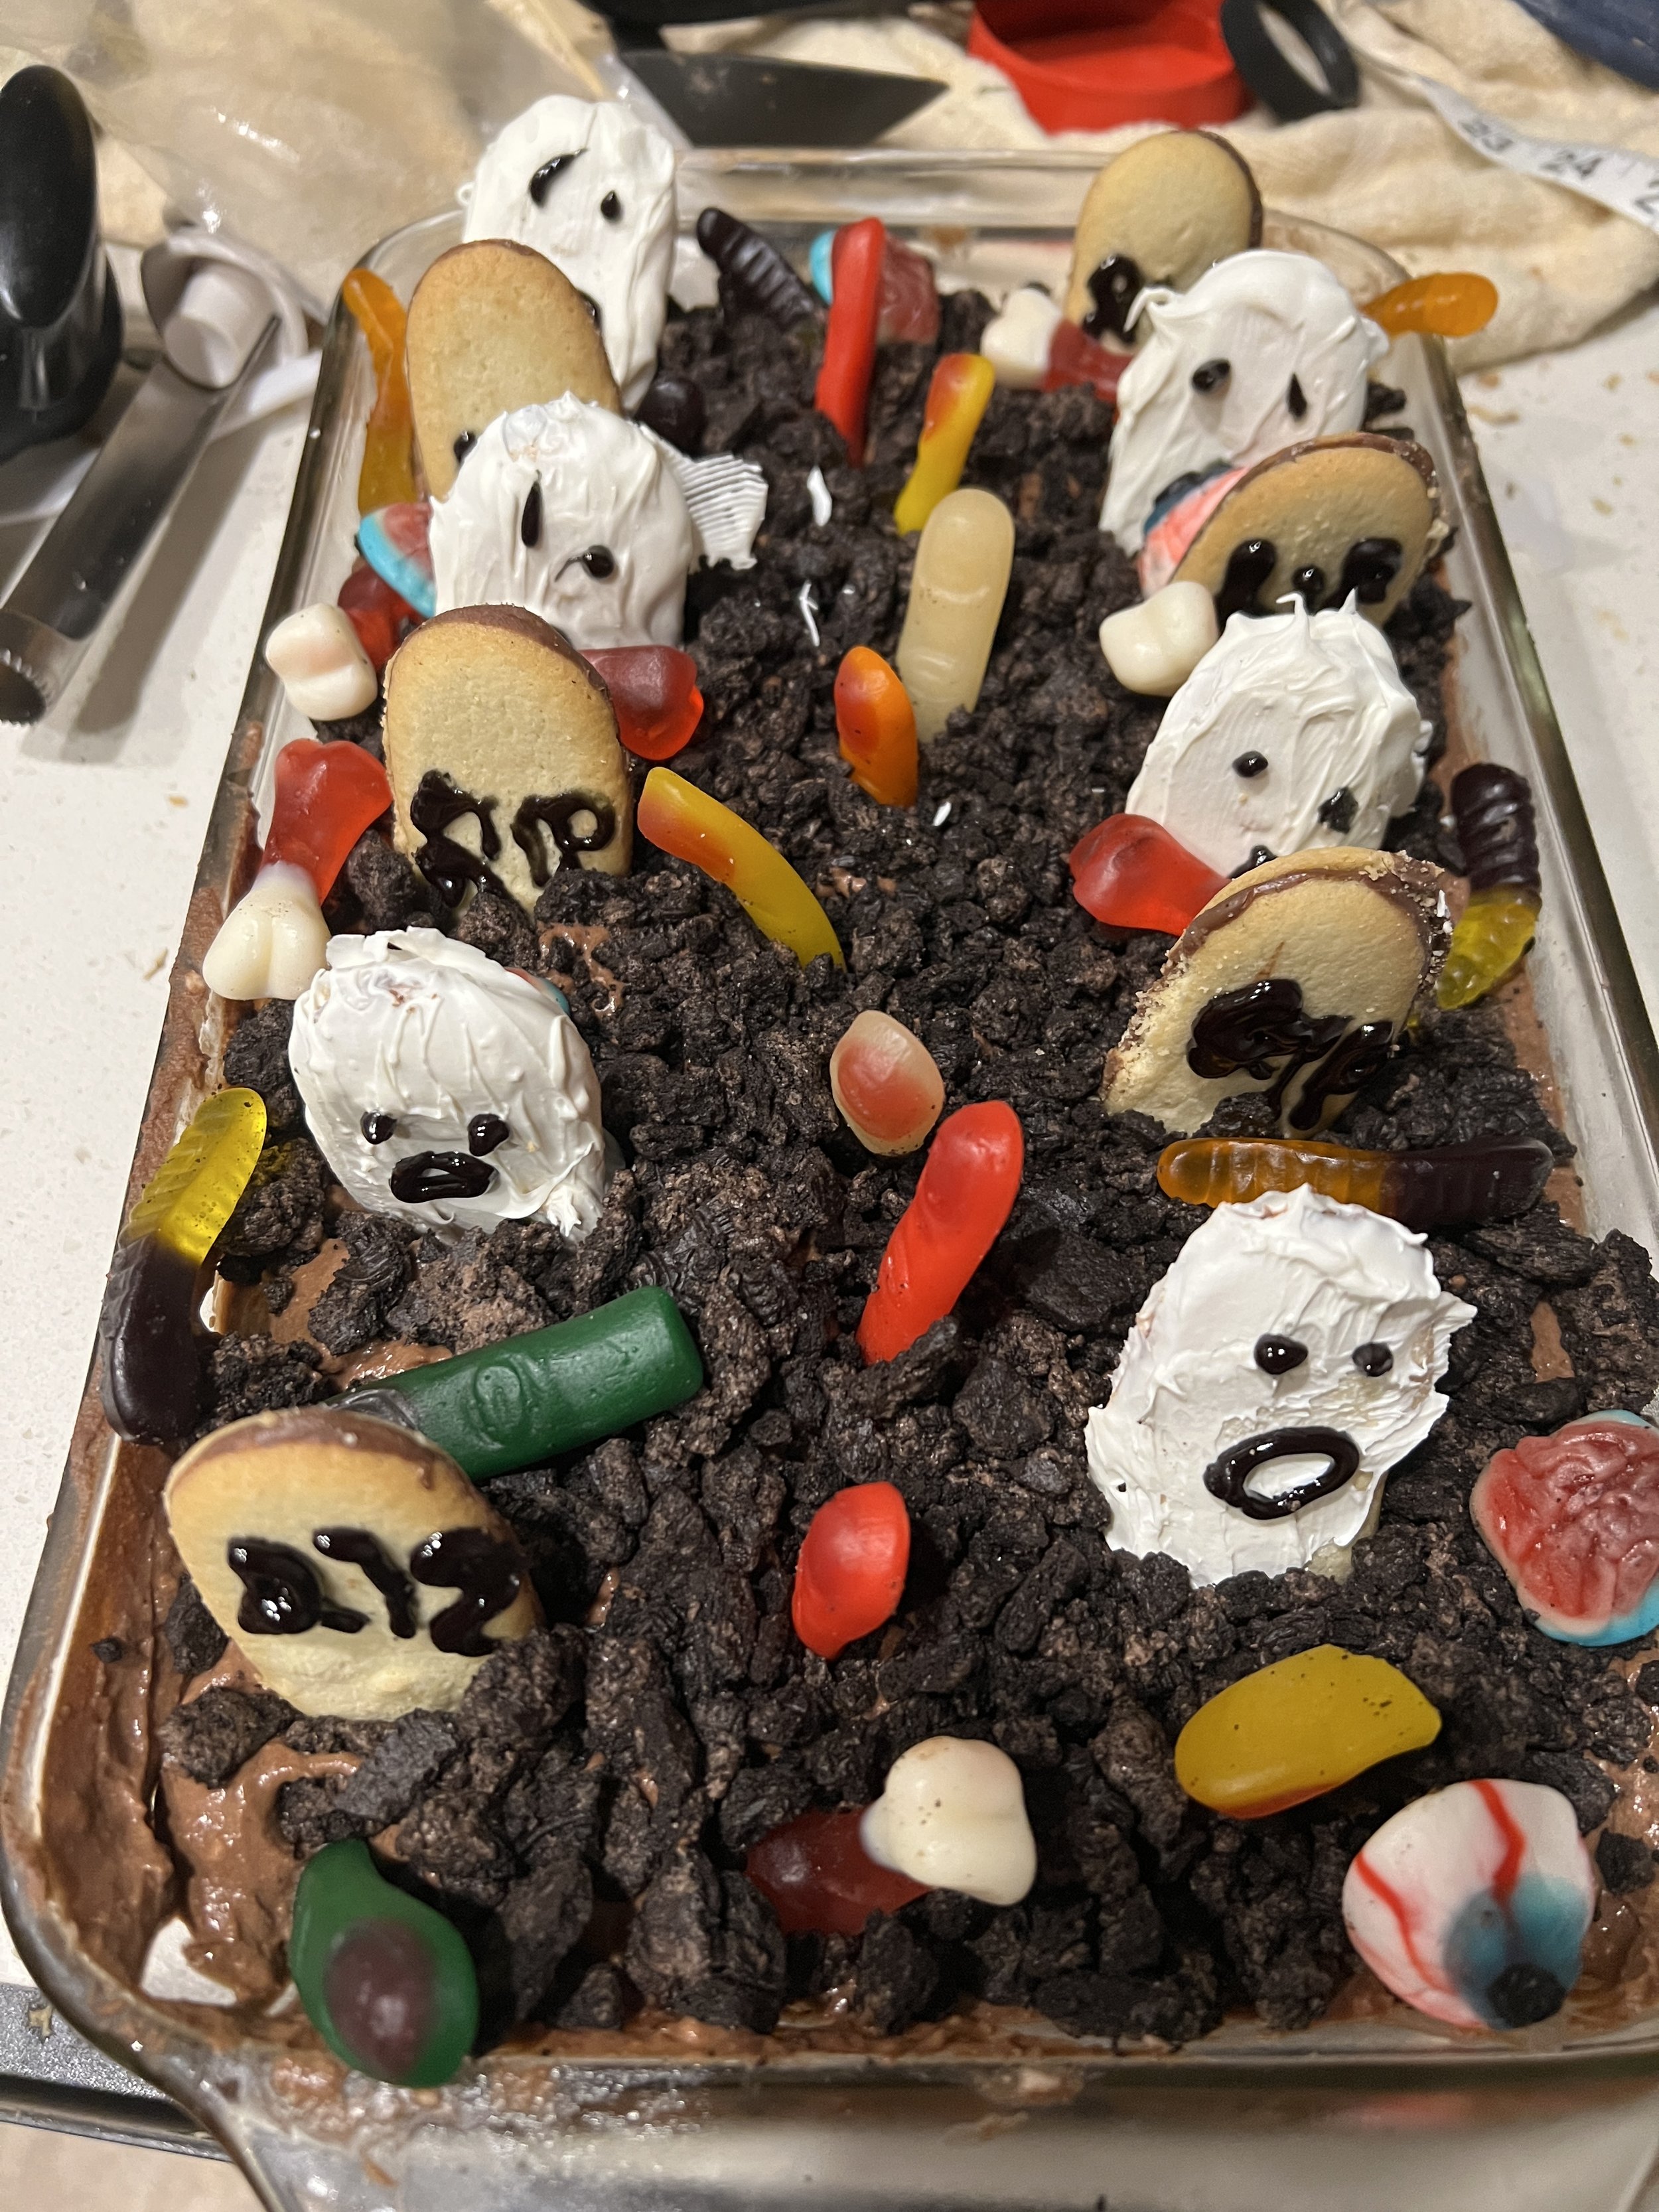
Graveyard Dirt Delight
Here’s a spooktacular treat that any Halloween lover, old and young will love, a frightening take on the classic Dirt Cake. I will admit, I got the idea from a graveyard pudding I saw in a Chopped basket. Dirt dessert was a favorite dessert of mine as a kid. It is a blank canvas for any stretch of the imagination, from flavor combinations to decorations. It’s simple, tasty, and fun for your little ones because you can let your ideas run wild. For mine, I took it up a notch by using mascarpone and homemade whipped cream instead of Cool Whip and cream cheese. Mascarpone works because it’s a type of cream cheese and it’s full-fat. I personally find mascarpone a bit easier to work with in a no-bake dessert filling like this. As for the homemade whipped cream, I stabilized it using a trick I recently discovered, adding 1 tablespoon of instant pudding mix to the heavy whipping cream before whipping. It worked beautifully, and thickened the cream enough to replicate Cool Whip. Reach out to me vie my email at the bottom of the page or on my social media pages. As I say, keep your appetites big and imaginations hungry.
Before we start, here’s the dish on dirt cake and some note I have. Dirt cake is more of a trifle than a cake; it’s traditionally a mix of pudding, sweetened cream cheese, and Cool Whip (almost like a mousse) topped with chocolate cookie or cake crumbs and gummy worms. Instant pudding mix stabilized the homemade whipped cream because instant pudding mix contains modified cornstarch (cornstarch that is cooked out). I developed this recipe using sugar-free pudding mix; if doing so, add 1/2 tbsp of powdered sugar to the whipped cream. You can also use regular or whipped cream cheese as long as it’s full fat. DO NOT use cream cheese spread, or as I call it the cream cheese equivalent of Cool Whip because it’s cream cheese with additives. Use your imagination for decorations. If you want, you can even use chocolate mousse as your cream base because the cream mixture is like a mousse.
Ingredients:
2 large boxes of instant pudding mix, any flavor (I recommend chocolate because it looks more like dirt; set aside 1 tbsp of the mix for the homemade whipped cream)
1 tsp instant espresso powder (optional, helps enhance the chocolate flavor)
About 3 cups of milk (check your pudding mix for any specific instructions on what milk to use; I used unsweetened vanilla almond milk)
8oz mascarpone cheese or plain full-fat cream cheese, softened
8 tbsp unsalted butter, softened
1 cup of powdered sugar
1 tsp vanilla extract
1 cup of heavy whipping cream, chilled
18-24 Oreos, crushed
About 12 oblong shaped cookies (Milanos work well)
1 or 2 tubes of black or red icing gel
1 pack of white candy melts or 1 bar of good quality white chocolate
Gummy worms and/or body parts
Directions:
Put pudding mix (except for the tablespoon of mix set aside for the whipped cream) coffee, and milk in a medium mixing bowl and prep pudding according to the package. Press plastic wrap over pudding to prevent skin from forming and set aside.
In a large mixing bowl, add mascarpone cheese, butter, sugar, and vanilla. Beat with a hand mixer on medium-low speed until incorporated and no lumps. Fold pudding into the mascarpone mixture.
Put heavy whipping cream and reserved tablespoon of the pudding mix into another medium mixing bowl. Using a whisk attachment, whip with the hand mixer on high until you reach stiff peaks. Gently fold whipped cream into pudding and mascarpone mixture in 3 or 4 additions until incorporated and no streaks of white remain.
Put your chocolate cream base in a 13x9 rectangular dish, cover with plastic wrap pressing on top of the pudding to prevent a skin from forming, and chill for at least 3-4 hours or until set.
Meanwhile, make your headstones and ghosts. Melt candy melts according to instructions. Dip the oblong cookies that will be your ghosts in the melted candy coating and lay on wax paper to dry. Once the candy coating dries, draw a mouth and eyes on each cookie for the ghosts. For the oblong cookies that weren’t dipped, write R.I.P using the icing gel.
Place the Oreos in a large ziploc back, and crush them. I used a rolling pin, but you can use your hands.
Once the pudding has set, remove it from the fridge, get your gummy candies out, and start decorating, First sprinkle the crushed Oreos on top of the pudding, then put the gravestones, ghosts, and gummies into the graveyard in any pattern you like. Enjoy. The pudding will keep in the fridge for about a week.
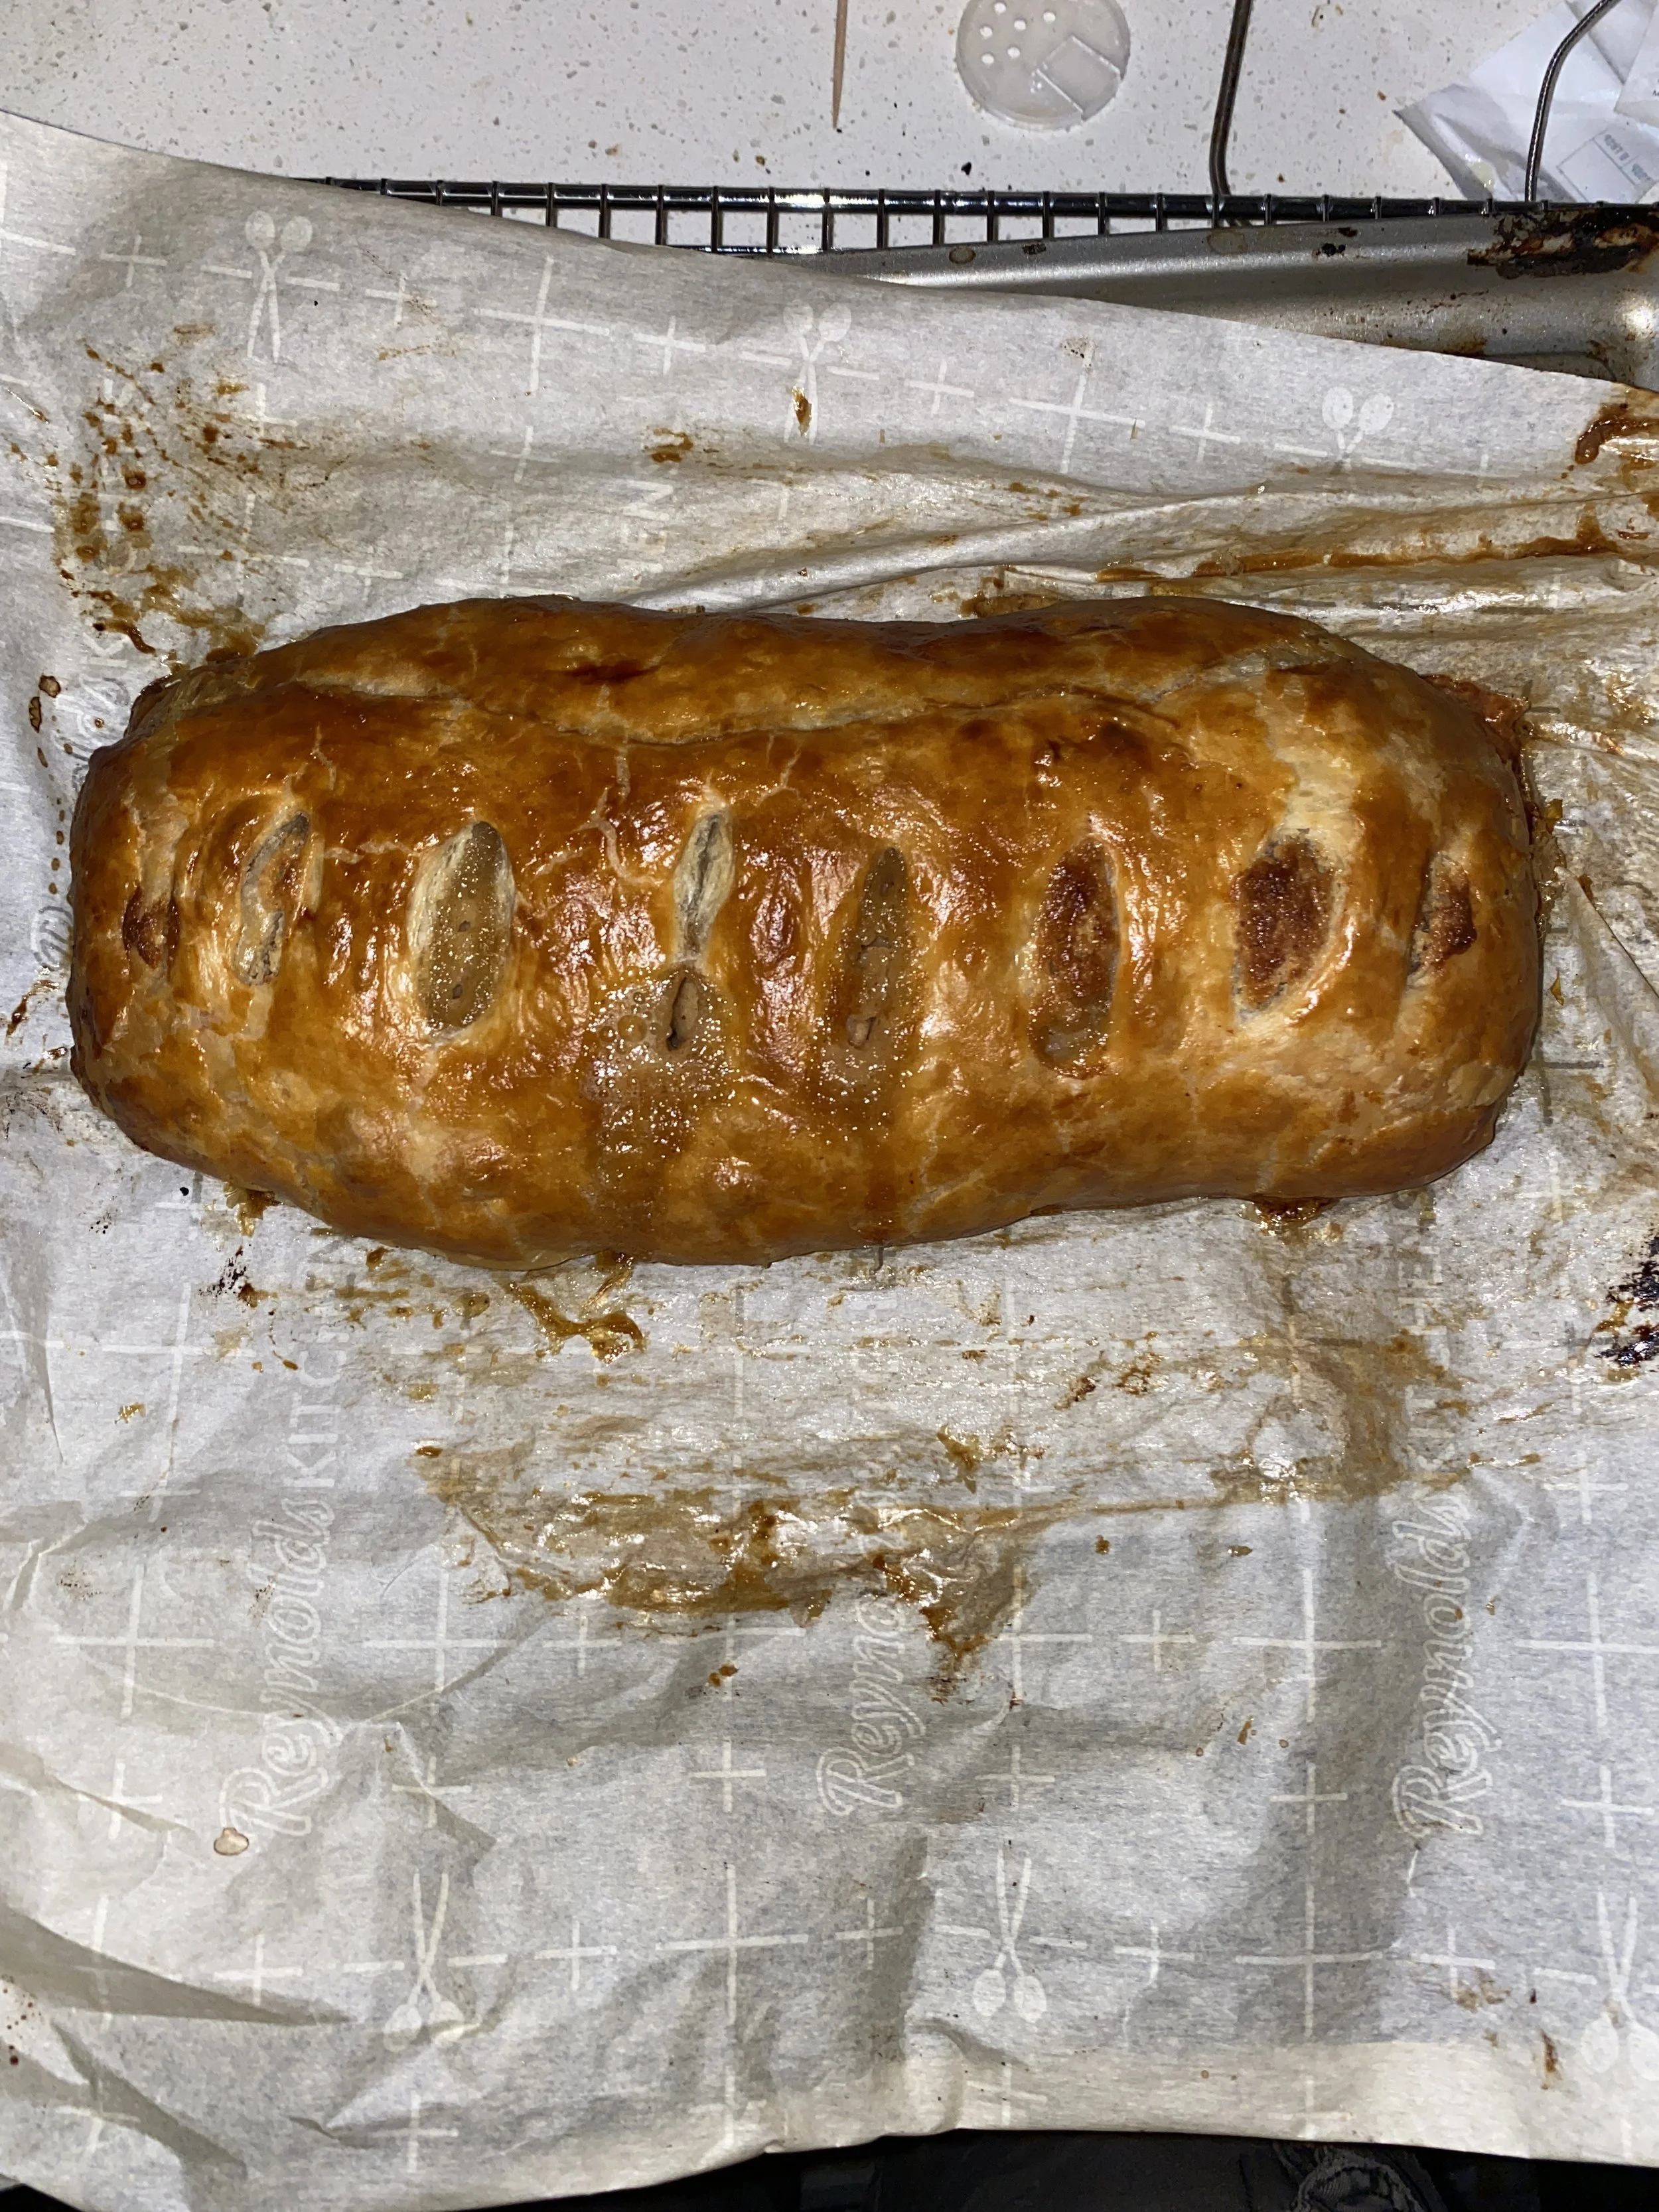
Apple Frangipane Strudel
Another thing I have always wanted to try out myself was Frangipane, a filling made from almond. Frangipane, is not like marzipan as it is meant to be used as a filling. I had an idea to make it into an apple strudel as I know apples and almonds pair nicely. This recipe makes 2 strudels, so I took 1 of them with me to work. The people at the office loved it; I even got a compliment from a co-worker who normally doesn’t like cinnamon. These strudels are adaptable. You can use any fruit that pairs well with almonds, like peach, cherry, and pear for example. It is great with breakfast with a cup of coffee, a quick snack, or even a dessert topped with your favorite ice cream. Try this out for yourself. I would like your feedback, which you can do via email or social media. As i always say, Keep your appetites big and imaginations hungry.
Some notes. You can find many Frangipane recipes online, but do not substitute marzipan because marzipan is meant to be used as decoration. Any apples work; I used Honeycrisp apples. If you don’t like almonds, you could maybe try substituting other nuts for your Frangipane, like walnuts or hazelnuts.
Ingredients:
2 sheets puff pastry, thawed
1 recipe Frangipane
1 egg, beaten
For the apple filling:
3 apples, peeled, cored, and chopped (size doesn’t matter, it depends on how much texture you want; I chopped mine a bit larger for more textural contrast)
A couple dashes or lemon juice (keeps apples from oxidizing)
1 tbsp honey
1/2 cup sliced almonds
2 tbsp brown sugar
1 tsp cinnamon
Directions:
Preheat oven to 375F.
Combine apples, lemon juice, honey, brown sugar, almonds, and cinnamon in small bowl. Set aside until ready.
Roll out thawed puff pastry on floured cutting board and transfer to parchment lined sheet pan.
Using a pastry cutter or bench scraper, make a couple slits in the middle section of the pastry sheets on both ends, 1-2” up from the ends (if your pastry has perforated lines, use that as your guide); this is for making the flaps for later on.
Spread 1/2 the frangipane on the middle section of each pastry sheet, then top with apple filling; be sure to leave about 1-2” from the flaps to fold up when closing the pastry (The flaps are a crucial step to prevent the filling from pouring out of the strudel as it cooks)
Fold the flaps over the filling, then fold the left and right sections of pastry over each other, sealing by pressing with wet fingertips. Make 4-6 slits on top of the pastry for ventilation; you can also try making smaller folds with the left and right parts of the pastry if you want to make a braided pattern for the top.
Brush with egg, cook in oven for about 40 minutes (or until pastry is cooked through and exterior is golden brown). Remove from oven and let cool completely on wire rack. Serve and enjoy; again, I recommend dusting with powdered sugar or topping with ice cream.
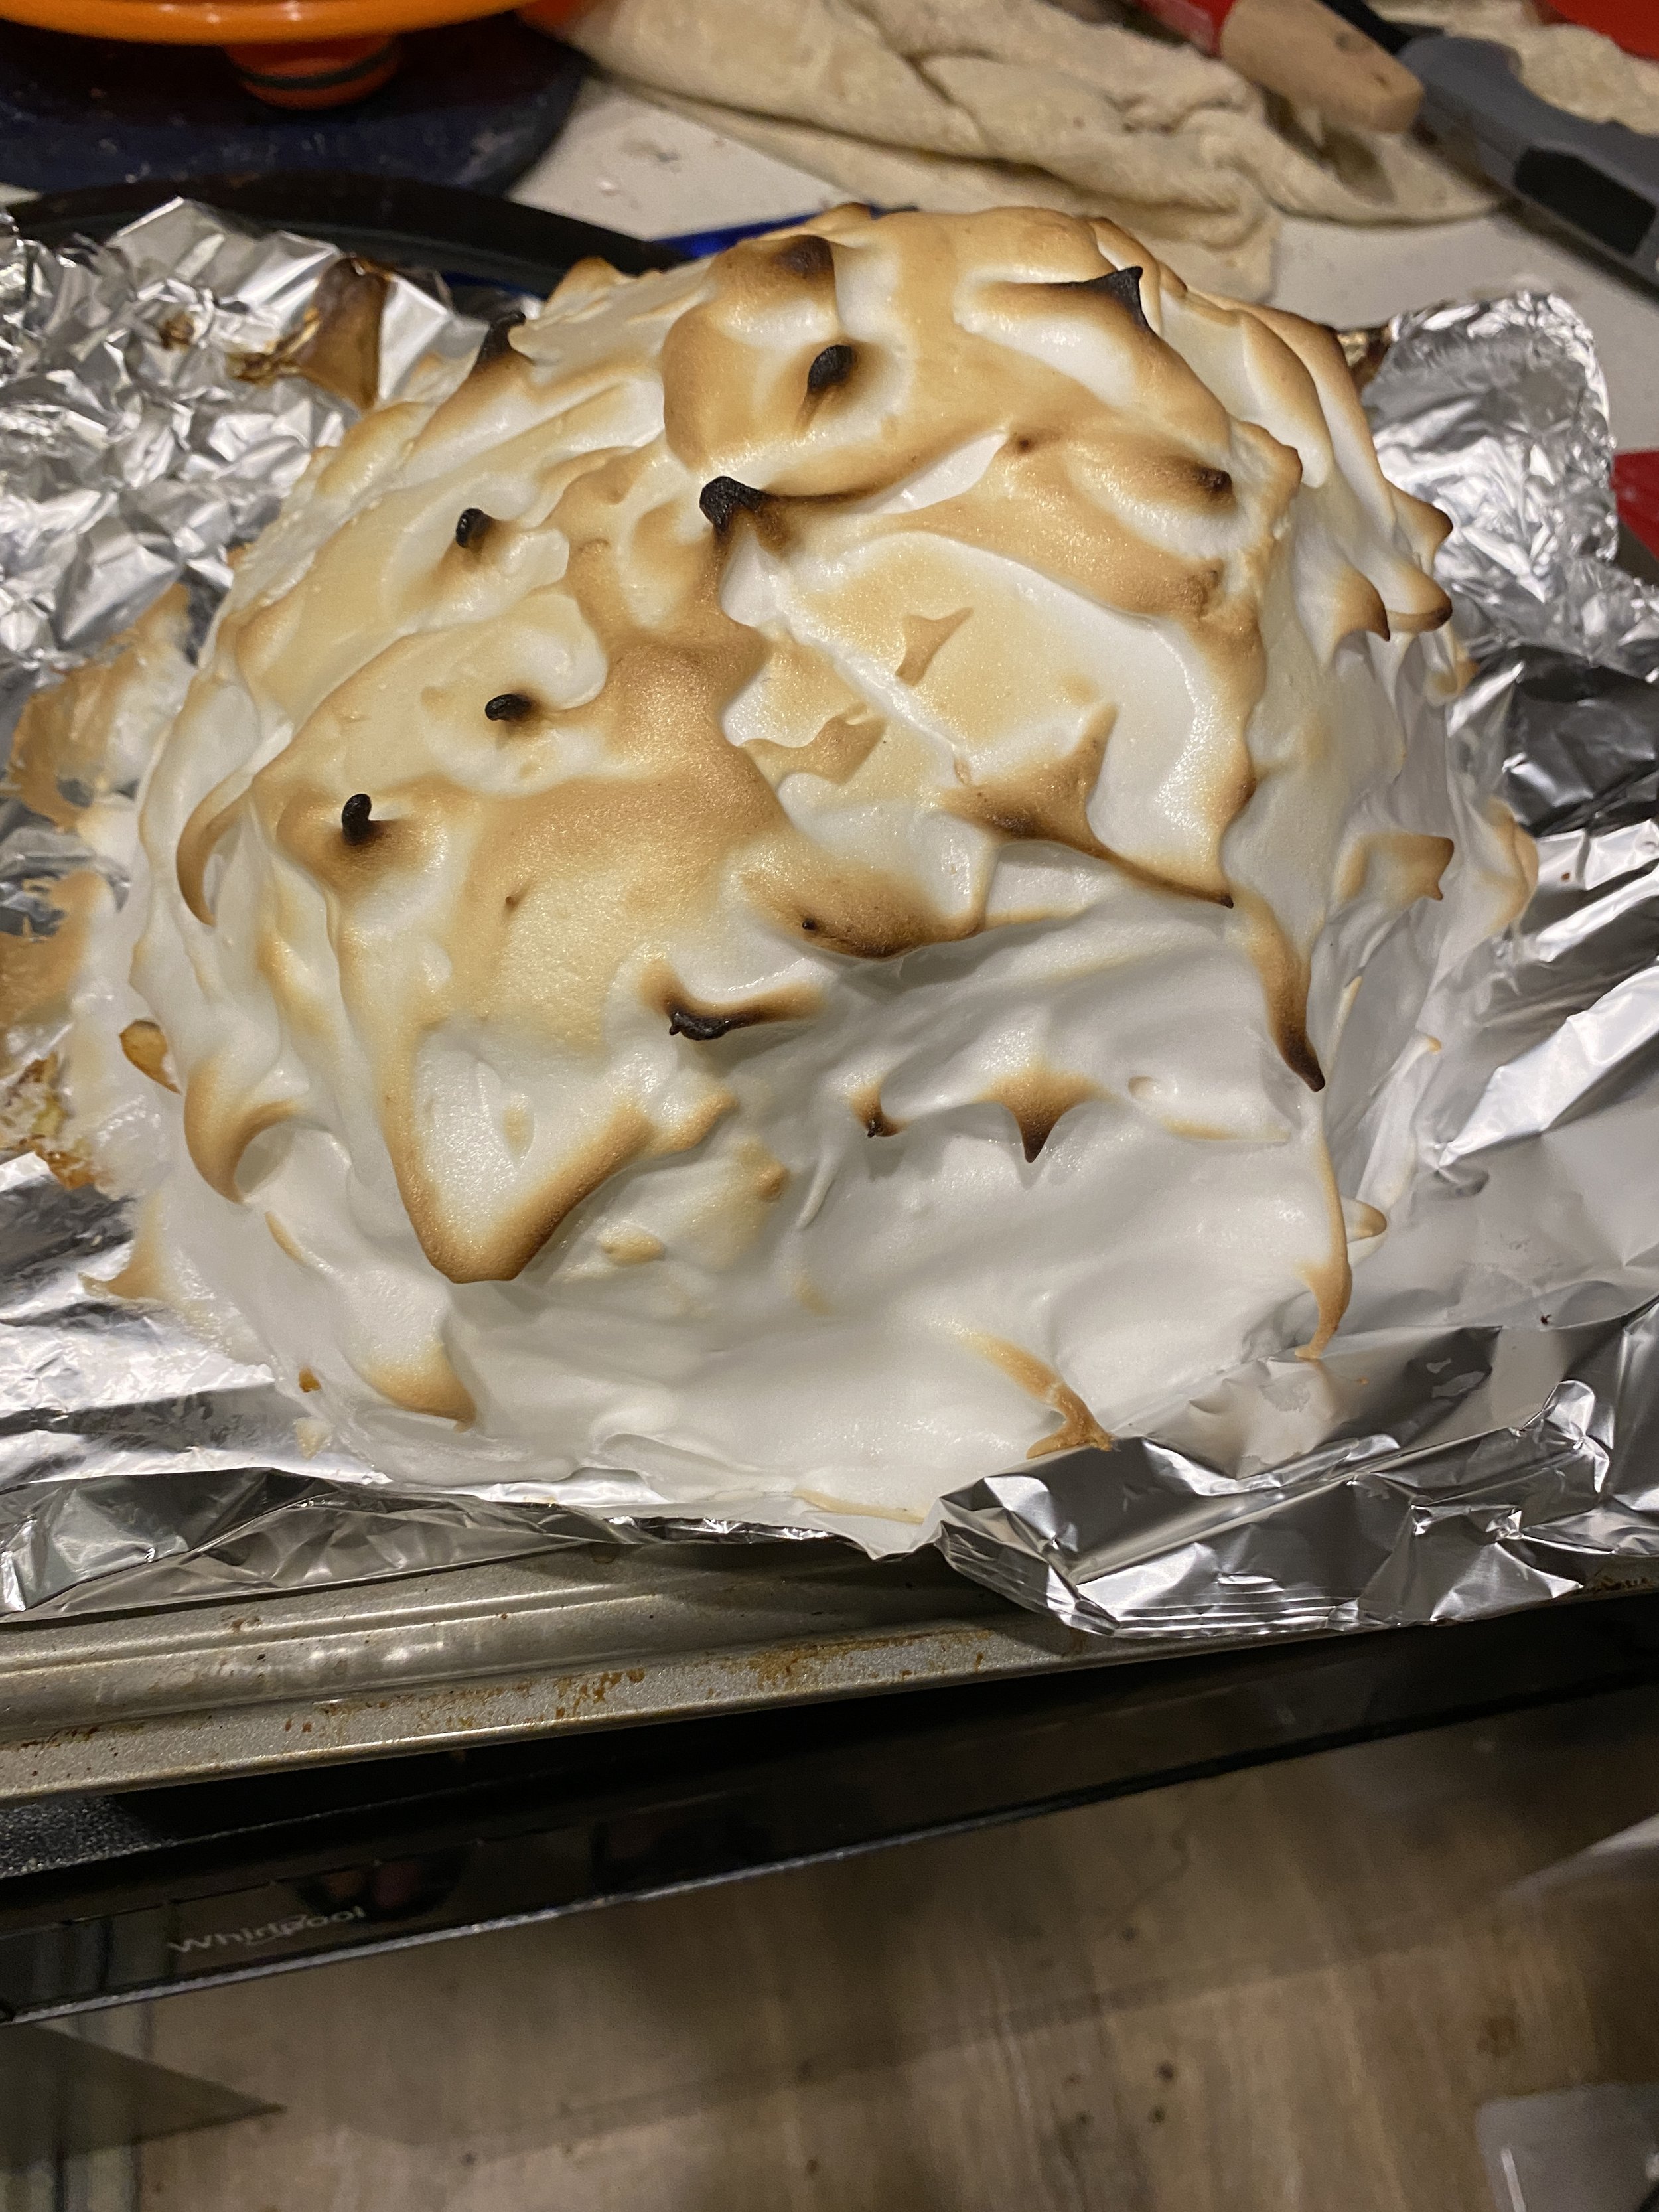
French Pastry Mash-Up Baked Alaska
Baked Alaska was a dessert that I have always wanted to make. After tons of research, I realized that I can use any combination of cake and ice cream in this meringue-coated frozen treat. This is what led to my “mash-up" idea. My inspiration came from the Opera Cake (layers of coffee soaked almond sponge cake, coffee buttercream, and chocolate ganache) and Paris-Brest (a ring of almond topped Pate A Choux filled with hazelnut praline cream). As intimidating as Baked Alaska sounds, most of the work is hands off. Use your imaginations for any cake and ice cream combo for this dessert. Contact me via email or my social media pages for feedback. As I say, Keep your appetites big and imaginations hungry.
Some notes before we start. Sponge cake is what I recommend because it insulated the ice cream better, especially when it goes into the hot oven. Praline paste is hard to find, you can substitute Nutella which will also add more chocolate goodness for any chocoholics. Use any meringue you want, I used Italian meringue; consult my Chiffon Pie recipe for meringue tips.
Ingredients:
1 8-9” round almond sponge cake, topped with 1 cup sliced almonds (This is the recipe I used)
1 pint each of coffee and chocolate ice creams (I was lucky to find chocolate ganache ice cream at my grocery store)
1 small jar of praline paste
Meringue made from 4 egg whites and 1 cup of sugar
Directions:
Grease a medium bowl with cooking spray and double line with plastic wrap.
Let the ice cream soften slightly. In separate bowl, add coffee ice cream and fold in praline paste. Add to bowl and press down to make a sort of well in the center. Cover and freeze for 30 minutes. Then remove from the freezer, uncover the top layer of plastic wrap, and add the layer of chocolate ice cream, leaving some space on top for the cake to go on later. Re-cover and return to freezer for another hour to firm up.
Remove from freezer and uncover top layer again. Press the cake on top of the ice cream (it doesn’t have to be perfect), cover with plastic wrap and return to freezer for at least 8 hours (or up to 2 weeks; the ice cream needs to be rock solid for the final steps)
Make the meringue just before adding to the frozen ice cream and cake. Remove ice cream and cake base from the freezer, unfold the top layer of plastic, invert onto a foil lined sheet pan and remove all the plastic wrap. Coat with meringue in any fashion (I spread it on and made spike patterns by tapping the meringue coated dessert with the back of a spoon all over.
Return to freezer, uncovered, for at least 1 hour (some say you can do this step up to 24 hours ahead). Meanwhile, preheat oven to 500F. Remove from freezer and place in the preheated oven for about 3-5 minutes, or until meringue coating is browned to your liking (keep an eye on the dessert or you may melt the ice cream). Rest for a few minutes, and enjoy.
Final notes. If you want to brown the meringue coating with a blowtorch, skip the 1 hour freezing after coating with the meringue. Freeze any leftovers in an airtight container.


Double Chocolate Black Forest Cake
Just yesterday, my family and I celebrated my grandmother’s 97th birthday, which made me want to make a cake. I do very little baking, so I figured it would be a good way to expand my baking skills. I have heard of Black Forest Cake and have always wanted to try it for myself, so I thought “why not”. It was a hit among my family Not to mention a good recipe for this time of year since cherries, a key part of Black Forect Cake, have just come into season.
Now for a brief summary on what a Black Forest Cake is. It is several layers (usually 3 or 4 layers) of chocolate cake with Kirsch, cream and cherries.
This recipe, while enjoyable in the end, can be challenging because of all the individual components and some technical detail whici I will get into in a bit. Thankfully, a good amount of the components can be made ahead, and you can repurpose other recipes to make this, which I did. You can literally use any chocolate cake recipe, whether it be a boxed mix or from scratch (I used this chocolate cake recipe from Food Network). I used both fresh and jarred cherries for the recipe (using the jarred Maraschino cherries for the cream filling). To make the cream filling, I repurposed my Kabocha Mousse recipe, substituting the same quantitiy of pureed cherries for the Kabocha Squash. My recipe also frosts the cake with whipped white and semisweet chocolate ganache as well, hence the “double chocolate”. I hope you try this out for yourself. Reach out to me vie my email at the bottom of the page and on my social media pages for feedback. As always, keep your appetites big and imaginations hungry.
Ingredients:
1 recipe of your favorite chocolate cake (preferrably one that will produce at least 3 6” round cakes or 2 8” or 9” round cakes)
1 recipe of Kabocha Spice Mousse, replacing the kabocha puree with the same quantity of pureed Maraschino cherries and without the Chinese 5 spice (I recommend Mezzetta Maraschino cherries, which you can find near the cocktail mixers. Here's a link to their website.)
For the syrup:
1/2 cup water
1/2 cup granulated sugar
1/3 cup Kirsch (I used Fidelitas Black Forest Kirschwasser)
For the ganache:
2 cups heavy whipping cream
10-12oz each of white and either semisweet or dark chocolate, chips or chopped will work
For assembly:
A little over 1 pound of cherries, halved, stemmed and pitted (fresh preferred for assembly, but you must have a few fresh ones, w/ the stems on, for the top)
1/2 cup chocolate shavings (any chocolate will work)
Directions:
In a small saucepan, combine sugar, water, and Kirsch. Simmer and let it boil for a minute. Take it off the heat to cool. Once cooled, put in a jar or container and set aside until ready (this will keep in the fridge for up to a whole month).
If using 2 8'“ of 9” cake layers, split the layers in half by running a serrated knife through the middle. Brush the first layer with the syrup. Then add some of the mousse and spread it around until covered. Then add the cherries, cut side down (this keeps the cream filling from flowing out the cake). Repeat the process until you reach the final layer. Then, cover the cake tightly with a lid or plastic wrap and refrigerate for at least 3 hours to let the mousse filling set. Save any remaining mousse for another use or as a treat for yourself.
Meanwhile, make the whipped ganache. First put the white and semisweet chocolate in separate bowls. Add 1 cup of the cream to each bowl. Melt chocolate over double boiler until smooth and fully incorporated, whisking until melted to prevent seizing. Set aside for about 30 minutes to firm up, whisking every 10 minutes to prevent lumps (this can be done at room temperature or in the fridge). Once firm but still soft, whip each batch of the ganache on high with a hand mixer for about 3-4 minutes until fluffy.
Remove cake from fridge. Frost outside of cake with the ganache in any pattern (I frosted the top with the white ganache and the sides and edges with the semisweet ganache). Arrange the unstemmed cherried around the top edges of the cake. Press the sides with the chocolate shavings. Cover and chill in the fridge again for another few hours or overnight. Enjoy.
This cake, if stored properly, will keep for up to 1 week in the fridge or up to 1 month in the freezer. If you freeze it, let it thaw in the fridge for a few hours or at room temperature for about 30-60 minutes.
Notes:
I recommend adding 1 teaspoon of instant espresso powder to the cocoa powder in your cake recipe to enhance the chocolate flavor.
The cake layers will need to be flat in order to assemble properly. There are ways to acheive this without having to level the cake with a knife. I used pre-soaked cake strips around the outside of my cake pans. I used Wilton cake strips. They worked like a charm. Here's a link if you want to check them out. Or, you can bake it at a lower temperature (325F) for at least 5-15 minutes longer than stated in the recipe. If you need more help on baking flat cake layers, here's a link to an article I found with additional tips. If you do have to level the cakes with a knife, you can crumble the unneded pieces of cake and use the cake crumbs in place of the chocolate shavings for decorating the sides.
When I made the mousse, I substituted 3/4 cup of the heavy whipping cream with meringue for lightness and added a teaspoon of Gourmet Blends Aged Raspberry Balsamic Vinegar to the fruit puree to enhance the cherry flavor, both of which are optional steps. Gourmet Blends even carries Black Cherry Balsamic if you’re interested. I reccomend their oils and balsamics because they can be used in a variety of applications.
For the syrup. the Kirsch is usually added after the syrup is boiled down and cooled. But since my little nephews and cousins were at the party, I added the Kirsch before heating up the mixture to cook off the alcohol, a trick I learned from the Preppy Kitchen Black Forest Cake video on YouTube. If you do not want to make your own syrup, just add Kirsch to a 1/2 cup of store-bought simple syrup (only do this if not serving to kids since it won’t cook off the alcohol). Kirsch is very hard to find and pricey; I was lucky to find my Kirsch (this is where I found my Kirschwasser). Here's an article from Tastessence on Kirsch subsitutes. You can also substitute purchased cherry syrup or grenadine (which will make the cake non-alcoholic and more kid-friendly); adjust the sugar content in the cream filling accordingly if doing so.
You can definitely use homemade whipped cream instead of the mousse and/or ganache. Whipped cream does tends to weep if left out too long so you may want to add some bloomed and melted plain gelatin to the cream to stabilize it, especially if made more than a few hours ahead.
If you want, you can even make this as cupcakes instead of one whole cake. Just inject either the cherry cream filling or a cherry jam into premade unfrosted chocolate cupcakes using a piping bag fitted with your smallest tip, then top with the whipped ganache or cream, and don’t forget the cherry on top. They will still need refrigeration afterward.
None of the links in the recipe are sponsored, I did this for free. The links are there for anybody interested in my findings.

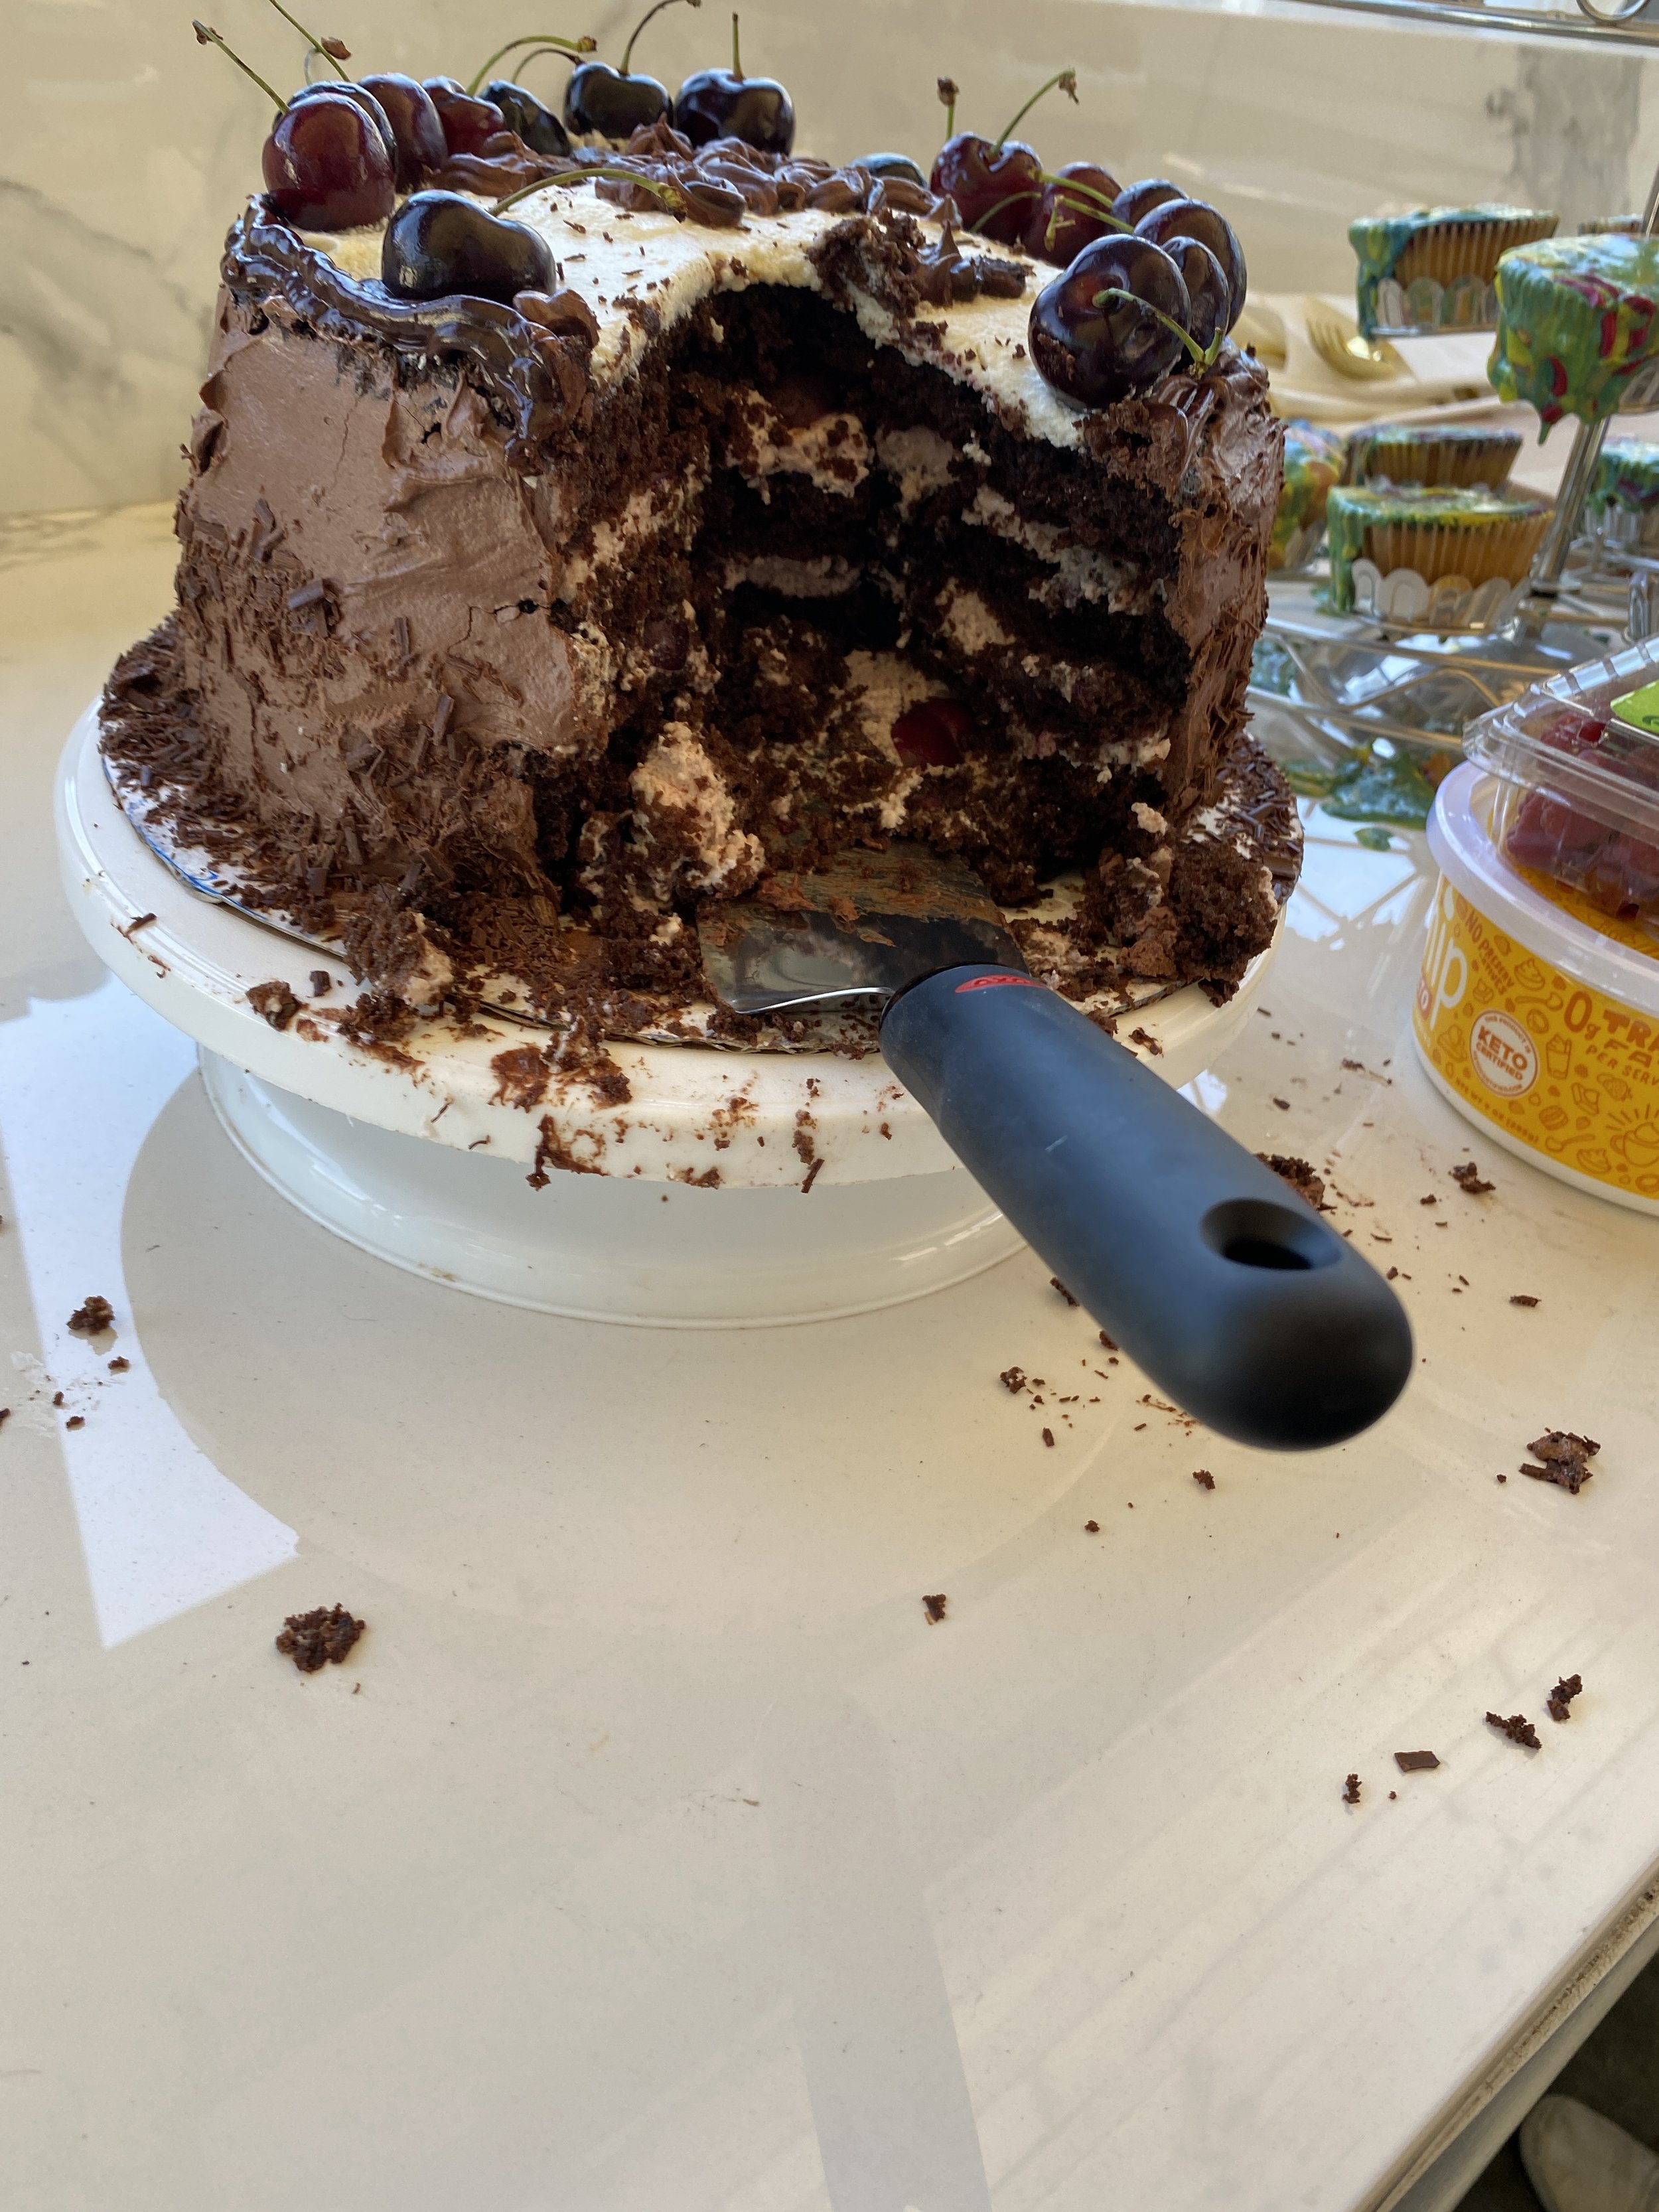
Trail Mix Energy Bars

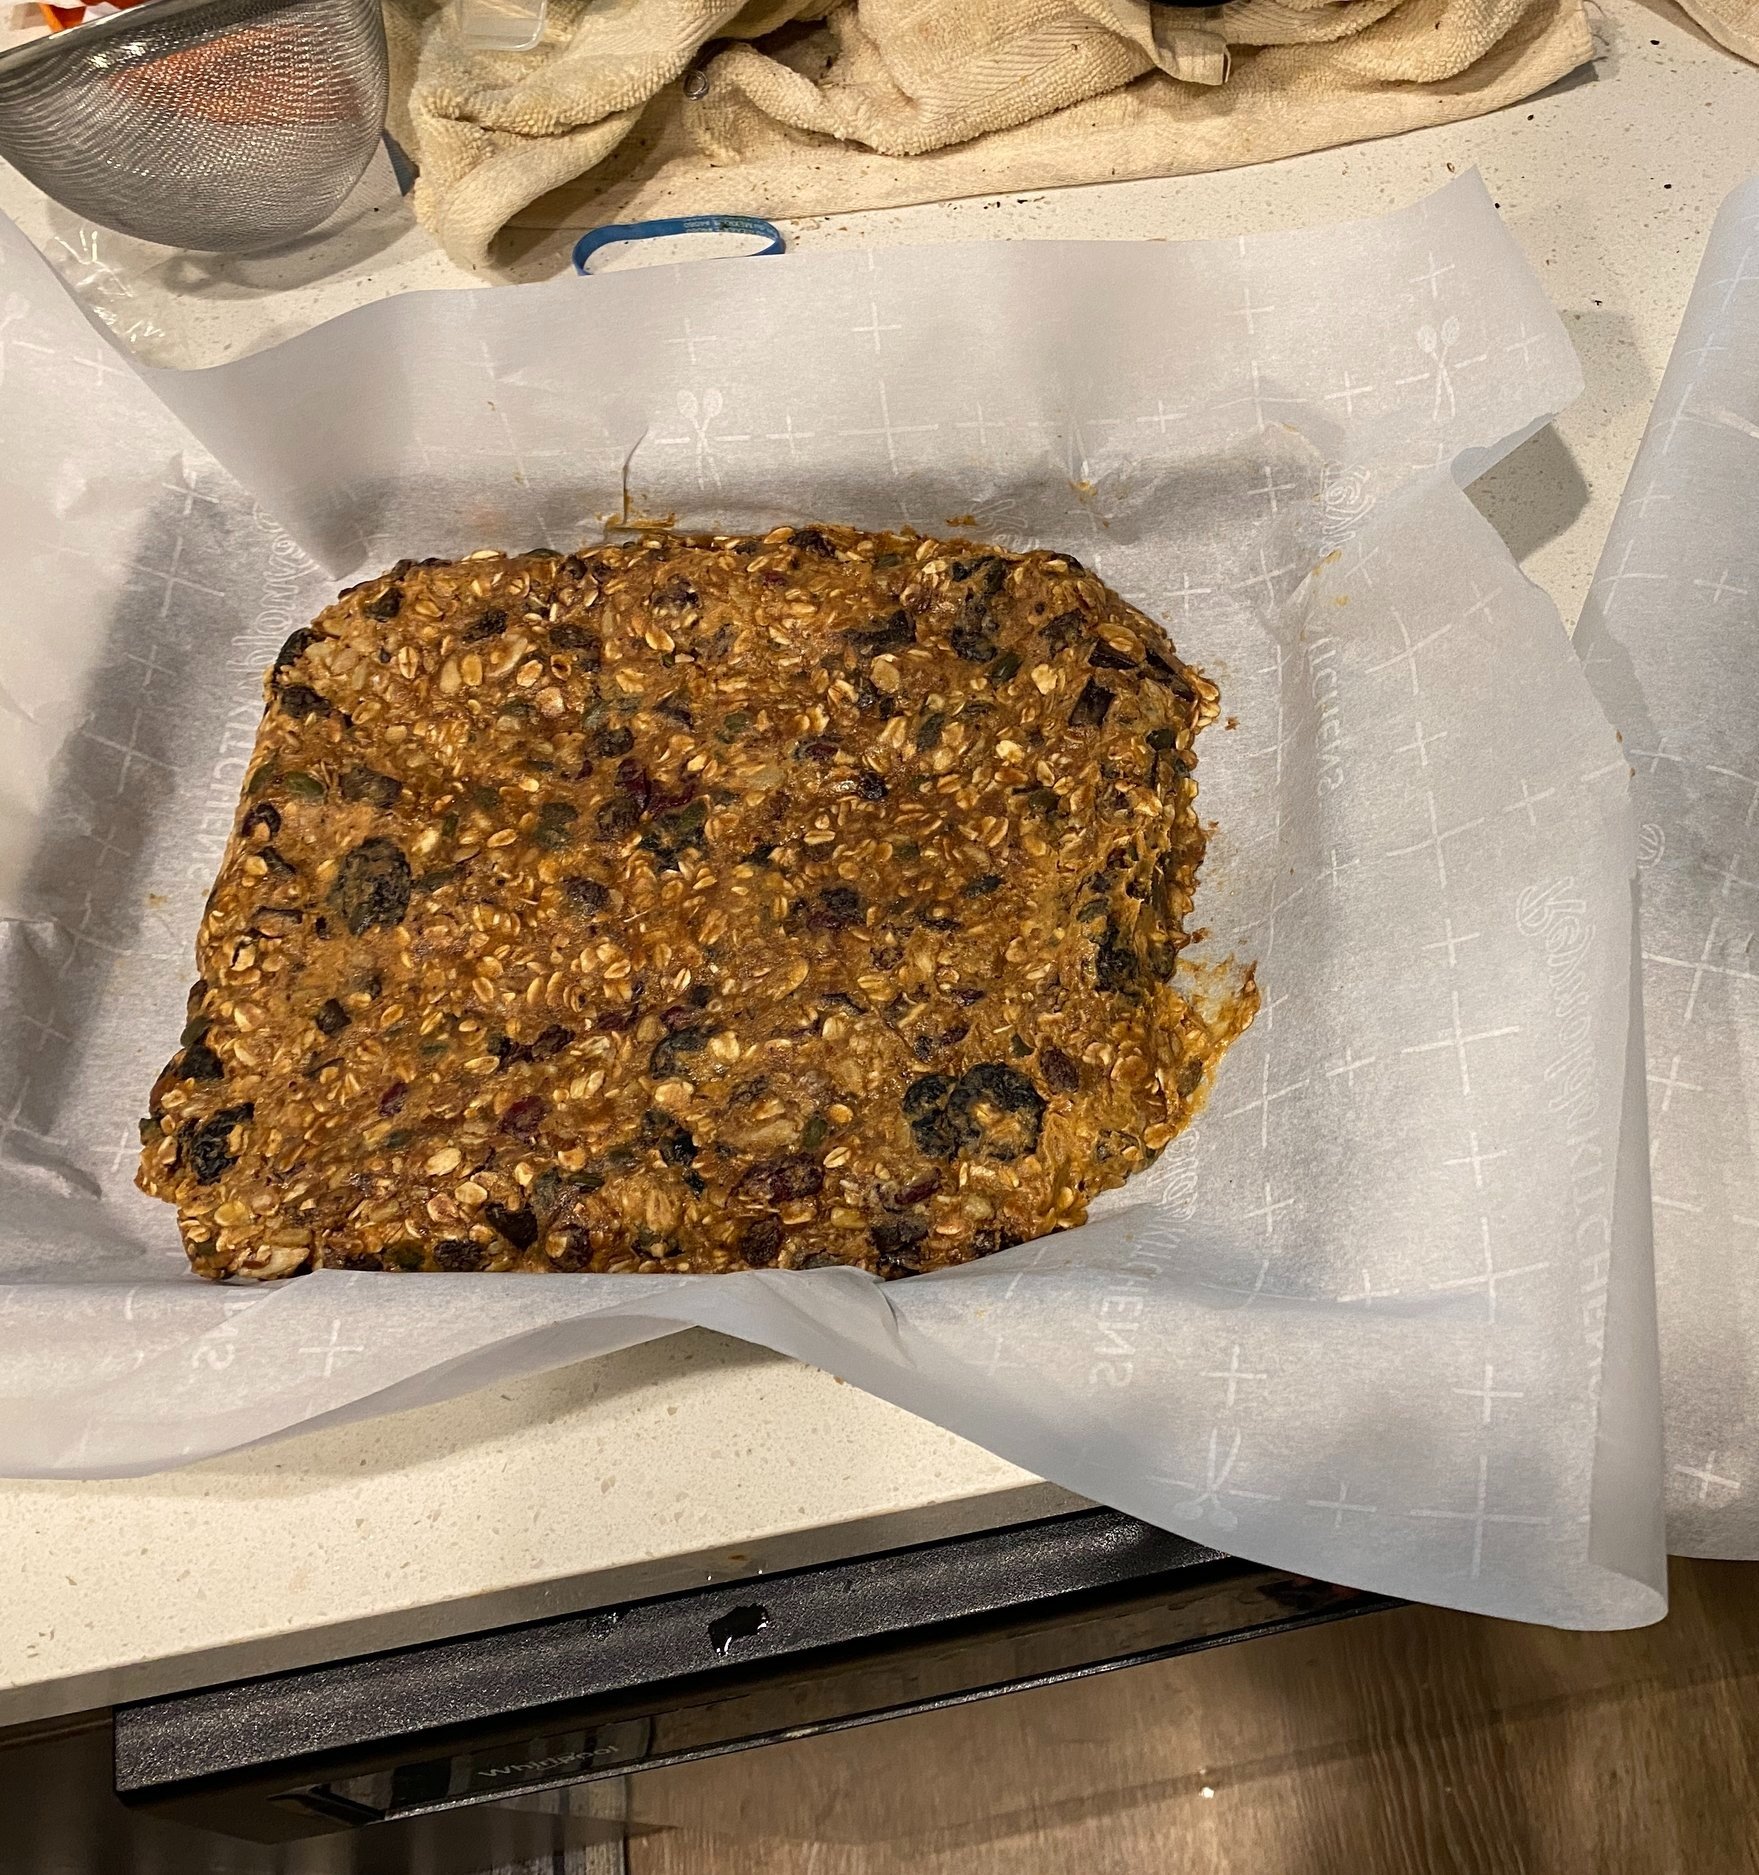
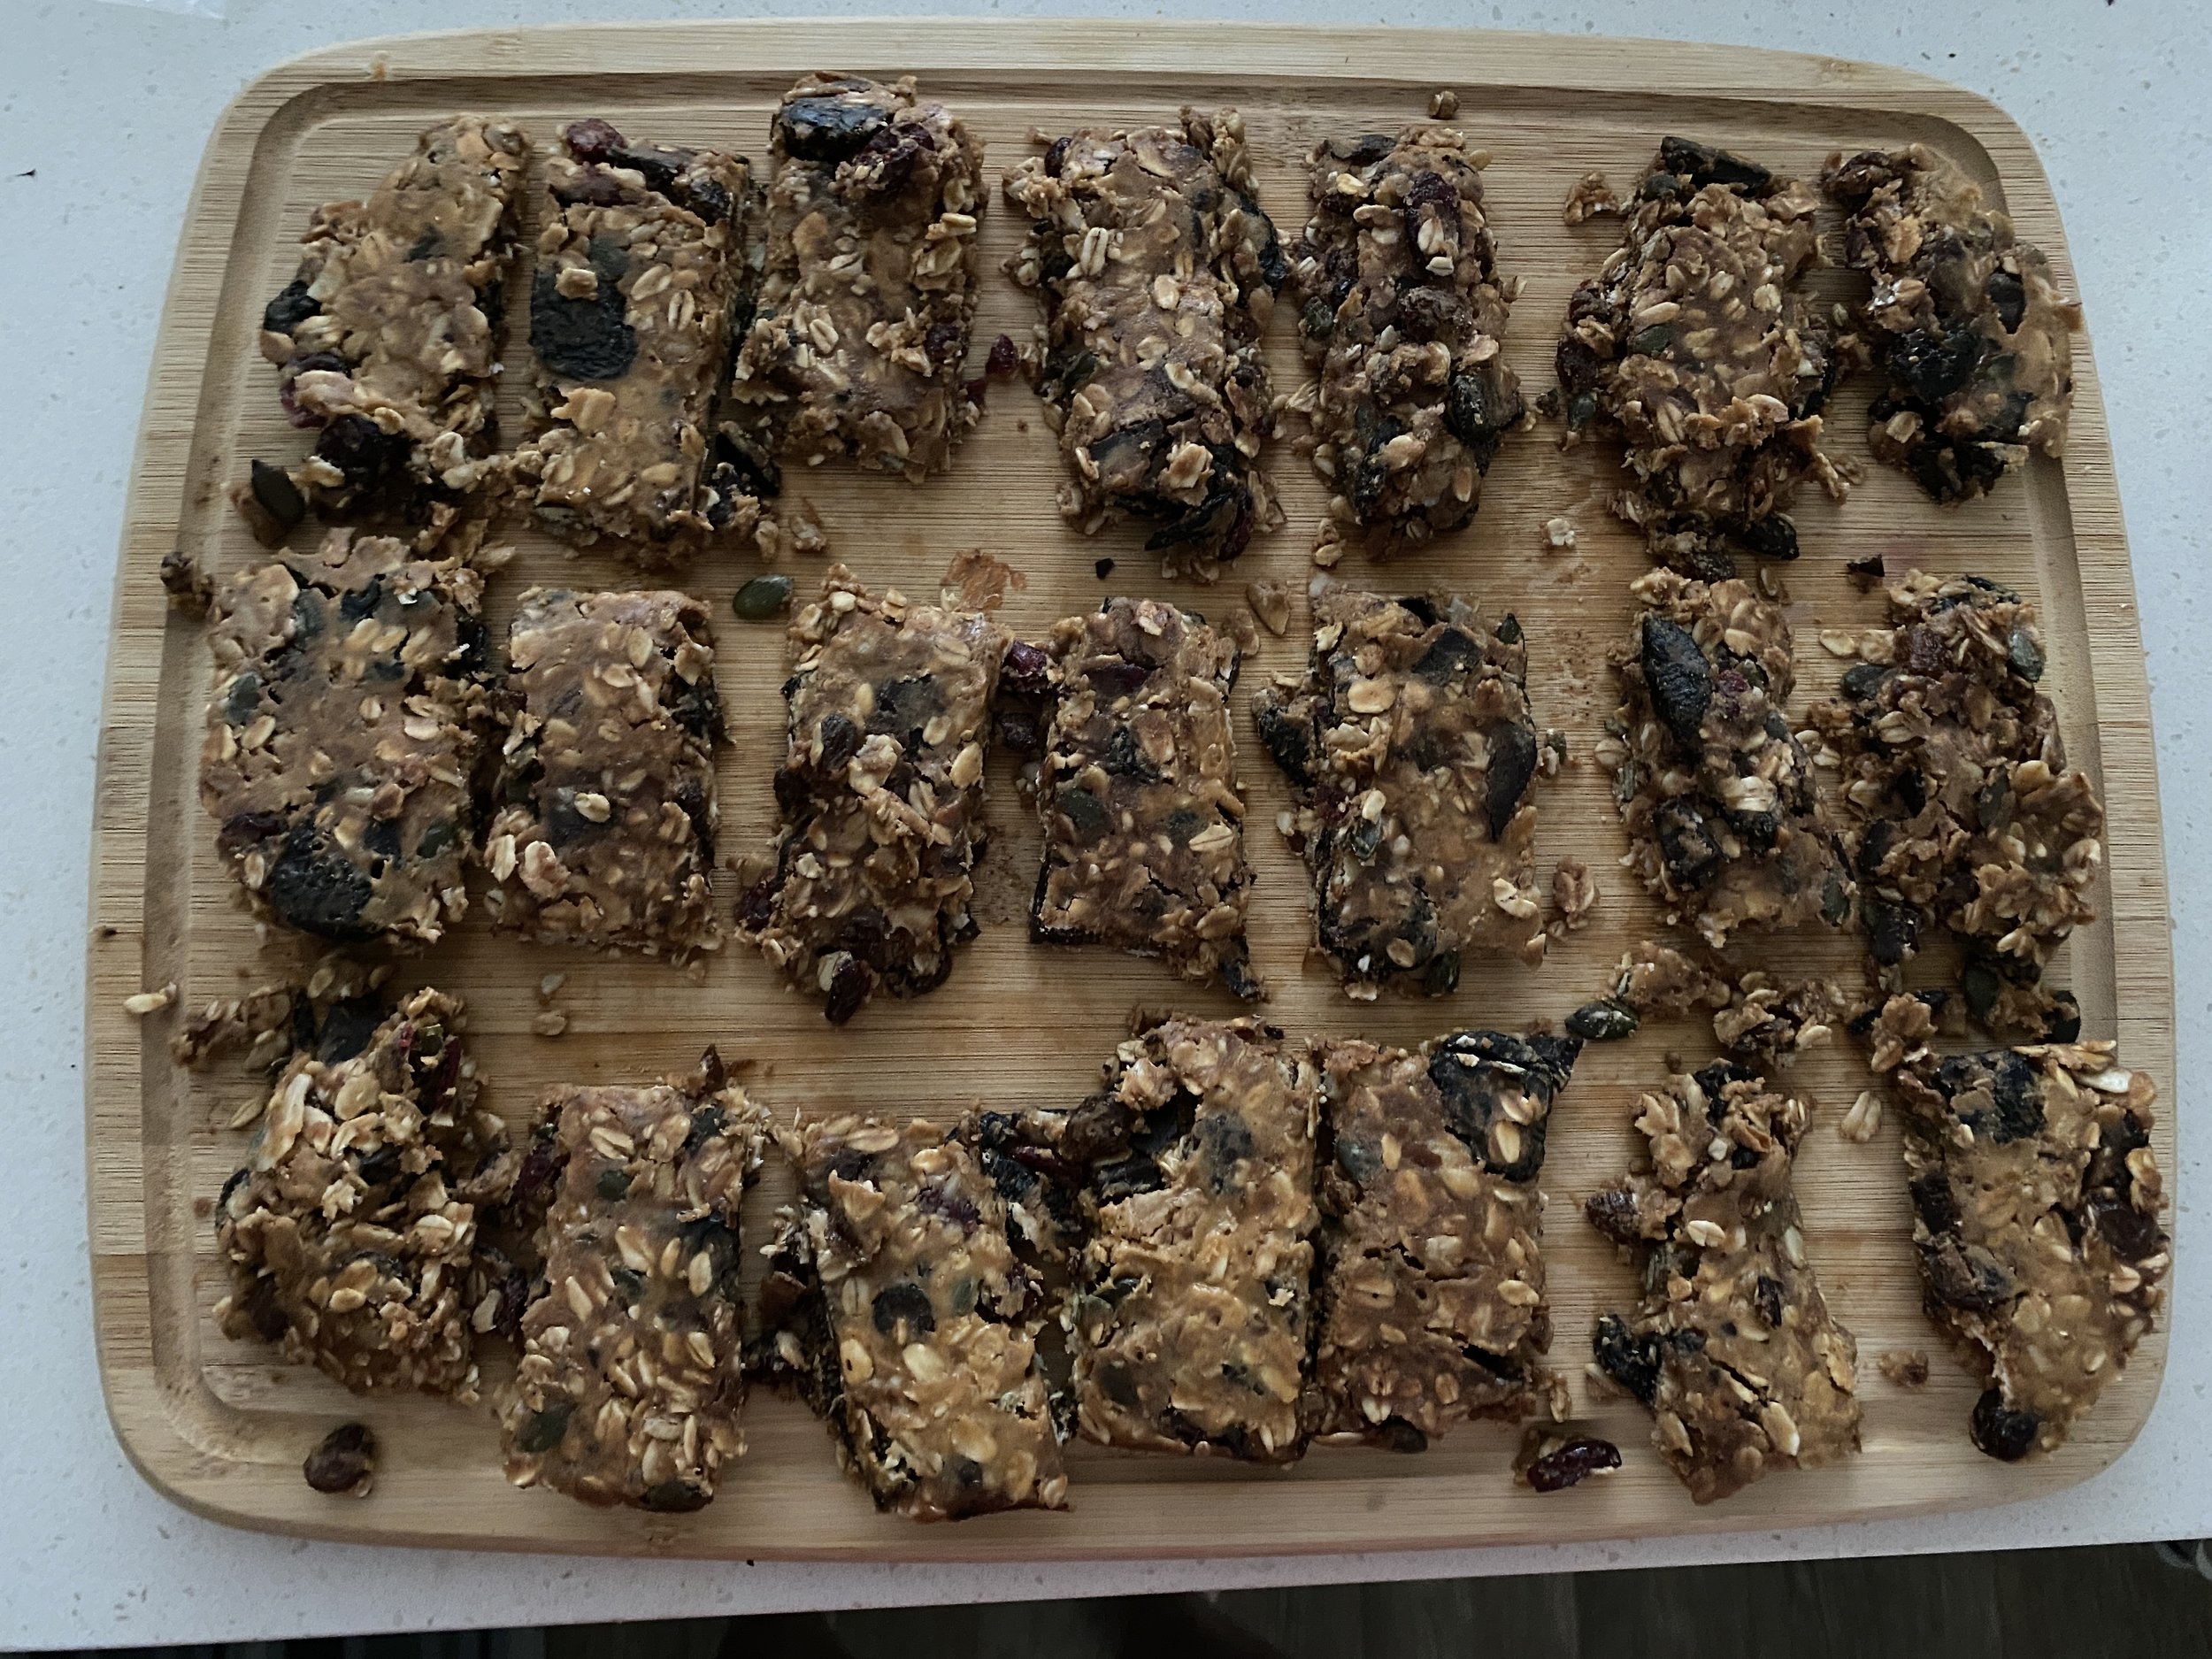
As someone who works out frequently and tried to eat healthy, I was looking for ways to get some energy and protein in my diet pre-workout. I have been satisfied with some store bought protein bars, but I often see that some energy bars like Clif bars have added sugar. I did some research and testing, which led me to creating my own tasty energy bars. I eat one before I hit the gym and it gives me plenty of energy and protein for my workout.
I adapted this from a no bake protein ball recipe from Eating Bird Food. Author Brittany stated a finding that some protein ball recipes use dates as a binder and a food processor. I used part of her recipe as a base. For the trail mix aspect, I feel that trail mix is a great on-the-go snack for good nutrition and energy. My research showed that a good trail mix has a few key elements: nuts, seeds, dried fruits, and fun stuff (I used dark chocolate as my “fun stuff”).
This is also a no bake recipe that requires very little equipment, and a great way to get some quality protein and healthy sugars in your diet. This would also make a great no bake cookie as well because the mixture may remind you of a cookie dough. You can bring these anywhere you go. Not only for the gym, but also as a snack at work, in your school or college bag for strength between classes, on the trail, or just taking a walk around the neighborhood. Kids will love these too because you can get creative with the mix-ins. Try this out and reach out to me vie my email and social media pages. And remember, keep your appetites big and imaginations hungry.
Ingredients:
1 1/2-2 cups rolled oats (I used a rolled oat and ancient grain blend from Trader Joe’s)
1 scoop protein powder (any flavor you like, I used chocolate flavored Designer Whey protein powder)
About 1 total cup of your favorite unsweetened dried fruits (I used cherries, raisins, and cranberries)
About 1 total cup of raw nuts and seeds (I used pepitas, almonds, and sunflower seeds)
1 cup organic nut or seed butter (preferably one without too much added sugar, I used peanut butter)
Optional, about 1/4 cup tahini paste (you can find this with the ethnic foods)
2 ounces dark or bittersweet chocolate, chopped into bite size chunks (I recommend a good quality dark chocolate that has at least 70% cacao for more nutrition, the one I used was 85% cacao)
A drizzle of organic honey and/or maple syrup (for sweetness)
Unsweetened vanilla almond milk (start with 1 tsp. If you don’t have vanilla almond milk, you can use plain almond milk and add a dash of vanilla)
Directions:
Combine all ingredients with your hands in a mixing bowl. I suggest wearing gloves because this mixture will get sticky.
Lay on parchment or silicone lined cookie sheet. Shape the mixture into a square or rectangular shape. You can do this by laying a piece of parchment and another cookie sheet on top of the mixture to flatten it; you may have to use your hands to shape the edges.
Put the cookie sheet with the now shaped mixture in the freezer for about 45-60 minutes, or until set enough to be semi-solid but not frozen solid. Remove from freezer, transfer to cutting board, and cut with a knife into portions of your choice of size. Enjoy right away or you can freeze them in a freezer safe container.
Makes about 1 1/2-2 dozen bars depending on the size you cut them.
Notes:
You can use sweetened dried fruits or almond milk or a sweeter chocolate. If doing so, you may want to omit the honey and maple syrup to avoid making the bars too sweet. If you leave the mixture in the freezer for too long, just let the mixture sit out at room temperature for a bit to soften before cutting it into portions.
Roasted Vegetable Pasta Primavera with Sicilian Pesto

I had wanted to do a recipe that highlighted spring. As I was brainstorming, I realized that I have no pasta or truly vegetarian dishes in my recipe list. Thankfully, I remembered from a Cutthroat Kitchen episode that pasta primavera utilized spring vegetables, which led me in this direction. I was so impressed that I took some to work for my lunch.
Here’s a quick history lesson on pasta primavera. Despite the name, it’s an American dish. The exact origins are debatable, but one of them is when the late Sirio Maccioni and his wife were on vacation in Nova Scotia and used ingredients they had on hand.
Normally the vegetables in a primavera are sauteed, but I chose to roast my veggies in the oven to make it healthier. I also made a whole wheat pasta from scratch with my Cuisinart pasta maker to emphasize the theme of fresh ingredients. In terms of the vegetables, comb your produce section or farmers market for any seasonal vegetables and choose your favorites. I recommend choosing as many different colors of veggies as possible for variety and visual appeal. You can use any type of seasonal veggies, but I think this dish is best with spring and summer veggies.
As for the pesto, I felt that instead of the traditional cream sauce, I figured a pesto would help add a fatty feel to the dish. Sicilian pesto is like a standard basil pesto, but with the addition of tomato and it usually has almonds instead of pine nuts. But, you can make the pesto with any kind of nuts or leafy greens.
Even non-vegetarians will love this pasta dish. Feel free to add some protein if you want, like tofu, chicken breasts, even shrimp or canned tuna. It is very versatile for any type of palate. Plus, it is a great way to get some veggies in your diet, and maybe get your kids to eat their vegetables. I hope you try it out and like it. Respond to me through my email at the bottom of the page or through my social media accounts. And remember; keep your appetites big and imaginations hungry.
Some notes before we dive into the recipe:
I developed the recipe using raw nuts. If using salted nuts, skip the salt in the pesto. If you choose to add seafood, omit the cheese altogether. I also recommend drawing out the moisture from the zucchini and summer squash with salt before chopping it to prevent it from being too mushy while it cooks. As for the pasta, salt the pasta water liberally and DO NOT for any reason add oil to your pasta water because that will take away flavor and prevent the sauce from adhering to the pasta.
Ingredients:
1 pound of your favorite pasta (you can use leftover, dried, or fresh pasta)
A pound of a variety of your favorite vegetables, chopped and sliced depending on the veggie (I used: asparagus, shallots, cherry tomatoes, zucchini, and summer squash)
1 tsp lemon juice
1 tbsp dried Italian herbs
1 tsp red pepper flakes to taste
Salt and pepper to taste
For the Sicilian Pesto:
1/2 dozen red cherry tomatoes
2 garlic cloves
1/3 cup sliced or slivered almonds, toasted
4-6 fresh basil leaves
A dash or 2 of lemon juice
1 tbsp Parmigiano Reggiano or Pecorino cheese
1/4 tsp red pepper flakes to taste
Extra virgin olive oil
Salt and pepper to taste
Directions:
Preheat oven to 375F
For the pesto, add all ingredient except oil to blender. Pulse until everything is combined. Then with the blender going on a slow speed, add the oil in a slow stream until at desired consistency. You can make the pesto a few hours ahead, and it will keep in the fridge for about a week.
For the veggies, toss in bowl with the herbs, lemon, and seasonings. Place on foil lined baking sheet and roast in oven for 25-30 minutes.
Meanwhile cook pasta according to directions. Once the vegetables and pasta are ready, add both to a large serving bowl, add the pesto, and toss to coat. Top with some shaved Parmigiano if desired, and serve.
Serves about 4
Crispy Seared Chilean Sea Bass Over Spicy Thai Green Vegetable Curry
The other day, I was in the mood for Thai curry. I decided that I would make my own Thai green curry paste instead of using store bought paste. Where the fish come in, I had seen Chilean sea bass at the store several times and have always wanted to cook it for myself.
I will admit, I did go non-traditional, mainly because I couldn’t find kaffir lime leaves, dried shrimp paste, Thai basil, or galangal at the store. I also used bits and pieces from recipe research because I had never made my own curry paste before. Still, this curry came out well. And, the fish was cooked nicely, considering I had no prior experience with Chilean bass. This is a great recipe for any spice lover because this is spicy. Try it for yourself and feel free to reach out to me via my social media pages and my email. As I always say, keep your appetites big and imaginations hungry.
Some notes before we start. Chilean sea bass is an easy fish to cook due to its fat content. It is not actually a bass, but a different fish called Patagonian Toothfish. It is called Chilean sea bass for the same reason huitlacoche is called Mexican truffle, to get Americans to try it. Chilean bass is pricey, so if it’s out of your budget you can use another fish like black cod. Just modify the cooking times slightly.

Ingredients for the curry paste

Curry paste is all mixed up
Let’s start with the green curry paste:
6 Thai green chilies (These give the paste most of its green color, you can use less if you have a lower spice tolerance. Wear gloves when handling)
2 stalks lemongrass, chopped
2 shallots, chopped
5 tsp dried shrimp (You can find these with the ethnic foods. If you have dried shrimp paste, use 1/2 the amount)
4 garlic cloves, grated
2 tbsp grated ginger, or galangal
Zest of 1 lime and 1/2 the juice of the same lime (Omit zest if you have both galangal and kaffir lime leaves)
1 nub grated turmeric (you can use powdered turmeric)
1 tsp each of cumin, cayenne, and coriander (toast and crush in a mocajete if using whole seeds)
1/4 cup chopped cilantro
Up to 1/4 cup of coconut milk
Dash of salt to taste
Directions:
Get a mocajete AKA mortar and pestle (You can use a blender, but it is better to use a mocajete). Crush cumin, cayenne, and coriander to a powder if needed. Add ginger, lime zest, dried shrimp, and lemongrass and pound finely. Next, add the chilies, lemongrass, and cilantro, pound further, and then add the shallots and pound until well incorporated. Then add the lime juice and a little coconut milk at a time to help loosen it until desired consistency. You may not need to use all the coconut milk in the paste. The process with the mocajete takes abut 15-20 minutes, but it is worth it. You can refrigerate it up to a few days ahead or freeze it up to a few weeks ahead.


Now let’s prep the rest of the dish.
1 12oz Chilean sea bass fillet, skin on
For the rest of the curry:
The rest of the coconut milk
Another small squeeze of lime
1 tsp each of fish sauce and sesame oil
A few of your favorite veggies (I used carrots, snow peas, yellow pepper, and zucchini)
A cooked starch of your choice (I used shirataki noodles)
Directions:
Heat coconut milk over medium heat in medium saucepan
Add curry paste, fish sauce and sesame oil, let it cook for about 5-7 minutes
Add the veggies, cover and simmer over low-medium low heat for 10-15 minutes (Check and stir it occasionally to prevent over reducing)
Meanwhile make the fish
Pat fillet dry and season with salt and pepper and cut into 3-4 portions
Heat oil in skillet over medium high heat. Add fish to pan skin side down, lower heat to just over medium and cook for about 4 minutes per side.
Just before serving, plate your starch. Top with the curry, and then the fish making sure to plate the fish skin side up.
Enjoy.
Wild Boar Banh Mi
One cuisine that I have not shown on the site is street food. As a person who regularly packs their own bag lunch for work, it gave me the idea to think of a street food recipe as those would typically fit the category of a portable food. Sandwiches are popular on the go food, so I thought I’d do my take on one of my favorite sandwiches, the Banh Mi.
Banh Mi is a popular sandwich and street food in Vietnam. It is usually a baguette filled with meats (usually marinated pork and a pate), fresh and pickled veggies (traditionally cucumber, chilies, carrots and daikon radish), and other condiments (usually mayo, a chili sauce and chopped cilantro). For my version, I used wild boar tenderloin I bought from Beck & Bulow. I made my own: marinade, pickled veggies, spicy mayo, and chicken liver pate for this, and it turned out amazing. This recipe makes at least 2 servings, which enabled me to take one serving for my work lunch. I’ll admit, I did go very non-traditional by using a ciabatta demi-baguette, but it was able to withstand the recipe and hold up well. This recipe was also developed using the sous vide for the boar, but will work with other cooking methods.
You can do this with marinated pork tenderloin, steak, chicken breasts, even firm tofu if you’re a vegetarian. Try this recipe out and give me your feedback by either at the email address at the bottom of the page or on my social media pages. As i say, keep your appetites big and imaginations hungry.

Let's start with the marinated boar tenderloin.

Boar and marinade vacuum sealed and ready to go.

There's that medium rare doneness you want.
For the marinated boar tenderloin:
2 boar tenderloins
1 tbsp red miso
1 grated garlic clove
a nub of grated ginger
1/2 a chopped scallion
1 tbsp lite soy sauce
1/4 tsp sesame oil
1/4 tsp fish sauce
squeeze of lime juice
Directions:
Clean the sinew off the tenderloins using a skinning knife (you can find these at most department or cookware stores). Place boar in vacuum sealer bag.
Mix the ingredients for the marinade in a small bowl. Add to bag with the boar. Seal the bag with your vacuum sealer according to your manufacturer’s instructions. (If you don’t have a vacuum sealer, place in a gallon size Ziploc bag and press the air out with the water displacement method.)
Set your sous vide cooker to 130F (medium rare), put meat in the water bath when ready and cook for 3 hours. While I usually prefer red game rare, I find wild boar to be best at medium rare.
Once finished, remove from water and bags, pat dry, and sear in a raging hot pan or grill for about 45 seconds per side (this helped me get the hard sear I wanted). Remove from heat and slice as thin as possible on the bias.

Meanwhile make the pickled veggies
You need:
2 carrots, peeled and thinly cut, I used rainbow carrots
1 Persian cucumber, thinly sliced
1/4 of a daikon radish, peeled and cut into matchsticks
1/4 tsp salt
3/4 cups hot water
3/4 seasoned rice vinegar
1/2 cup granulated sugar
1/4 tsp sesame oil
Dash of fish sauce
Directions:
Put veggies and salt in a bowl and let sit for 30-60 minutes to draw out the moisture.
Dissolve sugar in water
Mix in vinegar, fish sauce, and sesame oil.
Add veggies to a jar, then pour the pickling liquid over them.
Seal the jar and let stand at room temperature for 1 hour, or you can keep them in the fridge up to 2 weeks ahead. (If you don’t have a jar, just pickle the veggies in the bowl, covering the bowl with plastic wrap while they sit in the pickling liquid)

Time for the pate
Most banh mi shops make their own pate. I chose to make my own. You can use a store bought pate, but check the ingredients first. Avoid using fancy pate’s because they usually contain alcohol, which can overwhelm the other flavors. Keep the seasoning simple on the livers.
Ingredients:
1 pack of chicken livers
1/8 tsp salt and pepper
Squeeze of lemon to deglaze the pot
Directions:
Cook the livers in a medium saucepan with the salt and pepper for about 4 minutes (liver should be medium rare). Take off the heat and puree using either a food processor or a blender (I used an immersion blender). Once at smooth and creamy (should take about 1 minute), put in a plastic container and chill until time to plate.


Now let’s get everything else ready.
You need:
1 demi-baguette
Chopped mint
Chopped cilantro
A few sliced shishito peppers
A couple spoonfuls of mayonnaise
1/8-1/4 tsp your favorite hot sauce (Adjust the amount depending on your hot sauce and spice tolerance. I used a reaper chili hot sauce, which is said to be the world’s hottest chili)
Directions:
Slice bread in half and down the middle. Place on foil lined sheet pan and toast under preheated broiler until nice and browned, as pictured above. Keep an eye on the bread to prevent burning
Mix mayo and hot sauce in a bowl.
Get your spread ready.


Time to assemble your banh mi:
Spread pate on bottom piece of bread and spicy mayo on top piece (if you’re a vegetarian, skip the pate and spread both piece of bread with the mayo).
Layer everything on the pate coated piece of bread in this order (as shown in the picture): boar, pickled veggies, chopped cilantro and mint, and the shishito peppers.
Top with the mayo coated piece of bread, enjoy.
I hope I inspired you with this tasty sandwich.
Peppermint S’mores Chiffon Pie
After the success of my Kabocha Mousse at Thanksgiving, I got inspired to keep practicing my sweet treats. Luckilly, I had a Christmas lunch at work earlier this week, and decided to surprise everyone at the office with my first Christmas recipe, a Chiffon Pie.
For those unfamiliar, Chiffon Pie is a pie with a filling made by folding meringue into a mixture similar to fruit curd that is thickened with gelatin. It was also the pie that introduced us to the graham cracker crust we all know of today. The meringue makes it more airy and marshmallow-like, unllike a cream pie which is lightened by folding in whipped cream. It is mostly a no-bake pie depending on your crust.
How this is a peppermint s’mores chiffon pie one may ask. Easy: graham cracker crust, chocolate peppermint chiffon filling, and a marshmallow whipped cream.
I will admit that I used a premade crust, which is one of the few premade ingredients that I use. You can definitely make your own crumb crust, which I have made in the past. Any meringue (French, Swiss, or Italian), will work, I chose Italian meringue, where you pour hot sugar syrup into the whipped egg whites as you mix to pasturize them, because it is the most stable. To be honest, this was my first ever Italian meringue, and I surprisingly pulled it off on the first try without burning myself. I did have to consult a ton of recipes to do this, so I used bit and pieces from my research in the recipe. The hardest part will be all the cleanup afterward.
The pie was a hit at the lunch. My co-workers kept telling me how much they loved it. I am proud to say that I was able to show how that I can do more than just my usual savory foods. Being a good cook or chef requires branching out from what you normally make, much like how savory cooks on cooking competitions have to adapt for dessert challenges. Try it out for yourself and let me know your opinions by emailing me at the email address at the bottom of the page, or by following me on my social media pages. Merry Christmas, and as always, keep your appetites big and iamginations hungry.
Ingredients:
1 graham cracker pie crust (store bought or you can make your own)
4 eggs, separated (whites for the Italian meringue, yolks for the chocolate mixture, 1 egg contains 2 tbsp whites)
For the marshmallow whipped cream:
1 cup heavy whipping cream
1 cup marshmallow fluff
Dash of vanilla extraxt
1/4 tsp powdered sugar
For the Italian meringue:
1/2 tsp cream of tartar or 2 tsps either lemon juice or white vinegar (Acid helps stabilize the meringue. Rule of thumb, for each egg white, 1/8 tsp cream of tartar or 1/2 tsp lemon juice or white vinegar)
1 cup granulated sugar (Rule of thumb for meringue, 2:1 sugar to egg whites ratio)
1/2 cup water
For the chocolate mixture:
1 cup whole milk
1 packet plain gelatin, bloomed in the milk
1/4 cup granulated sugar
7oz chopped baking chocolate (equal parts semisweer and bittersweet, I recommend Godiva baking chocolate)
1 tbsp peppermint extraxt (this stuff is strong so be careful)


Directions:
Beat the cream in a mixing bowl on medium-low to medium speed.
When almost blended, add the marshmallow fluff (dip a spoon in hot water before scooping out the fluff as it is very sticky) and keep mixing.
When almost at the desired consistency (3-4 minutes) add the vanilla and sugar, set aside (you can make the whipped cream a few hours ahead).


Now for the chocolate mixture:
Get the bottom of a double boiler filled with 1-2” of water to simmer (you can make your own double boiler by using a pot as the bottom and a bowl that fits over the pot for the top, just be sure the bowl’s bottom does not touch the water).
In the top of the double boiler, add milk and gelatin, and bloom gelatin in the milk by letting it stand for about 5 minutes.
Once the water is simmering, put the bowl over the pot.
Add chocolate, sugar, and egg yolks, in that order to the top of the double boiler, and mix with rubber spatula until slightly thickened, chocolate fully melted, and the mixture registers 160F on an instant read thermometer (about 15-20 minutes). DO NOT take your eyes off the mixture or the yolks will turn to scrambled eggs and the chocolate will seize.
Once at the correct consistency and temperature, remove bowl from heat and place in an ice bath (simply a larger bowl filled with ice water) to cool the mixture down. Add the peppermint extract and keep stirring every now and then with rubber spatula until thickened more (approx. 20 minutes).


While the chocolate mixture cools, make the Italian Meringue:
Start with the sugar syrup, put the water and sugar in a small pot, and put an instant read probe in there as well.
Bring to boil.
Normally you would stir the mixture and brush the sides of the pot with water to prevent sticking. However, if you have a right size lid for your pot, like I do, you can put the lid on the pot instead, and the condensation from the heating will take care of the pot sides for you.
Meanwhile, put the egg whites and cream of tartar in a medium sized glass or metal mixing bowl, and mix on medium-low speed with a hand mixer until soft peaks form.
Once the boiling sugar syrup registers 240F (soft ball stage) on the instant read, take off the heat.
With the mixer still beating the egg whites at medium-low speed, pour the hot sugar syrup into the whites in a slow and steady stream, aiming for the stream to go between the mixer attachment and the side of the bowl. This is similar to pouring hot melted butter into egg yolks while mixing them for a Hollandiase sauce. The sugar syrup will be very hot, so be careful when pouring it into the egg whites or you may get a nasty burn.
Crank up the mixer to meduim-high and keep mixing until the bowl is cooled to touch (this should take around 5 minutes) and stiff peaks form.
If you want, I also gave it the inversion test, as pictured above. Read my mousse recipe for tips on doing the inversion test.
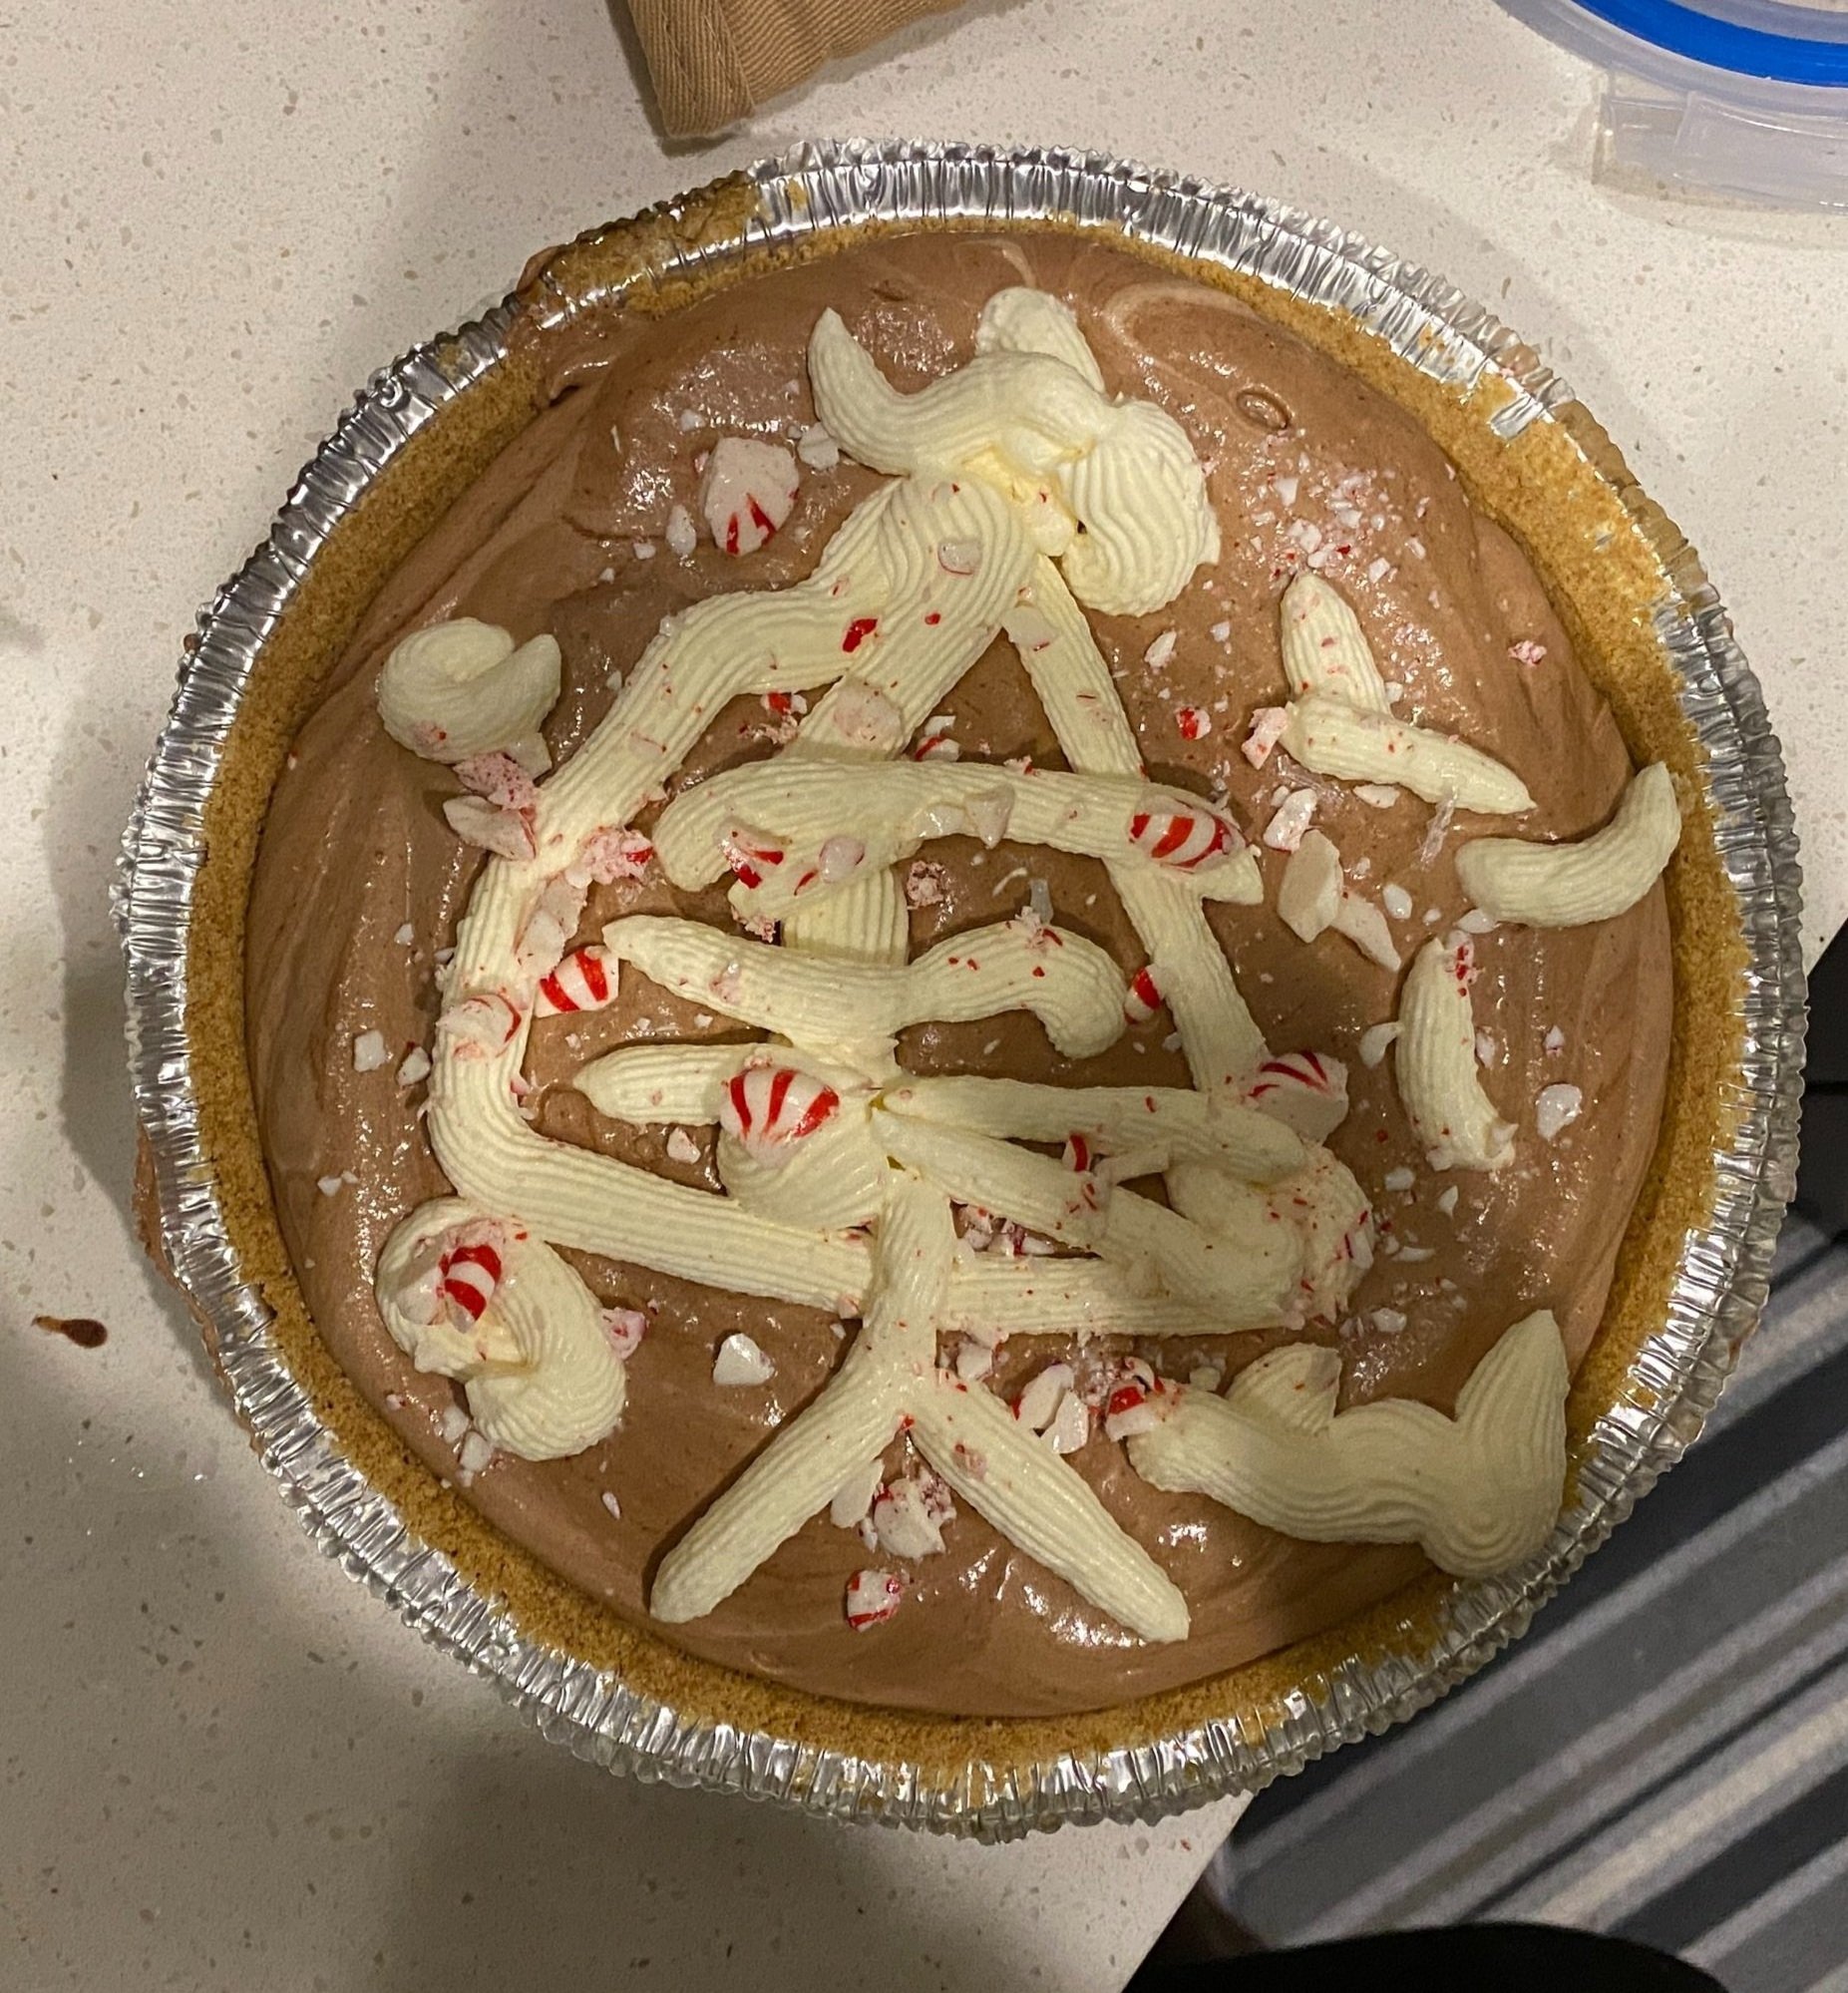
Finally, fold the meringue into the chocolate mixture 1 large scoop at a time. Add to pie crust, smooting it over with a rubber spatula. Top with chilled whipped cream however way you like, I piped out a Christmas tree design using a piping bag to keep it jolly and festive. Cover and refrigerate overnight, and enjoy.
If you want, you can fold some of the cream into the Chiffon filling for creaminess. I also topped with some crushed peppermints, which I crushed by doing a round of punches on my gym’s punching bag (don’t worry, I double bagged the candies to prevent crushed peppermints from making a mess in my gym, and it worked). You can also crush them with a rolling pin or small pot, a great way to let off some steam if you had a rough day.
Variations and Notes:
Have extra eggs on hand because if any yolks get into your whites, you must discard the whites and start over because any impurities will prevent the whites from remaining stable and forming correctly, resulting in a collapsed meringue disaster, hoepfully not as bad as the melted Baked Alaska from The Great British Bake Off. Eggs are easier to separate when cold, but let them get to room temperate after separating.
Before you add the whites, wipe down the bowl and mixer attachment you will be using for the meringue with lemon juice and a paper towel to get rid of any surface impurrities. Make sure they are very dry
If using a French meringue, which involves leaving the egg whites raw, use pasteurized whites to prevent salmonella (don’t use liquid egg whites from a carton as they may be too thin to whip properly). Another good variation if using French meringue is to substitute marshmallow fluff for half the sugar because you can thin out marshmallow fluff with egg whites. Or, you could make French meringue with aquafaba (the liquid from canned beans) instead of egg whites; aquafaba will take about 10 minutes to get to stiff peaks.
If you are making your own crumb crust, AVOID using store bought cookie crumbs because I find that they do not have as much structure as using crumbs that you made yourself.
Kabocha Spice Mousse


As I was coming up with a new recipe for Thanksgiving, I realized that I have no dessert recipes. I originally planned to make mini Basque burnt kabocha cheesecakes, but they sunk in the oven. Thankfully, I had some extra kabocha squash puree and decided to make a kabocha squash mousse. I adapted this from a 3-ingredient chocolate mousse recipe from Kitchen Cents. I used most of Kitchen Cents author Rachel’s tips to guide me, and it turned out perfectly. You can use other flavors or make her original recipe. This is also egg-free so people who do not eat eggs can eat this. She mentions that some would consider this a flavored whipped cream due to the absence of eggs, but it is a mousse because the finished product has the same structure as a mousse. As for the reception, It was a hit among my relatives, most of which have never tried my cooking until now. Rachel originally developed this recipe as a filling and topping for cakes, which I think is a great use for this mousse. It could also work as a topping for a pie as well or even a filling for pate a choux. I am glad that I could develop a sweet treat for the website, and I hope to do more. As I always say, keep your appetites big and imaginations hungry.
Ingerdients:
1/3 cup of pureed kabocha squash, (butternut squash puree or pumpkin puree will work as well, I pureed the squash myself)
1 1/2 cups heavy whipping cream (crucial ingredient as the fat content will help form the stiff peaks you want)
1/4 cup powdered sugar
1/4 tsp vanilla extract
1/2 teaspoon chinese 5 spice (you can find this in the spice section of the grocery store, or you can use equal parts cinnamon, nutmeg, and cloves)
1 packet plain gelatin (helps for structure and keeps it from deflating, especially if you want to make this more than a few hours ahead)
Directions:
Put medium mixing bowl (glass or metal preferred) in freezer for 1/2 hour, to help speed up the mixing later on.
Meanwhile, bloom the gelatin. Add 1/4 cup cold water to the gelatin and let it sit for about 90 seconds for it to bloom. Then, melt it in the microwave (one of the few times I use my microwave) for 40 seconds. Let it cool to room temperature. This is important because if the melted gelatin not cooled enough before added to the mousse mixture, the heat will deplate the mousse.
Once the bowl is chilled enough, add all ingredients except gelatin and mix with a hand mixer at around medium speed for a few minutes until almost at stiff peaks.
Once at that peak stage, add the gelatin and continue mixing with the mixer until stiff peaks form. Do not overmix or you will have lumps like butter.
Optional: If you want, I gave the mousse the inversion test. This is an old school pastry technique for testing if mousses and meringues are mixed correctly. To do this, have a large plate or bowl on the table and invert the bowl with the mixture inside over the vessel. If the mousse stays in the bowl when inverted, you know it is mixed correctly. Having the vessel under the mixing bowl will prevent a mess on your table if the mixture fall out of the bowl.
Chill for a few hours, serve and enjoy.
I hope you enjoy this. Contact info is on the bottom of the page.
Butter Basted Opah


I was at the Beverly Hills Farmer’s Market a couple weeks ago with my family and happened to stumble across opah from the fish supplier. This was a fish that I had been dying to cook for a while, but could not find it until recently. Opah, AKA moonfish, for those unfamiliar, is a deep water fish from the Pacific that has several cut and uses like nice meaty fillets from the loins, bacon from the belly, the pectoral and adductor muscles that are good for ground fish applications, and much more. This recipe will also work with other firm and meaty fish like: cod, mahi-mahi, shark, swordfish, marlin, even tuna and halibut, cooking times may need to be adjusted with other fish. Try this for yourself and net me know if you are inspired. The piece I used serves 2-4 people.
Ingredients:
1 Opah fillet (my piece appeared to be from the top loin)
A handful of fresh thyme and oregano sprigs
1/2 a lemon cut into thin slices (I used pink variegated lemons, which flavor wise are sweet and less sour like Meyer lemon, but a bit more floral)
2-3 tbsps butter
Salt and pepper, freshly ground
Directions:
Pat Opah dry with paper towels. Cut into portions and season all over with salt and pepper
Put butter in pan and melt over medium-high heat.
Once melted and heated, add Opah to pan and reduce heat to medium.
Add herbs and sliced lemon. Tilt pan towards yo so that melted butter pools on one side. Use a spoon to baste the fish with the melted butter (this process is called arroser).
Sear on each side for about 4 minutes depending on the thickness of the fillets. My pieces were of uneven thickness.
Flip with a fish spatula (you can find fish spatulas in the cookware section of any department or grocery store like Target). Continue cooking on the other side and butter basting for about another 4 minutes, again depending on thickness. Opah fillets should be treated like wild salmon, around medium-rare or a little under.
Once ready, plate and enjoy.
I served my Opah with some red dandelion greens and sunflower microgreens that I tossed in a blend of blood orange olive oil and raspberry balsamic vinegar, which I got at the same farmer’s market. The fish was amazing. The butter basting gave it a nice crust and the lemon and herbs accented the mild flavor of the fish. It was so good that I took the leftovers for my lunch the next day at the office. I hope you all like it. Contact info is on the bottom of the page. Always keep your appetites big and imaginations hungry
Bibimbap
This was a dish that I had been wanting to make for a while. For those who’ve never heard of Bibimbap, it is a popular Korean dish. It’s like a cross between fried rice and a grain bowl. Basically, it’s rice or grain topped with things like veggies, meats, sauce, and a fried egg. It is a blank canvas that has endless variations. Here is my version of Bibimbap, and use your imagination to make your own version of this dish.

Ingredients:
1 cup of your choice or rice or grain, I used farro
2 1/2 cups liquid, I used chicken stock
Mixed veggies of your choice, I used: shallots, lacy cauliflower, brussels sprouts, snap peas, and rainbow peppers
Your choice of protein, I used flap steak
1 egg, this is a vital part of Bibimbap
For the marinade/sauce:
2 scallions, sliced
Dash of dried lemongrass
1 tbsp Gochujang, depending on your spice tolerance
Dash of chili flakes
4 mint leaves, chopped
A little soy sauce and sesame oil (be careful, sesame oil is powerful like saffron and truffle oil)
1 yolk of a preserved duck egg AKA century egg (you can find these with the refrigerated Asian items at your grocery store, I found mine near the tofu)

Mix the ingredients for the marinade in a bowl. Set some aside for the sauce and use the rest to marinate the meat.
Coat meat in marinade, let it sit for about an hour
While this happens, chop your vegetables
Cook grain according to package, rule of thumb is 2-3 cups liquid for every cup of grain (farro usually takes about 25 minutes to cook)
Cook meat using any cooking method until cooked through (I did the steak on the grill. If using steak, cook to desired doneness, I like rare to medium rare, so I cooked it to that temeperature)
Saute the veggies in a wok until tender, but still al dente for texture, about 5-7 minutes
Just before serving, cook the egg. The egg must be sunny side up, and you want the whites to be cooked while the yolk is still nice and runny
Finally, assemble, grain or rice first, then the meat on one side, then the veggies on the other, and finally the egg in the open space in the middle, as shown in the picture above, then top with the sauce. Enjoy
Final thoughts, I like that this is a dish that stretches the imagination. The sauce/marinade is also great with noodles. You can even transform this dish in so many ways, like a noodle bap, bap tacos, even a Bibimbap pizza. Try it out for yourself and don’t be afraid to get creative. Contact info is at the bottom of the page. Follow me @theautisticgourmet on social media. As I say, keep your appetites big and imaginations hungry
Spanish Surf ‘N’ Turf with Romesco Roasted Cauliflower
For Labor Day, I thought I’d do something special. I thought what better way to honor the end of grilling season than with surf ‘n’ turf, one of my favorite combinations. Inspiration partly came from my childhood. I grew up on Long Island where fresh seafood is common, and my dad used to travel to Spain for business trips when I was younger. I did get to visit Spain, without my family, while in college and loved the Mediterranean vibes and cuisine. I chose to use very Spanish proteins, octopus tentacle (purchased at a great seafood market in Santa Monica) and Solomillo Iberico de Bellota (a breed of pork from Spain’s black Iberico pig, basically the Kobe beef of pork). Romesco is a tomato based Catalonian sauce paired with proteins, usually seafood. I love roasted cauliflower and decided to toss it with that for more flavor. This was another recipe that shows my love for elevated and fresh cuisine.
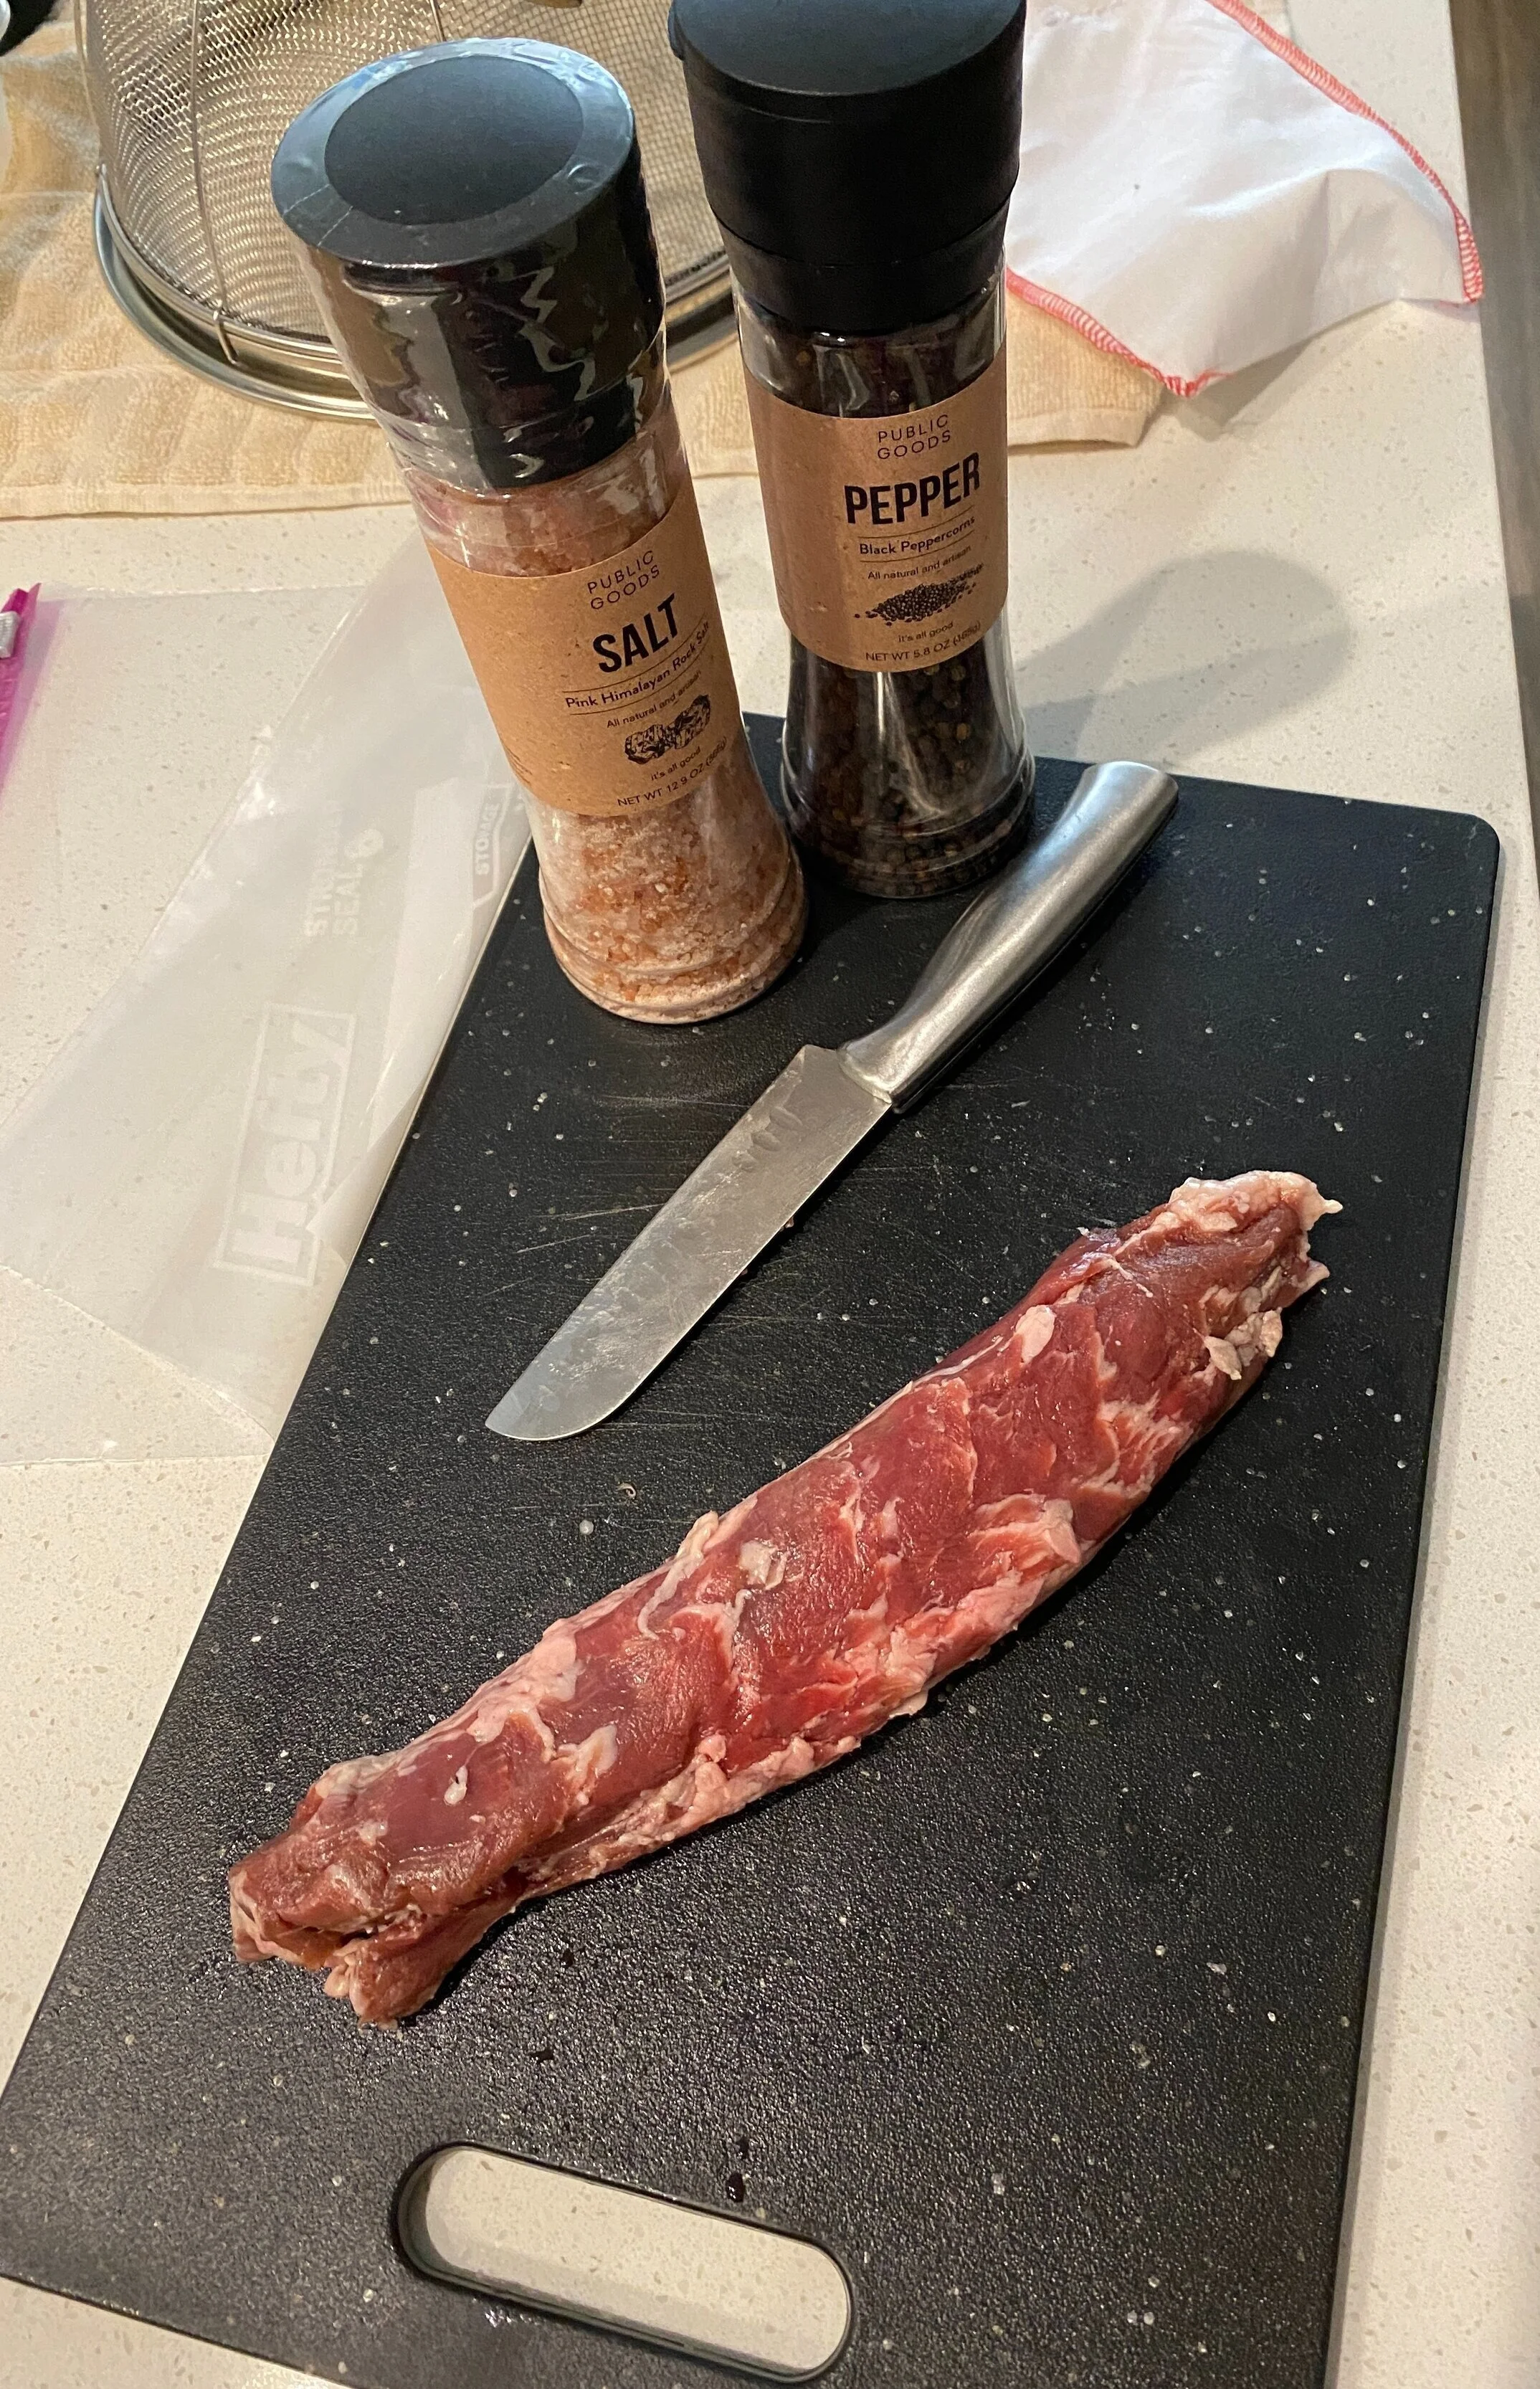

For the turf, I used Solomillo Iberico de Bellota that I got through Marky's. Bellota means the pig was fed on a diet of: fruits, nuts, and acorns, giving it some nice intramuscular marbling. I kept the seasoning simple with just salt and pepper to let the natural flavor shine. To cook it, I broke out my sous vide and cooked it in the water at 127F (rare to almost medium rare) for 2 hours. You’ll think I’m nuts for cooking pork to that temperature, but hear me out. While it’s OK to do pork medium rare nowadays, Iberico pork should be medium rare. And unlike the pork we often get at the store, Iberico pork can be eaten rare, which is traditional in Spain. Don't believe me, here's an Iberico recipe I found on Marx Foods that says Iberico can be done rare.


Now for the turf. The octopus tentacle was purchased (precooked) at Santa Monica Seafood in Santa Monica. They have a wide selection of fresh seafood to choose from. I coated it in a marinade using the following ingredients:
Juice and zest of 1/2 a lemon (I used a Meyer lemon I got at Whole Foods)
2 cloves chopped garlic
2-3 tbs olive oil
Sea salt and freshly ground pepper
and, Dried herbs (I used a dried Italian blend)
Marinate the tentacle for an hour, you can do this for 1/2 hour in the fridge and then another 1/2 hour at room temp.
Once the Iberico is cooked and the octopus is marinated, sear them over raging high heat. I used my grill sheet to get the job done. Give the Iberico about 2 minutes, turning every third of the way to brown each side. For the octopus, turn it until nice and charred, about 3-4 minutes turning periodically.


Time for the Romesco roasted cauliflower. But first, let’s make the Romesco sauce.
You will need:
1 whole tomato(peeled, seeded, and chopped)
1/2 a roasted red bell pepper (peeled, seeded and chopped, you can use jarred roasted peppers as well)
2 chopped garlic cloves
1 small handful freshly chopped Italian parsley, with tender stems
1/2 lemon, juice and zest (I used the other half of the Meyer lemon)
Pinch each of smoked paprika and cayenne pepper
1 slice stale baguette, chopped and toasted (this helps thicken the sauce)
Small handful Marcona Almonds, toasted (The ones I used were salted, if that is the case you don’t need to add salt)
Fresh ground black pepper
Drizzle of Extra Virgin Olive Oil
Directions:
Put all ingredients except oil in blender and pulse on higher speed until more finely chopped.
Then, blend on a slower speed and add the oil in a slow steady drizzle. I recently learned that slowing down the blender when adding the oil also helps it distribute better, and it worked. You can make the Romesco a few days in advance and refrigerate it until ready.


Now for the cauliflower. I was lucky to find a Romanesco cauliflower at Whole Foods. To make the roasted cauliflower, chop it up into pieces and toss them, tender leaves as well, in the Romesco. Then put on a foil lined sheet and and roast in a 375 degree over for 20-25 minutes, or until caramelized and charred to your liking. Then serve and enjoy. I went for a more restaurant quality presentation to showcase the beauty of the ingredients. I also roasted some king oyster mushrooms that I tossed in the extra octopus marinade with the cauliflower cause I love mushrooms with red meat.
Final verdict, chef approved. The Iberico had the right amount of texture and flavor from the marbling. My octopus was charred beautifully and played well with the marinade. And, the Romesco was a delicious pairing with the cauliflower, which gave it a roasty, nutty flavor.
I will be honest, I had wanted to do octopus for a while, but only recently found a good place that carried it. This is another recipe that reflects my culinary point of view, by taking the time to make sure each component is executed well and tasty. To conclude, I want to hear what you like to use for surf ‘n’ turf because it does not have to be lobster and filet mignon. It is an interchangeable pairing because of the endless possibilities or sea and land proteins to choose from. You can use your favorite meat and seafood for this dish instead of the octopus and Iberico. Contact info is on the bottom of the page, let me know if you get inspired. Until next time, keep your appetites big and imaginations hungry.
Seared Barramundi with Watermelon and Yellow Dragonfruit Salsa
I had just moved to LA, and found inspiration at the grocery store for a recipe. I chose this to highlight summer and the freshness of California Coastal cuisine. The salsa is inspired by my cousin Matt’s watermelon salsa, which is really good. The sweetness, acidity, and earthiness of the salsa pairs well with any seafood. I also recommend it with shrimp as watermelon pairs well with shellfish. It is a tasty way to get your five fruits and vegetables a day. Try it and let me know if you enjoy it.

Ingredients
For the fish:
1 Barramundi fillet
Salt and pepper
For the salsa:
1/2 cup diced watermelon
Juice and flesh of 1 yellow dragonfruit (it has a more noticeable flavor than regular Dragonfruit, not bland and sweet like a pear)
1/4 small onion, chopped
1/4 teaspoon Epazote (it’s like a Mexican marjoram, I got mine at Penzey’s)
1/3 Pasilla chile, charred, seeded and chopped
Pinch of salt
Squeeze of lime juice
A little chopped cilantro (leaves and tender stems)
Directions:
Char the Pasilla chile over an open flame to help peel off the skin. This also helps add a depth of flavor, but have your fan going just in case of smoke and turn it with tongs every now and then. Careful when turning and do not use wooden or plastic tongs for this step. Once off the heat, cool before seeding and chopping.
Chop the: fruit, onion, chile, and cilantro and add to bowl. Then add the Epazote, salt, and lime and give it a mix. You can make the salsa earlier in the day if you want, chilling it in the fridge until serving time.


Now for the Barramundi
Heat an oil with a high smoke point, like grapeseed oil, over medium-medium high heat. Then add the Barramundi fillet and sear until cooked through, flipping halfway. The fillets are of uneven thickness so some parts will cook unevenly. The rule of thumb for cooking fish fillets through is 5 minutes per side for each inch of thickness. The fillet I used was about .6 inches thick at it’s thickest part.

Plate and enjoy!
I thought it was delicious. I should thank my cousin for inspiring me with his watermelon salsa. This was for one serving, but you can adjust the recipe for a larger crowd, or to your personal taste. Come to think of it, this would also make a great fish taco. I hope you all try this recipe and I hope to hear feedback from you. Contact info is on the bottom of the page if you want to reach out to me for feedback.
Sous Vide Venison Filet Mignon with Mustard Herb Butter and Beet Carpaccio Spring Salad
I wanted to develop a recipe that showed my strongest culinary skills and passions. They are: fine dining, fresh exotic ingredients, modernist techniques, and innovative flavor combinations. This recipe shows them all. I made this recipe for my parents last weekend, and it was a hit. It was so good my mother cannot stop mentioning it, and it is an accomplishment when I get my parents to enjoy rare meat. Some of the salad ingredients were picked up the same day from the farmer’s market, which allowed for seasonality. I came up with the idea for the compound butter to help give the lean venison some much needed fat as red game meats have almost no fat and can dry out easily. This is a good recipe for spring and/or summer because it uses fresh ingredients and can be served outdoors on a warm spring or summer evening. I hope you try it out and let me know if you enjoyed it.
Ingredients:
4 venison filets (the filets I used were New Zealand venison ordered from Meat N’ Bone and appeared to be from the ribeye part of the backstrap)
A little salt and pepper
For the compound butter:
2-3 tablespoons softened butter (use really good butter because you want the flavor, I used Kerrygold Irish butter)
1 tablespoon whole grain mustard
Handful of fresh herbs, chopped (I used: parsley, thyme, oregano, and a little rosemary)
A couple drops of Worcestershire sauce
For the salad:
Beets, peeled and shaved (the exact number depends on their size)
Segments of 1 fresh tangelo
Fava beans, removed from the pods (use as many as you need for serving)
Optional, treviso leaves, cleaned
1 tablespoon Dijon mustard
Juice and zest of 1 lemon (adjust the amount of juice to get your preferred flavor balance)
Freshly ground pepper and flaky sea salt
A little honey for sweetness
Extra Virgin Olive Oil (I emphasize this a lot, use good quality olive oil for condiments)
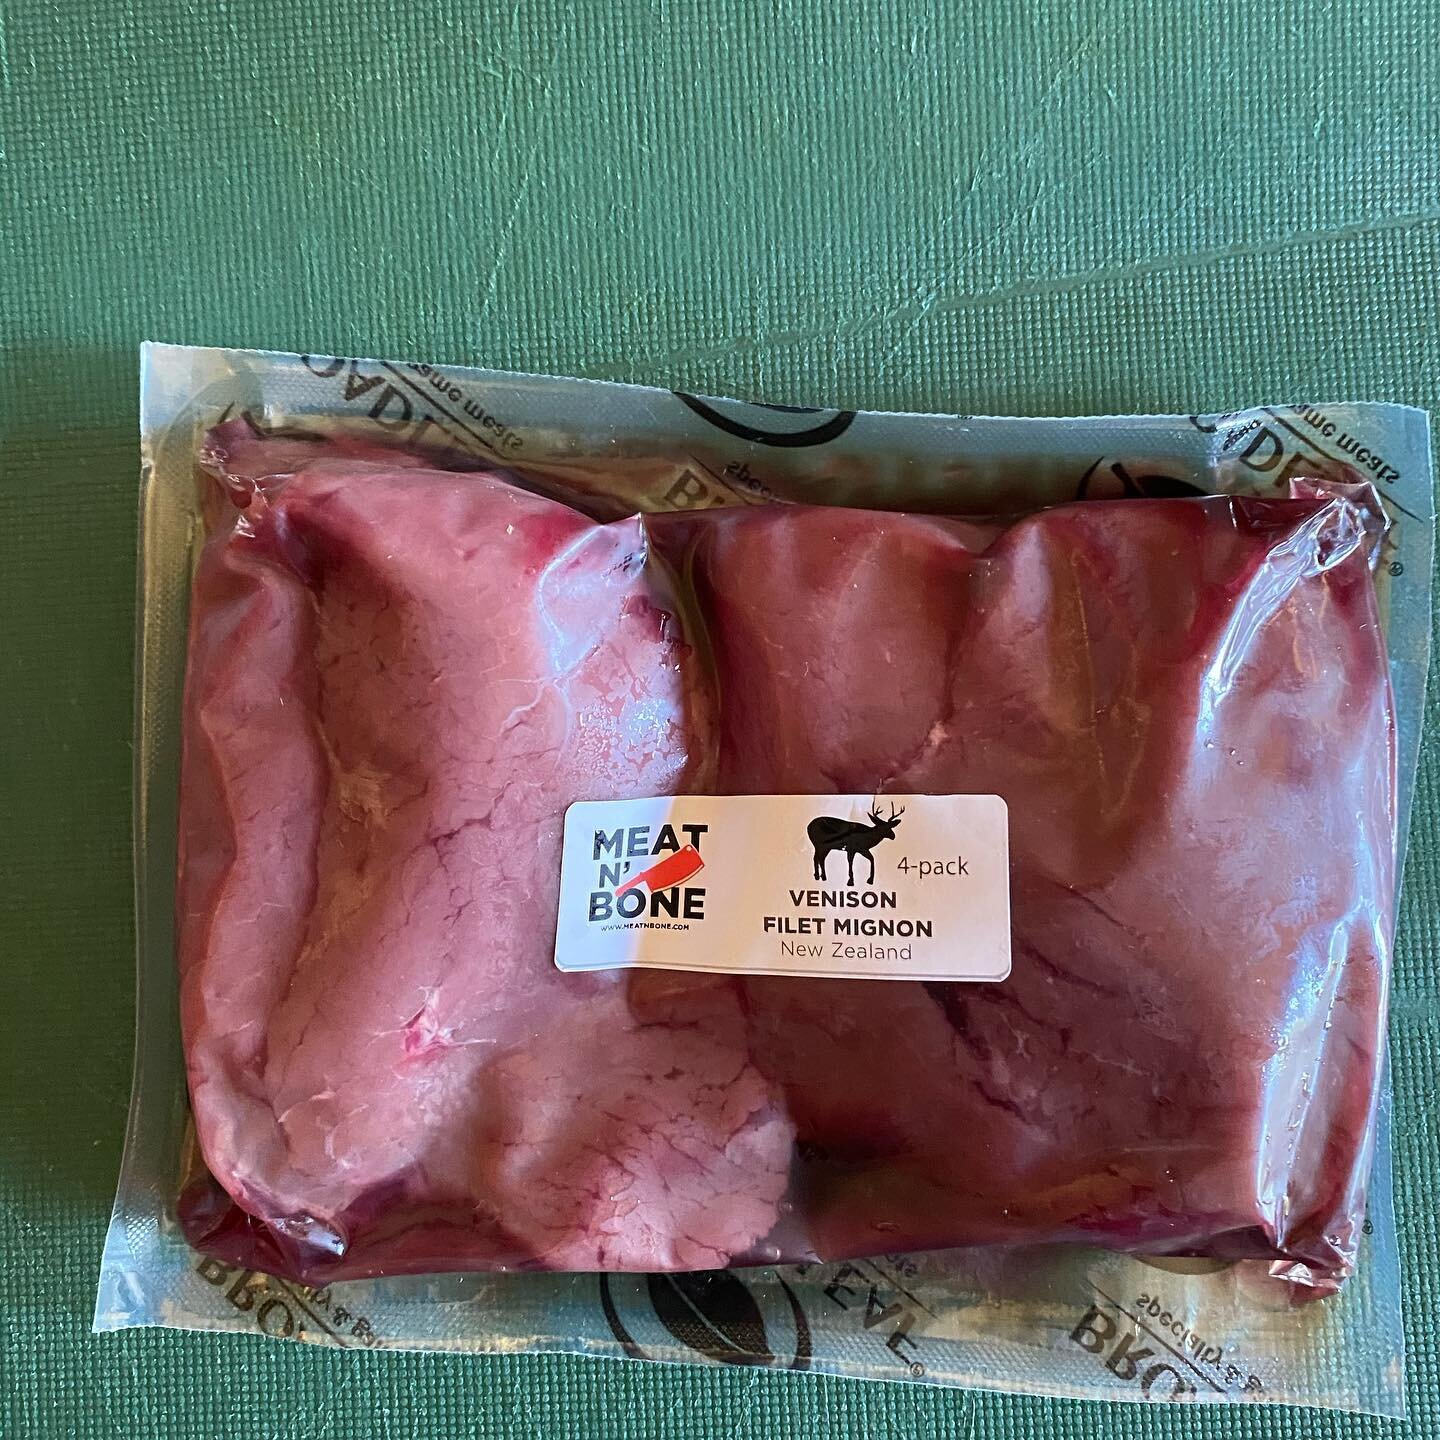
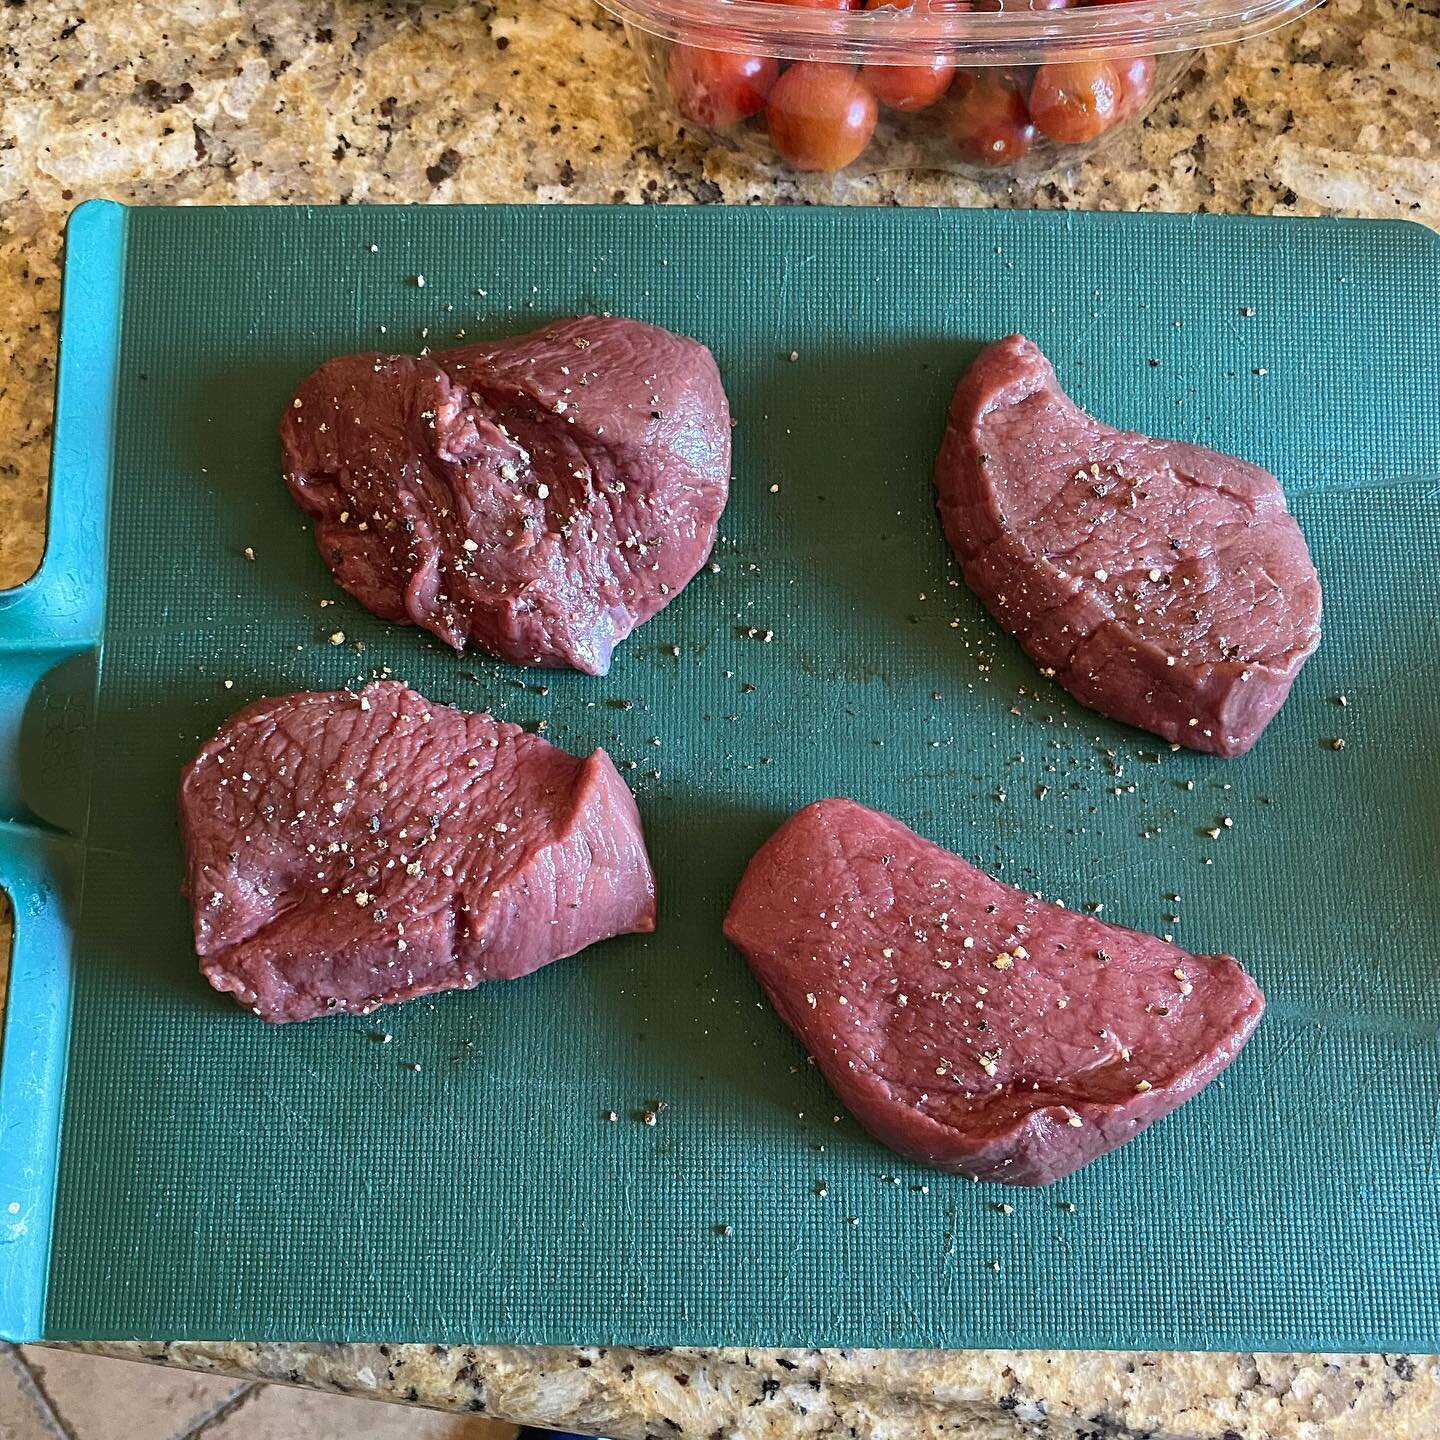
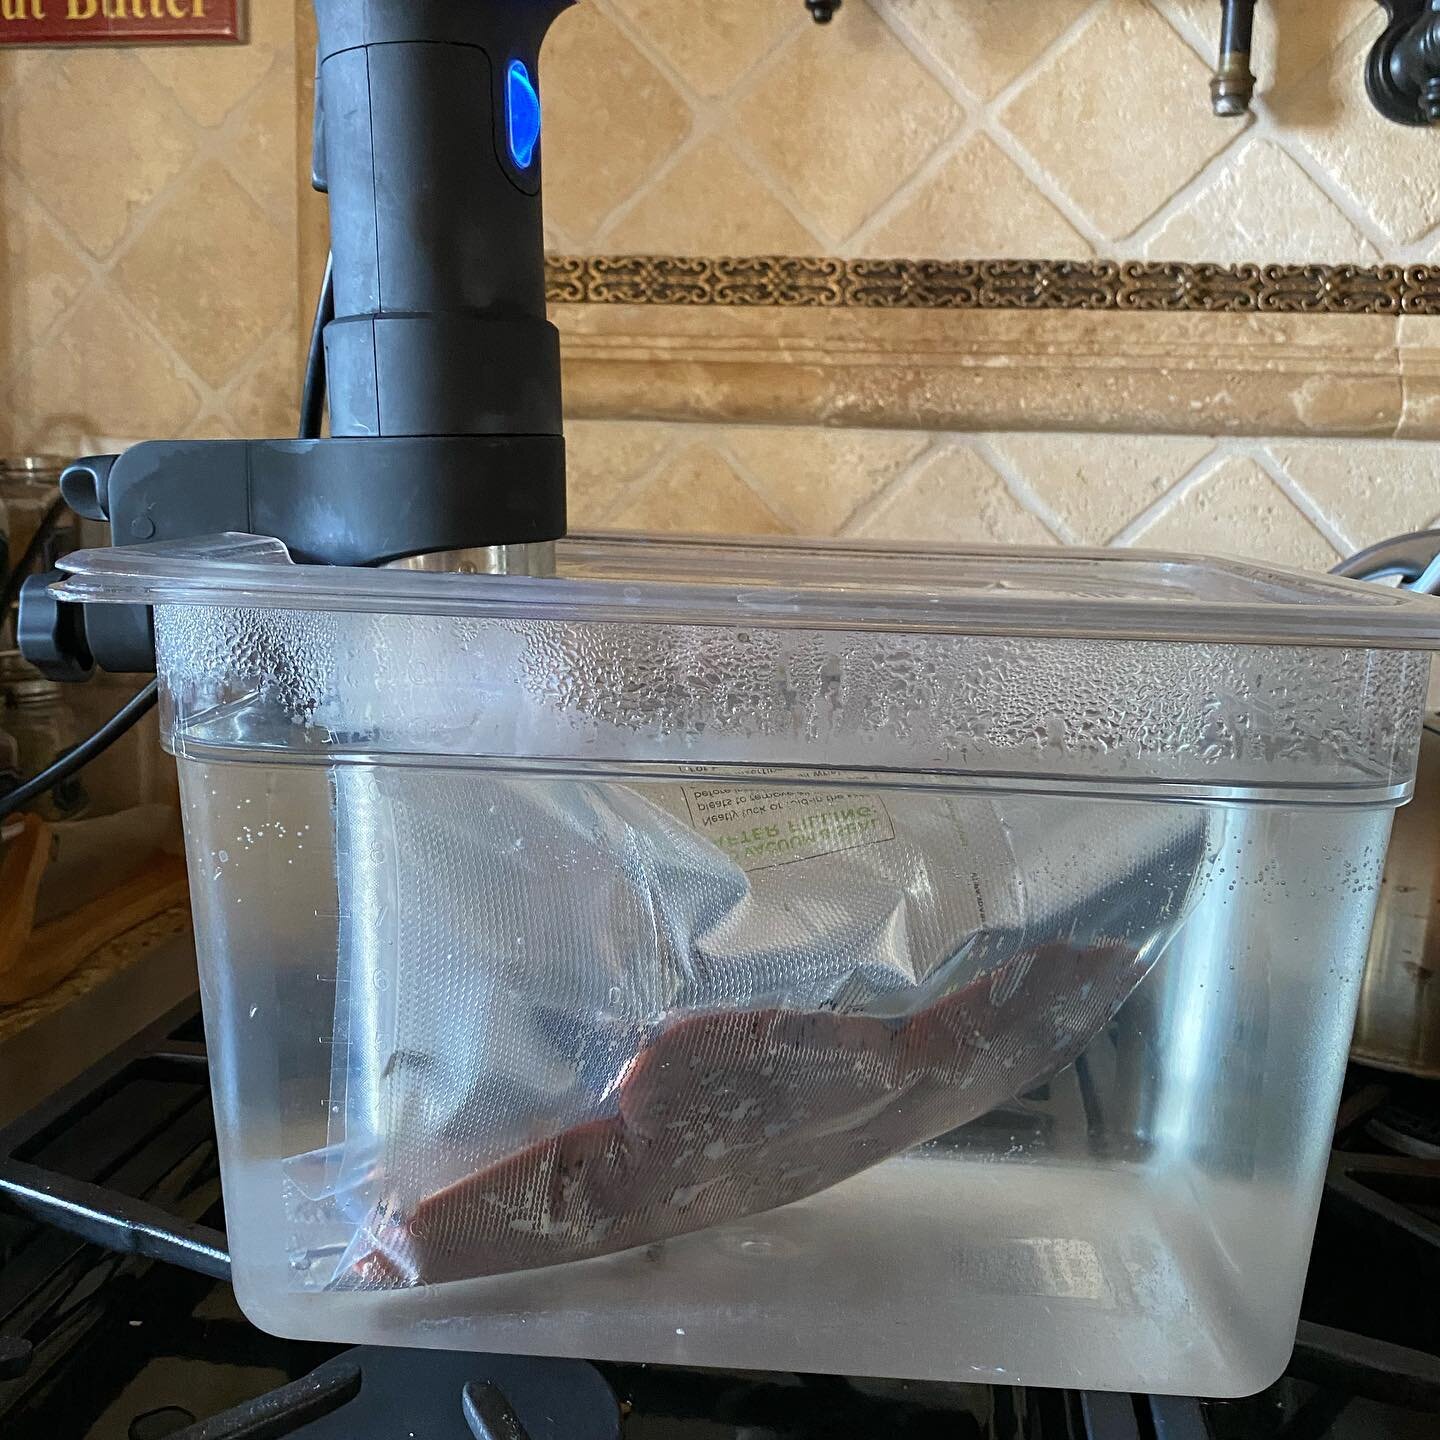
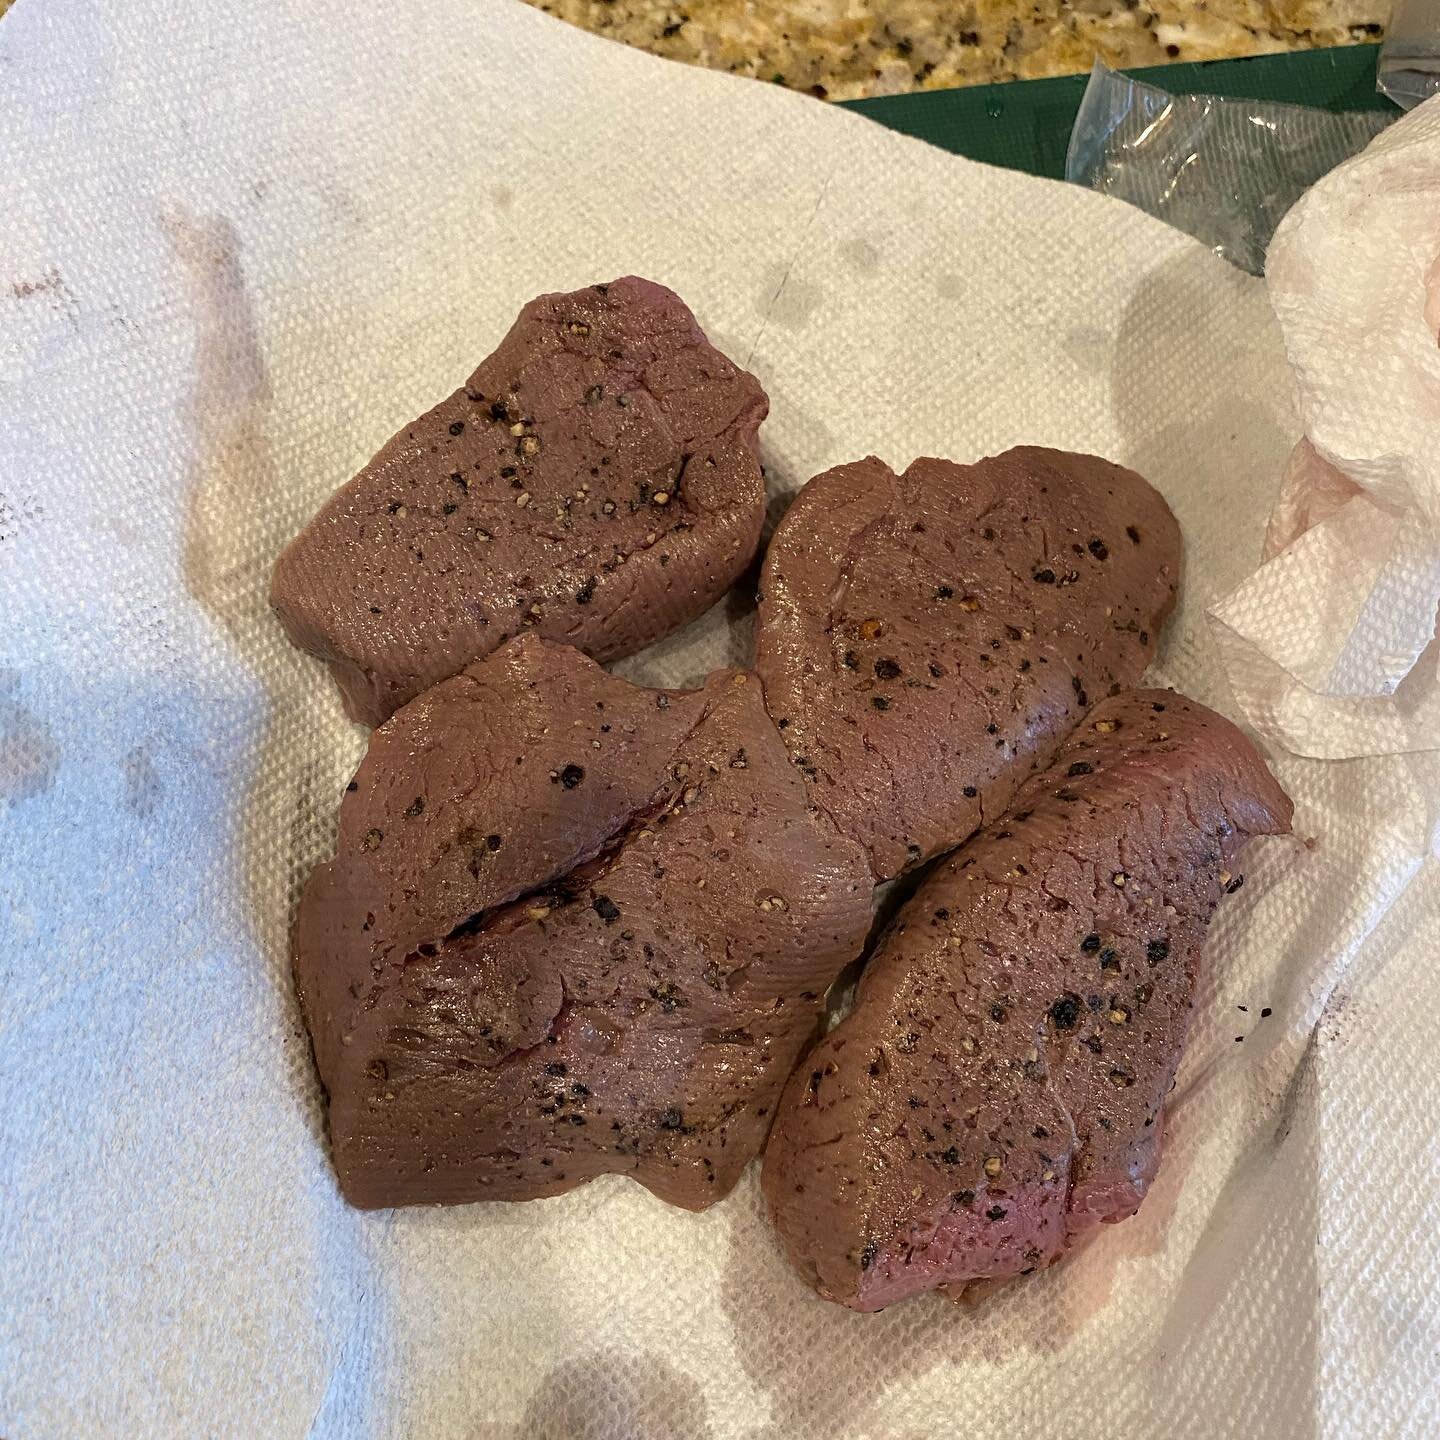
Directions:
For the venison:
Remove meat from packaging and pat dry.
Season with salt and pepper.
Put in sous vide bag and use vacuum sealer to suck the air out and seal the bags. If you do not own the right bags or a vacuum sealer, you can put the meat in a Ziploc bag and press the air out using the water displacement method.
Fill a plastic tub with water, insert immersion cooker (I used and Anova cooker) and set to your desired temperature (I set it to 125F to keep it rare and tender). Red game meats like venison cannot for any reason be served past medium rare (130F) because their muscle structure and lack of fat makes them toughen and dry out more easily if cooked past 130F.
Once your sous vide is up to temp, put bags with meat into the water bath, cover the tub with a lid and leave in the water for 2 hours.
After time is up, remove bags from water, then remove meat from the bags and pat dry again.
Meanwhile, make the compound butter:
Combine: butter, herbs, mustard, and Worcestershire sauce in small bowl until well mixed, mashing butter with a fork in the process. Then set aside in the fridge to chill until ready for use. I decided to make a torchon by wrapping and rolling my butter in plastic wrap, shaping it into a log as I wrapped it. Then I stuck it in the freezer for a couple hours to help it firm up. If freezing your butter, let it soften in the fridge for 30 minutes to make it more plyable.

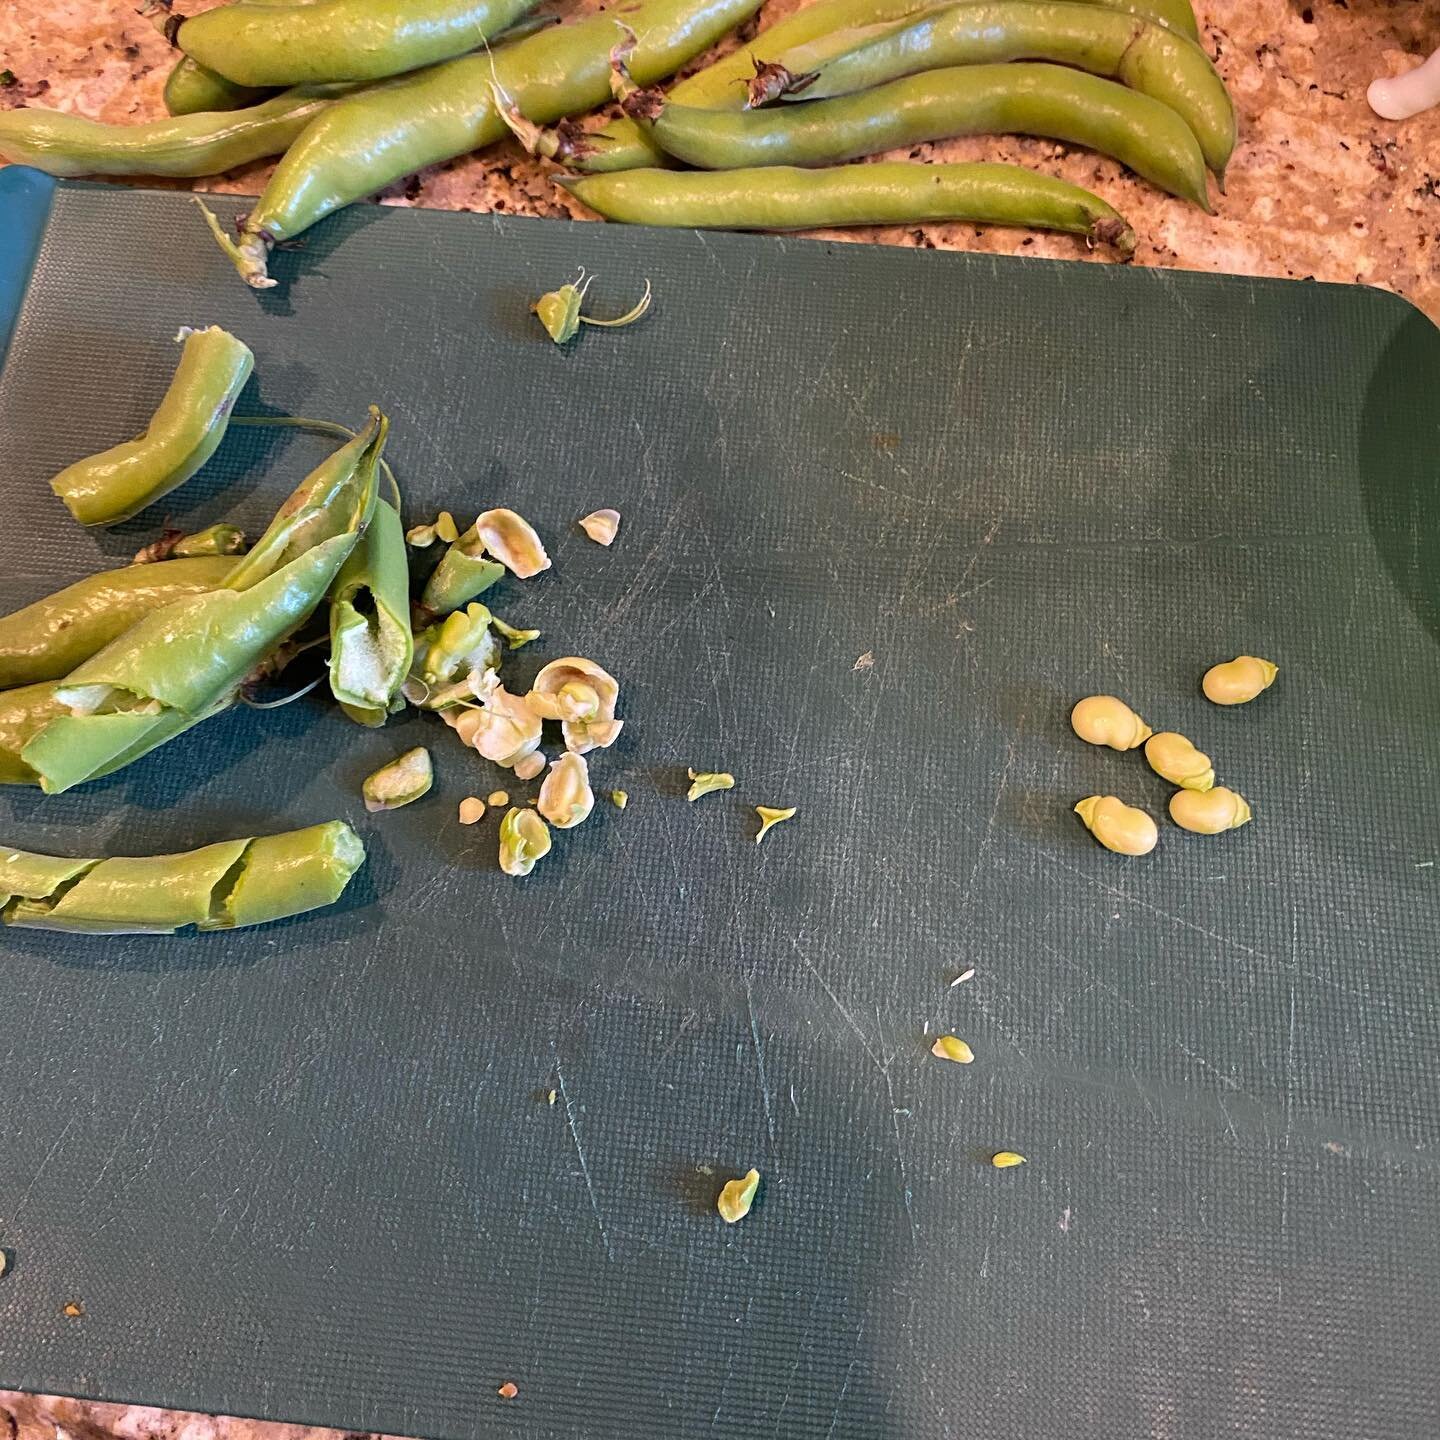
For the beet carpaccio salad:
Peel the beets and shave thin, I shaved them to 1/8” think on a mandolin. Mandolin’s are very sharp and can take off a finger if used incorrectly, so use care when working with one. Shell the fava beans from the pods. The husk on each bean is usually removed before serving. But, if you are as lucky as I was and get them the same day from the farmer’s market, you can leave the skin on the beans. The husks are edible if the beans are very fresh. Then make the dressing. Whisk: Dijon mustard, lemon, thyme, honey, salt, pepper, and olive oil in a bowl, adding oil in a slow stream as you mix for better distribution. It only took a couple of minutes to reach my desired consistency, but adjust the amounts for your personal taste. Set aside until ready to serve.
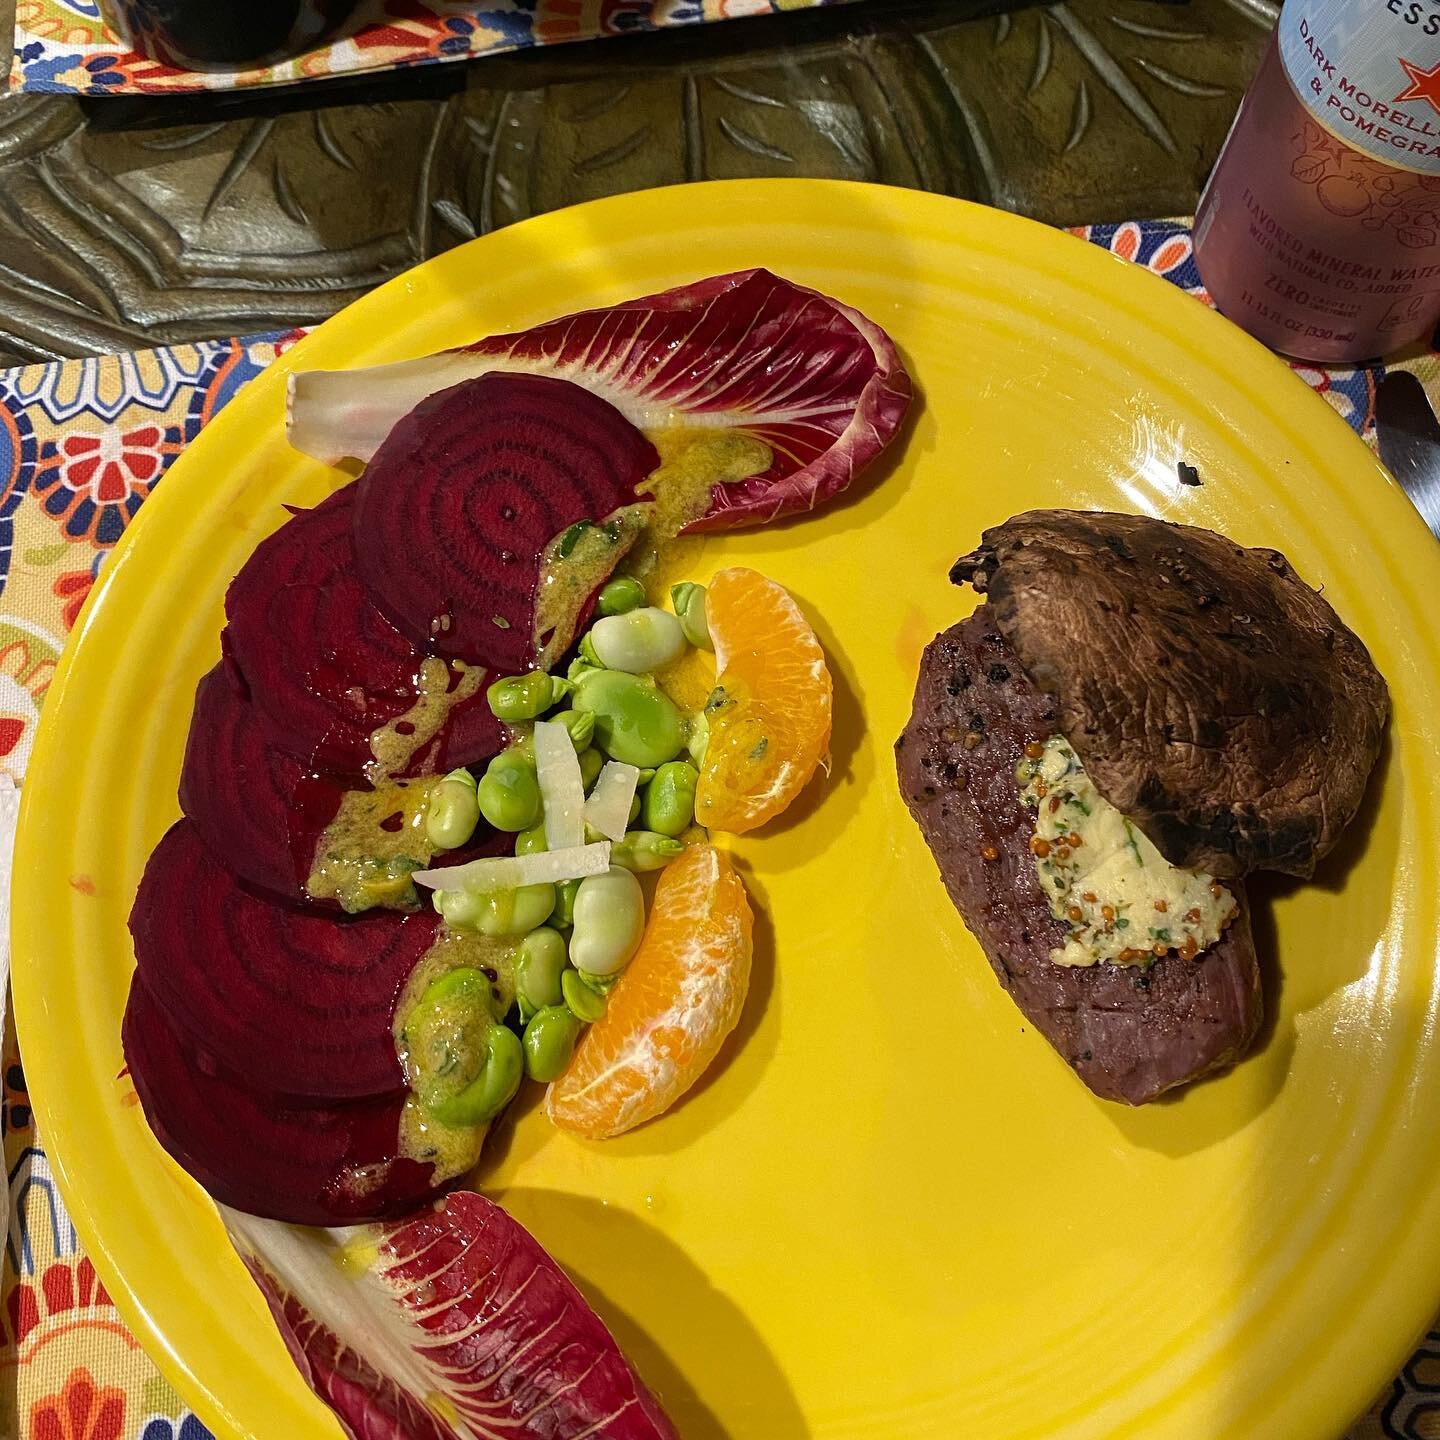
After you cooked the venison in the sous vide, rub it with some fat, I rubbed it with some of the compound butter for flavor, and sear it for 30-60 seconds a side. I decided to sear it on the grill. To plate, layer the beet slices, then surround with the: beans, tangelo segments, and, if using, the treviso leaves. Then drizzle salad with dressing. Choose your plates carefully to make the dish stand out visually. If you want, you can also top the salad with shaved Parmigiano-Reggiano. Then plate the venison next to the salad, topping it with a slice of the butter. I also made some portobello caps with the dish, and capped the meat with the mushrooms for presentation. Enjoy. Serves 4.
The butter was a perfect accompaniment to the venison because it both added fat and could take on the gamey flavor of the lean meat. The salad was also great because it had the right balance of: acidity, sweetness, bitterness, and earthiness that could serve as a supporting role to the main protein. I chose this type of salad because I wanted my side to be fresh and light to serve as a counterpoint for the hefty protein.
To conclude, I enjoyed developing this recipe because I got to show my best culinary interests and skills. I gravitate more to a fine dining style because of how it focuses on attention to detail. Not only in taste, but also in: quality, plating, and execution of your ingredients. It is also a style that makes good use of fresher ingredients, which to me shows more respect to where our food comes from. This style of cooking may be intimidating to some, but if you practice you may be able to develop your own take on gourmet cuisine. Use your imagination, and before you know it you may develop a meal worthy of the best chefs. My email address is at the bottom of the page, I would love to get feedback from you, especially if you end up trying the recipe for yourself. I hope I inspire you to get out of your culinary comfort zones. I hope to hear form all of you.
Radish Top Salsa Verde
Last week, I was making steaks for Inauguration Day. To serve with them, I thought that I would whip up a condiment. When I saw the radish tops, I settled on a salsa verde. This is a Mediterranean salsa verde, which unlike a Mexican salsa verde is more: herbacious, acidic, and umami.

Ingredients
A handful chopped radish tops (clean them thoroughly first)
2 good size cloves of garlic, smashed with back of knife
1 tsp Oregano (I only had dried on hand, triple amount if using fresh)
Leaves of 2 sprigs of fresh thyme
Juice and zest of 1 lemon (I used 2 small lemons, adjust amount of lemon juice to taste if you want)
2 leaves fresh basil, chopped
1 tsp rinsed capers
1/4 tsp dried parsley (again, I only had dried parsley on hand)
A small squeeze of anchovy paste (I personally prefer whole anchovies)
Pinch of salt
A few grinds of pepper
1/2 tsp Dijon mustard (optional)
Good quality extra virgin olive oil

Directions
Put all ingredients, except olive oil, into food processor or blender. As the blender goes, add olive oil by pouring in a slow stream for better distribution, a step that I heavily emphasize.

After mixed to your desired consistency, it took me about 3-4 minutes, add to a bowl. Give it one final stir with a spoon, and chill until ready to serve

I found that this radish top salsa verde was a great accompaniment to my steak because the acidity, herbs, and brininess, can stand up to the bold char of a steak, especially a rare one which is how I cooked my steak. This is also an example of putting undesirable parts of produce to good use because most people would just throw away the leafy tops of some vegetables like radishes. The bitterness of the leaves also enhanced the flavor of the salsa verde. The only downside is that this condiment will not last more than 24 hours, so use it as soon as possible if using.
I hope you all try this out. let me know if you like it and if you put your own spin on it.
Polenta Cakes With Spiced Toasted Pepitas
This was adapted from a recipe from chef Lola Nelson. Some polenta and pepitas came in the mail, and I thought I would serve this for Thanksgiving. Polenta is made from corn, which is eaten at Thanksgiving, so why not.

Ingredients:
Polenta
Water (4 cups of water for every cup of polenta you make)
A pinch of salt
Pepitas (Spanish for pumpkin seeds)
A dash of cumin and cayenne
Optional other toppings (a light drizzle of maple syrup if you have a sweet tooth, pomegranate seeds, goat cheese, you name it)

Cook polenta according to package.
Keep whisking that polenta until you get a creamy consistency. Add more polenta to help thicken it if needed.

Pour cooked polenta into greased baking pans, and set aside to set. This will set fairly quickly, 20-30 minutes minimum. If time is short, throw it in the fridge to speed up the setting. If the polenta does not adhere to the sides of the tray as it sets, then you have set it up correcty.

Once the polenta fully sets, cut cakes out of it. It does not matter if it is square or circular, I did both. If you want circles, cut your rounds using a 3” round cookie cutter, I used a small shot glass.
Fry the polenta cakes in a greased skillet until golden brown on each side, about 3-4 minutes per side.

For the pepitas, simply toast them in a small skillet on the stove over medium-high heat until fragrant, about a few minutes. Keep an eye on them to prevent burning. Then add to a bowl and toss with a dash of both cumin and cayenne pepper. If using plain unsalted pepitas, add a pinch of sea salt when tossing with the spices.

When serving, you can top the polenta cakes with a small drizzle of maple syrup if you like sweet. As mentioned above, you can also go savory and top the cakes with things like: goat cheese, pomegranate seeds, you name it. Polenta cakes are a great blank canvas for flavor experimentation.
If you have any leftover polenta scraps, Chef Lola suggests things like topping them with an egg. or doing polenta fries. I hope you try this out. Adjust it how you like it and notify me what you think.
Pomegranate Vinaigrette
Over the weekend, I was experimenting around in the kitchen. I had received some pomegranates in the mail earlier this week and thought to make a pomegranate vinaigrette. I did look up some recipes to get an idea of what I needed for this. After consulting recipes, I unleashed my innovative side and came up with this recipe. My family enjoyed the vinaigrette so much they saved the leftovers for lunch the next day. Seriously, if refrigerated properly, it keeps well the next day without breaking, unlike most vinaigrette’s. It also makes for a tasty way to enjoy a super-food like pomegranates, which are full of vital nutrients that can lower risks for several health problems like prostate cancer and heart disease to name a few. Try it out for yourself and let me know if you enjoyed it.

Recipe:
Juice of 1 pomegranate (Fresh juice recommended. The amount of juice you will get depends on the size of the pomegranate. I used a smaller one, which gave me about 1/4 cup of juice)
Citrus juice (Fresh preferred, I used lemon. the amount of citrus juice needed will be half the amount of pomegranate juice)
3 good size garlic cloves, hand chopped. (Pre-chopped garlic in a jar will not give the right flavor, a tip I learned from Steven Raichlen’s book Planet Barbecue)
2 tbsp Honey (I used grapefruit honey)
A little Dijon Mustard (Not too much. It is used as a flavor enhancer.)
A couple tbsp Extra Virgin Olive Oil (A higher quality EVOO is a must for flavor)
Directions:
Add all ingredients, except olive oil, to a mixing bowl. Whisk while adding the olive oil to the bowl in a slow stream for better distribution. Keep whisking until it is desired consistency, I like a thin yet slightly viscous consistency for textural balance, which took me about 5 minutes. Add more oil if needed, but not too much or the vinaigrette will be too oily. Cover and refrigerate until ready to use.
If using as a condiment, you want it to be chilled. You can also use this as a marinade. It is great with foods like grilled fish and fresh vegetables. It is really delicious with poultry, especially chicken. In fact, I recommend this vinaigrette as a marinade for boneless skinless chicken breasts to add flavor and moisture.
Notes:
Pomegranate juice is in the seeds. There are a couple ways to juice them. You can pulse them in a blender, not on a grind or puree setting, even though the seeds are edible and full of dietary fiber. Or, you can crush them by hand, which I did. I strongly recommend wearing gloves and an apron, and if possible, do this outside because the juice can stain surfaces. However you juice a pomegranate, always have a fine mesh strainer over a bowl to strain out any seed fragments.
If using store bought pomegranate juice, use pure juice not from concentrate, and preferably without added sugar, like Lakewood or Pomegranaze brand. Some commercial brands, like POM Wonderful, are 100% from concentrate and contain very little, if any, of the fruits vital nutrients. This is particularly important with juices labelled as a juice drink, which has other juices and usually added sugar. You want a true pomegranate flavor, not an artificial and/or overshadowed flavor.
Last weekend, I got innovative in my kitchen by making Grilled Tuna with Salmoriglio.

Salmoriglio is a condiment similar to a gremolata served with meat and fish, usually swordfish, in Sicily and Calabria. It can also be used as a marinade as well, and is very simple to make. The Calabrian version, which this recipe is for, adds additional herbs like parsley and mint.
Ingredients for the Salmoriglio:
Oregano (either kind works)
Lemon juice (fresh lemon juice preferred)
A few garlic cloves, roughly chopped or minced (the sizes of each clove varies so adjust accordingly)
Extra Virgin Olive Oil (use good quality olive oil)
A pinch of salt
Optional: other chopped herbs of your choice (I used parsley, with the stems. If adding the optional chopped herbs, you must use fresh herbs)

Simply add everything to a bowl and mix. Add the olive oil in little streams as you are mixing for better distribution.
You can make this ahead of time and refrigerate it as well.

Now for the tuna:
These were frozen Ahi tuna steaks. I simply brushed them with canola oil and sprinkled them with salt and pepper.

Heat the grill on high and when ready, cook them on each side for around 2 minutes.
Important notes: tuna steaks, fresh or frozen, must be cooked rare. You can go up to medium rare if you want. Even sashimi grade tuna is frozen as part of the process to kill off the parasites. The doneness temperatures for fish is 15 degrees Fahrenheit lower than it would be for meat and poultry. Rare fish is 105F, medium rare is 115F , medium 125F and so on.
I looked at a tuna recipe from Ina Garten for reference since this was my first time doing tuna on a gas grill.

This is why I brushed each tuna steak with oil beforehand. It not only helped it stick less to the grill, it can also help get those grill marks you want.

Finished product
The Salmoriglio was an excellent pairing with the tuna. The sauce had the right balance or acidity and herbaciousness to compliment the fish. The tuna did come out just under medium rare, but still moist and flavorful. I may either adjust the temperatures on my grill or leave it on for less time. Overall, delicious meal. I would definitely do this again.
Yesterday, me and a family friend named Martha made homemade chicken mole with rice and white beans. This is what we did in the process.

Starting off the mole
We stewed the chicken with some: water, celery, carrots, whole garlic cloves, and whole cilantro.

Then, we added the mole paste, whisking it in a bowl of hot water until dissolved, and added it to the chicken before letting it simmer for a while.

Next, she showed me how to make the Mexican rice. We rinsed the rice with water first to prevent it from getting gummy. Then we sauteed it in a pan with oil to coat the grains. Then we added whole garlic cloves, salt, and cilantro (with the stems) before adding water to let the rice cook further.
Notes:
When cooking rice, use a 1:2 ratio of rice to liquid (e.g, 2 cups liquid per 1 cup uncooked rice). The amount of rice you use will triple as it cooks (e.g, 1 cup uncooked rice will produce 3 cups cooked rice). Taste your rice to see if it’s cooked and/or if seasonings need adjustment.
Herb stems are great for adding flavor, so do not overlook them when using fresh herbs. Some herb stems, like parsley and cilantro stems, are edible as well.

Before adding the water, we also added some tomato sauce and sliced scallions for flavor and color.

Then we added some water to the rice, and covered it until it was cooked, stirring occasionally to keep it from sticking, this is not paella.

Now for the beans
We used white beans that had been boiled in water for a while. Then we added them to a separate pot and I smashed them with a potato masher to make something like frijoles fritas. We also added some of the reserved cooking liquid to help with the texture. The beans we used were possibly white pinto beans.

Finished Product and Review
The food was delicious. I loved the depth of flavor and earthiness from the mole, and the back note of the spices. The rice was tender and seasoned nicely, especially from the cilantro stems, and the beans were cooked beautifully and had a good seasoning balance.
Overall, I hope to expand my culinary knowledge and continue cooking good from scratch recipes that are from the heart.

How to do Blistered Shishito Peppers:
Shishito peppers are small green Japanese chili peppers that are in season from summer to early fall. They are quite mild in flavor (50-200 Scoville unit), but you will get a hot one every now and then. They are perfect for an appetizer at a summer party or you could try them out in an application like a burrito or a salsa.
Ingredients:
Shishito peppers (any quantity you need to feed your crowd)
Fleur de sel to finish (I used olive oil and thyme fleur de sel)
Directions:
Over medium high heat, heat a skillet big enough to accommodate the amount of peppers you need.
Put the peppers in the pan in a single layer and turn occasionally until blistered (about 5-7 minutes total)
Put them in a big enough bowl depending on the amount you made, add fleur de sel, and serve right away.
Optional: You can heat some oil in the pan to help the peppers blister, but use an oil with a high smoke point, like canola oil.

These steaks are chilling out in my signature marinade.

Recipe for my signature brown sugar wasabi steak marinade:
brown sugar
wasabi powder (get the good stuff for a more authentic flavor)
salt (I prefer sea salt)
pepper
garlic powder (you can use fresh chopped garlic as well)
soy sauce
few drops of Worcestershire sauce
Directions:
Mix ingredients in a bowl
Coat steaks in marinade and let sit for at room temperature for at least 20 minutes to let the flavors of the marinade absorb better.
Notes:
I used NY strip steaks, but I usually do this marinade with ribeye. This will work with other cuts that can take on a marinade (e.g: skirt, flank, flat iron, sirloin flap, Denver, Vegas or chuck strip, sierra, merlot, Santa Fe AKA top round cap, and many more).
I developed this marinade after my mother sent me back to college with a bag of wasabi powder. I decided one day with my then roommate Parker to try it out in a steak rub. The brown sugar, salt, and pepper for the marinade came from a rub I saw Penn Jillette do for buffalo hanger steak when he was on Chopped (too bad he was chopped in that round cause even though the rub was good, he hammered the steak and sliced it without resting it.) My rub ended up performing much better than I had expected. I even got well done lovers to enjoy rare to medium rare using this marinade.